Monday, November 6, 2017

White Linen Again


White linen is wonderful to cut, press, sew. This one started life as a large man's shirt - lots of potential. And it is currently a woman's linen shirt. It's like full circle. But the ride was such fun.


The MixIt top from Sewing Workshop is often my starting place with upcycled items. I like that it fits throught the shoulders and bust and then there's plenty of room below. The original shirt was plenty large for cutting out the MixIt Top.


Above I have the MixIt Front piece on top of both the left and right fronts of the original shirt. I aligned the fold line on the tissue with the buttons and buttonholes on the shirt. That is, I aligned the Center Fronts. So I did not disturb the buttons or button holes on the original shirt at this point, figuring to make my shirt button up the front too.


The back was cut on the fold, using the fabric below the original yoke. This was a BIG shirt. I rather like the shape of the man's shirt tail and so decided to keep it, removing only enough of the hem stitching to sew my side seams.


This shirt was big enough for me to cut long sleeves. I used the sleeve cap for the MixIt Top and the rest of the sleeve was cut from the MixIt Shirt. That is such a great, versatile pattern. I still had to reshape the lower portion of the sleeve a bit to smooth out the lumps. But I was able to keep the button placket from the original shirt.

Then I began to play with the leftovers.


The original yokes became sleeve cuffs, though I had to use a piece of white Kona cotton for the back side of the cuffs.


Oops. this needs pressing!
The original cuffs became my collar.


The original collar became my pocket.

And then I began to puzzle how I would deal with the buttonholes from the original shirt. Of course they remained on the left side of the shirt, as is traditional in men's shirts. That's awkward when you've been buttoning the other way for nearly 7 decades (!). And it was fun to think about options.


At Gail K in Atlanta I found these silver coin buttons. These are obviously not made from coins - they are too small to be nickels and check out the tiny ones I used for the pocket and upper sleeve placket. I love these little silver buttons. They remind me of my Texas roots for some reason.


My current solution to the closure puzzle is this: I used some of the scraps to make bias tubes and threaded the tubes through the button shanks. Then I threaded the tubes through the original button holes and tied a knot in the tubes on the back side. Also I added a new row of buttonholes to the right side of the front.


One added advantage to this solution is that I can easily remove (most of) the buttons when I launder the shirt. I thought it might feel wierd when I wear it, but it does not. So far. I can always change it. And that's one of the best reasons to sew.


Bottom Line:
Thrifted Shirt - $2.75
Buttons - $18.00
Time spent - Priceless? Yep.

Thursday, November 2, 2017

Twice as Nice

Fear not; I'll wear this with a jacket.
A few weeks ago I took a class from Marsha McClintock of Saf-T-Pockets. As you may know, her focus is on travel garments with lots of pockets, many hidden, as well as reversable garments. In this class we made a reversable shell from her pattern Twice as Nice.


It would hard for a pattern to be easier and still worth the trouble. There is one tricky bit, but otherwise it's a straight-forward make.


It is composed of a front piece cut on the fold, a back piece cut on the fold, and an optional pocket. I did cut out the pocket but then decided to omit it.

a pocket from one of Marsha's sample tops
The top has armhole darts that are not illustrated anywhere on the outside of the pattern envelope. To me, that's a feature to be highlighted, especially in a sleeveless garment, so I am not sure why that was omitted from the drawings.


I chose fabric from stash for the class version. Both the purple and the black are cotton lawn - light enough to make a reversable shell.


The tricky bit is the clever way you attach the armholes of the two layers. The two layers are constructed as separate shirts through bust darts and shoulder seams. Then they are joined at the neckline in the usual right-sides-together method. Next the two shirts are attached in the arm holes, using a burrito method. I had seen this done with vests where the two sides of the fronts allow you to pull things through the shoulder opening, but I could not visualize it without the front openings. The geometry is counter-intuitive.


It was worth making a reversable garment just to try out the trick.


The vents and hemlines are to be joined together so I decided to leave the layers loose. I like that the other color shows.


It is a nice basic pattern and I like having those in stash to retrieve from time to time. It does not take much fabric so it's perfect for remaking an old garment.


A while back I made a tunic from this bright red linen. And then I seemed never to reach for it. Time for a remake.

This version looked most interesting in the scarecrow pose.
Following the class Marsha sent us a PDF pattern for a sleeve to add to this top. It is a short sleeve that I lengthened to 3/4 length. I did not make this one reversable. Marsha does include instructions for doing that but I am not sure I'd really like two layers on the sleeves even in a lighter fabric.


I was unable to cut either the front or the back on the fold which turns out to be a good thing. More vertical lines; more opportunity for sashiko.


It's plain. I think these will be good layering pieces and an opportunity for jewelry or scarves.


One tip: the front armscye includes clips for the dart legs, as well as a third clip for attaching the sleeve (or pocket). I managed to confuse those and only discovered it when I tried to match the sleeve notch to the garment notch. Next time I hope to watch for that.

Tuesday, October 31, 2017

Grainline Archer


The Grainline Archer shirt is a popular shirt. There are 129 (!) reviews for it on Pattern Review. And I do think it's a shirt pattern I'll make again.


The envelope contains two views. View A is the classic shirt with an inverted pleat off the yoke in the back. I made view B with its "lower back detail," that I would call a peplum. It is a little low for a peplum as I learned from other reviewer. So I raised it by 2 inches. That is, I shortened the back piece by 2 inches and lengthened the lower back piece by 2 inches.


There are many things to like about this pattern, starting with the instructions. They are contained in a convenient 8.5 X 5.5 brochure. I do hope this catches on. It is sooooo much easier to manage than those huge fold-outs I've used for years, decades. Also the instructions are well-written and clearly illustrated.


The seam allowances are 0.5 inch; that worked out fine as soon as I noticed it.


The pattern includes a separate right and left front. The left front has a cut-on button band and the right front has a separate buttonhole band. My fabric is this pretty Ikat cotton purchased from Topstitch in Decatur, GA. Initially I worried about matching the weave of my fabric both vertically and horizontally.


Finding center front seemed important. I searched and searched but found no center front markings on any pattern piece. Now that I've completed the shirt, it's fairly easy to determine CF. It's 2.5 inches from the raw edge on the left front; 0.5 inch on the right front; 1 inch on the buttonhole band.


I don't know why I worried about all of that. In the end, I did my best and I like the result.


The Archer, like a lot of shirt patterns, includes a bias-bound vent in the sleeve, rather than the classic placket. I love plackets on sleeves so pulled out my favorite shirt instructions for that and the yoke. Cutting Line Designs' the Blouse Perfected has the best instructions for these techniques, IMO.


This changed the size of the cuff so I putzed with that a while before adding a 3rd pleat to the sleeve. It's just barely noticeable, but I cut the yoke on the bias:


The next time I use this pattern, I'll make a few changes:

  • Shorten the sleeve by 1 inch.
  • Decrease the circumference at the wrist by about 2 inches.
  • If pattern matching is involved, I'll cut two left fronts. The buttonhole band is only needed if you are creating a contrast there.
  • I'll use 0.5 inch seam allowances from the beginning.


In sum, this is a really good pattern. Go ahead and try it. You can be the 130th reviewer on PR if you hurry!

Friday, October 27, 2017

Silk and Serendipity

Sunflowers on a farm in NH
The more I play with plant dyes, the more I want to play. There are endless variations and the results are unpredictable. I enjoy the surprise and make no attempt to create repeatable processes. Sometimes I chastise myself for not keeping better notes, but not often.

Black walnuts rescued from my local hiking trail
Years ago I spotted a bolt of PFD china silk at an estate sale. I have only just now come to appreciate the magic that is silk. I'm guessing that most silks contain dye magic. Of course I love to sew with cotton and linen but dyeing is not nearly as exciting with those celulose fibers.


My most recent adventures have been primarily with black walnuts but also with leaves and sunflowers. Here is the (first) one with sunflowers. You can see that bolt of PFD china silk in the upper left hand corner.


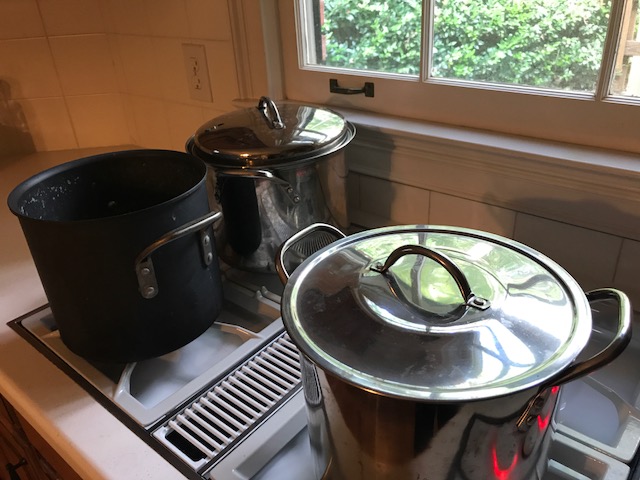
I started by dipping the silk in an iron bath: The iron bath is water and white vinegar in a glass container with some rusty objects. After about a week of steeping, it was a light orange color. So I dipped about a yard of the silk in it and squeezed it out. Wearing gloves, of course!

Steamer with the silk piece and some Hanji paper pieces
Next I pulled the flowers apart and laid out rows of the various parts of the flowers on half of the damp silk. There were green leaf-like structures (sepals) under the yellow petals, the yellow petals and then the black center torn into small pieces, each placed in rows.  I folded the remaining silk half over the plant parts, rolled it tightly, securing with twine. Then I curled it so that it would fit on top of my steamer.


I am totally in love with the resulting patterns and colors. I believe that the dark navy/purple parts were stained with the dark center seeds and that the other parts produced the orange stains. Now I am itching to stitch and wear this. I've done some research and I'm fairly comfortable that these are safe to use for clothing. For more on this subject, check out this very helpful post from India Flint, as well as this one from Alpenglow Yarn.

Meanwhile I've returned to my black-walnut-dyed silk pieces with plans to make something. The variety of results is endlessly interesting to me. This one was folded and steeped in leftovers from last year. I am amazed to see the pink colors and have no idea what caused it. I was not expecting much from year-old black walnut juice. But silk is magical.

Folded, clamped and dyed with year-old black walnut juice
The fresh walnuts from this year also yielded a wide variety of results. All pieces came from that off-white china silk. The following piece was simply stuffed in the dye pot and left to steep for a week or so, stirring occasionally. It looks more solid in reality. Some combination of sunlight and the camera created a rusty color. Because of the sheen, the color varies quite a lot.


This next piece was folded and clamped between two pieces of glass. It was steeped in a plastic container also for about a week. Perhaps the plastic inhibited the color transfer, or maybe the clamping was especially effective as a resist.


So now I must make something.

Thursday, October 19, 2017

Mychael Knight RIP

So sad to hear of the too-soon passing of Mychael Knight (1978-2017) here in Atlanta. You may recall his appearances on an early season of Project Runway, as well as Project Runway All Stars. He was voted fan-favorite.


I was lucky enough to meet him briefly at Charleston Fashion Week 5 years ago. I asked if he would allow a picture to which he responded, "of course." He seemed to be a kind, gentle soul with little ego.


I send good karma and prayers to those left behind who mourn for him. He was a very talented guy.