Showing posts with label free. Show all posts

Wednesday, December 16, 2020

Monroe and Helix


The Monroe Turtleneck pattern is a freebie from Tessuti, very similar to their also-free Mandy boat tee. It came out in (my) spring 2018 and I downloaded it almost immediately. I even traced off a size 3. Then I tucked it away to wait for cooler weather in the northern hemisphere. And of course, I forgot about it.


As is often the case during these COVID times, I find myself most inspired by online sources of eye candy. I routinely visit Pattern Review and Instagram for ideas. The Monroe was recently reviewed on PR and I loved what I saw. She rates it 5 stars. Then I read the rest of the reviews of the Monroe. Wow. Not complimentary.


Having made the Mandy, I was familiar with one potential problem. The sleeves on these Tessuti patterns are often too danged tight on me. That is why I had traced the largest size initially. Here are their suggested body measurements for the largest size, 3:

Bust 40-44”
Waist 35-43”
Hip 44-48”

Not close to my measurements, especially now that I've lost weight. Working off their measurements, I belong in a size 1. Of course, the Monroe's problems have nothing to do with bust, waist, or hip measurements, as there is no fit in those places. Rather, the problems are with the neckline, as well as the sleeves. Several disgusted reviewers rated it as a wadder from the get-go.

I decided to give it a go.

SEWING KNITS: I know from sewing knits for years that every knit has a different amount of stretch, vertically and horizontally, as well as differing amounts of recovery. I also know that I do not like negative ease, something that is almost a given in a pattern designed for knits. I'm OK with zero ease in some cases but I'm happiest with a little positive ease.


SLEEVES: Working from my previously traced tissue of size 3, I first pinned the sleeve tissue together along the seam allowance. Then I slipped it over my bicep. That was fine, good news because I really did not want to mess with the armscye.


NECKLINE: Next I took the edge of my knit fabric and wrapped it around my head to see how large the circumference needed to be. That was revealing. I needed 6 more inches than allotted in the size 3! And I will say that my head is not unusually big either. The drafters of this pattern must have assumed a knit with an enormous amount of stretch. They suggest that even a ponte knit would work. May I politely say, no way, José?

Adjusting the turtle neck pattern piece was easy because it's just a rectangle.

The neckline took a bit more work, because it is not linear. First I trimmed about 1/4" off from the front and back necklines. Then I measured with a 12" Curve Runner similar to this one, to see how close I was to the planned size of my turtleneck collar.


After 2-3 more iterations, I was pretty close to the size of the planned turtleneck collar. So finally I scooped out the front a bit, leaving the circumference of the neckline just a smidge larger than the circumference of the collar.


You've probably noticed that mine is not a turtleneck. That is because my knit fabric is quite drapey and so it produced more of a cowl neckline which, frankly, is my preference. I mostly wanted something soft and warm around my cold neck during these winter months.


My fabric is a cooperative jersey knit, 100% polyester. This makes me sad because I never ebd up actually wearing tops made from 100% polyester. Polyester fabrics tend to have static cling in the winter and they are hot in the summer. The days that fall between are days I'd rather wear cotton or linen or silk. It was a good toile and sort of wearable (DH likes it). 


TIP: It had one of those very wide selvages that distorted the fabric. After removing the selvage though, it was a breeze to cut and sew. I used a ball point needle and polyester thread. I also used a leading patch and trailing patch while sewing. This is a quilting trick that I've found prevents light weight fabrics from being sucked into the stitch plate.


Here I'm combining the Monroe top with some new black ponte Helix pants, modified to include a waistband. I seem to always need new black pants!


Happy holidays and happy creating to you!

Wednesday, May 6, 2020

Tessuti's Simple and FREE Apron


This make was pure pleasure. It has all the components for satisfying sewing:

  • 100% linen, the good kind
  • simple lines and shapes
  • loads of top-stitching


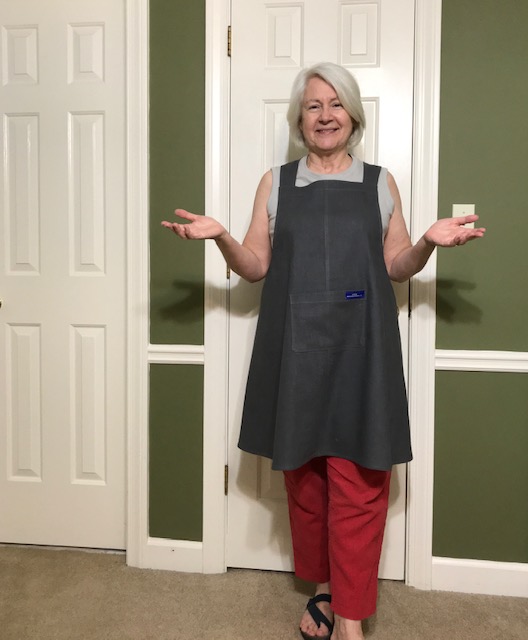
Yes, I made an apron. And, as it happens, I need one. I find myself cooking way more than usual within this corona confinement. I think it's lovely enough to wear whether I'm cooking or not.


Last summer, we spent a week in a resort in the French Alps. The trip was designed by our son and his family, and we were invited to tag along. Most activities were of the outdoor kind. But we ladies did find some sweet spots for shopping.


One nearby village had two shops of note. There was a little shop where the entrepreneur makes handbags out of bicycle tires and other unusual materials. She had her workshop set up as part of the shop. I was charmed.


The second shop contained various small items, housewares and hand towels and the like. I noticed some lovely linen aprons for about 70 Euro each. There was something about the linen in such a simple item that was attractive to me. My reaction was of course, wouldn't that be fun to make? What sweet memories.
As we are all more-or-less confined due to the novel corona virus, Tessuti has issued a free downloadable apron pattern that is exactly this basic design. I think of it as the French apron. Merci, beaucoup!

view from the back with no hips
It is considered one size. But, of course, it fits me a little differently than it does their models. You can see the difference in the wrap.

view from the back with hips
The linen is from a shop in the fabric district of Paris, a shop with tables containing beautiful linen cut into 3 meter pieces. If only I had brought an empty suitcase...


The instructions are pretty straight-forward, if maybe a little verbose. The pattern calls for fabric that is 60" wide in order to cut on the fold. I decided to create a center front seam so as to use my 55" width fabric more efficiently. I am inexplicably happy with that center front vertical flat-felled seam. I like the effect of the intersecting top-stitching, on the front pocket and elsewhere.


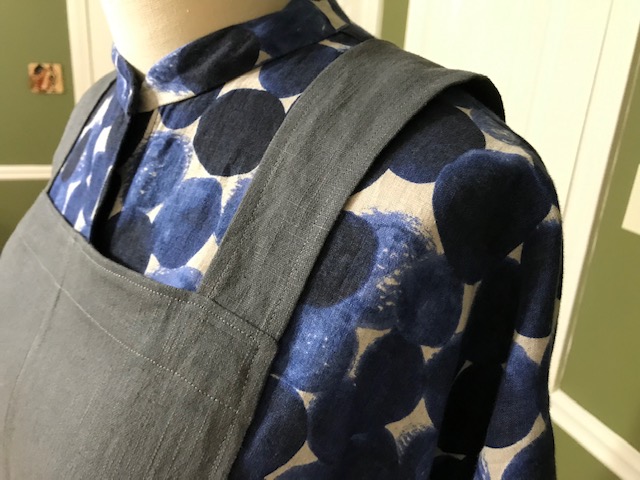
On the other hand, I got tripped up with one phrase. Late in the instructions, there is a reference to matching a *finished* edge to a *neatened edge.* In order to attach the straps to the front edge, you are to align the *neatened edge* of the garment armhole with the finished edge of the strap. Hmm. I figured out what needed to be done way before I figured out what a *neatened edge* was.


Most of the edges are finished with a shirt-tail method I learned from Pam Howard. This is the perfect technique for a cooperative linen like this one. The idea is to stitch 1/4" from the raw edge, and then use that line to fold the edge under twice, creating a neat narrow hem. Some recommend pressing it in place first, but I find that just creates a crease I don't want. Instead, I finger-press it as I go, edge-stitching the final hem. It is very zen.


So, back to the *neatened edge.* This is the edge created by folding over that line stitched 1/4" from the edge, and then folding again. I think.

INCORRECT
In the above picture, I'm trying to determine how to attach the strap to the front bib. You can see that the strap edges are finished and the armhole is not. This picture shows the wrong way to sew it. Below you can see the correct way to place the straps on the bib.

CORRECT

I guess that *neatened* means folded twice but not stitched. Anyway, I figured it out. Below you can see how the bib facing looks right after stitching it to the garment top edge, sandwiching the straps inside. The top edge is stitched at 1/4". The armhole edge is stitched at 1/2". And the bottom edge of the facing is turned under prior to stitching.


This is really a simple sew. I promise. I do not know why I obsessed over the neatened edge. I do really like the result.


It was so very satisfying to make. You know how wonderful a really good linen can be to sew.
#makesomethingeveryday


Tuesday, August 25, 2015

(Small) Six Pocket Tote

This free pattern has been available at the Better Homes and Gardens website for a while. I made it a number of years ago for my daughter. Today I finished one for my granddaughter.


Both times I was surprised at the size. Somehow the finished measurements did not register. Either time. It just looks larger than 8 x 10 x 4 in the pictures. Or maybe it's the word *tote* that throws me. I think it's more of a medium size purse.


I might try it again someday with larger dimensions.

It's quite a good tote pattern, especially given that it is free. They recommend 1/4 inch seam allowances which seems too small to me with all those layers. Mine are more like 3/8 inch seam allowances.

Here is the BHG version compared with mine:

BHG version - super cute fabrics, right?


It started with a visit to my son's house last month. My granddaughter selected some fabric at a local quilt store. We played around with hexies which are all the rage in one of my groups. She produced this little flower shape before she became bored. So I promised her I would make her a tote with that on the outside.

Hope she approves!

Saturday, August 30, 2014

The Mandy Project

One-size. This free downloadable pattern from Tessuti (Mandy) is one size. Daughter tells me that one size means the one size that does not fit you.

It is actually a great pattern, especially if you can follow directions.

There is this 4 inch square printed on the paper to help you calibrate your printer. On my printer, it was a little off. I guessed that it was still one-size. Here is the result:

woof.
So I started again. I took the PDF file to my local big-box printer and ask if they could help. They said they could print it on wide paper, which was desirable. I expressed concern about the 4 inch square, so the helpful clerk opened it on her computer and changed the display to 100%.

Then she measured the 4 inch square by placing her ruler on the screen. It measured 4.5 inches. If I had not been grouchy, I would have laughed out loud.

I printed it anyway.

The stars aligned and the printed version was only off by about 1/16 inch. Here is the result:

Whew! better.
I actually like this one quite a lot. It is made from an ITY knit purchased from Marcy Tilton. It was easy to sew and it feels good on. But it is polyester and it is in the 90s today so I'll wait until the weather cools a bit before wearing it much.