Showing posts with label cotton. Show all posts

Monday, September 5, 2022

Camp Shirt Happiness

Happiness is...

A 16 year old grandchild who loves the item you made, just for them!

First the fabric. I spotted it when I was lucky enough to visit Mulberry Silks and Fine Fabrics in Carrboro NC. Hubs and I were on our way to visit our grandson who lives in Raleigh NC. Our son plus wife and daughter rented a house there so that we all could visit and catch up. It was delightful. 

Back to the fabric. It's probably quilt weight but I don't care. I kept circling the store and returning to it. It came home with me. When I showed it to the 16 year old (SYO), there was a squeel of delight. I knew immediately it should become something for not-me. 

I wanted the print to be about foxes but it is definitely squirrels. Foxes don't climb trees, it seems. Oh well. 

Aren't the colors wonderful? We have a lot of squirrels around here but they are not this wonderful color. SYO has a sweat shirt the exact color of the fox-squirrels. 

After some consideration, I decided upon the Cutting Line Design shirt in the Easy, Ageless, Cool envelope. I had made it once before for moi and did not like it on me. But it seemed like the style SYO gravitates towards. 

Size was not a huge deal because this is a loose fitting shirt, but SYO is petite so I went with a size S. The size is just right!

The cutting of it was slow-going. I wanted to match as much as I could. I think I succeeded with the center fronts, as well as the chest pocket. I forgot to check the side seams before gifting it.

Making it was such fun. I immediately went into the zen zone. This style is simple - slightly dropped shoulder inserted flat, convertible collar, front and back facings to enclose the raw seams of the collar, side seam vents. It was totally meditative.

I made one tiny change to the pattern, converting the Louise-Cutting version of mitered corners (at the hem) to the Linda-Lee version.

I need to make another shirt now. It is so predictable and cooperative. And I love the top-stitching part, even when it doesn't show. The next time I make this, I expect I'll add a yoke. I do love that shirt detail missing from this pattern.

Before gifting it, I did try it on, just in case it got shoved into the back of the closet at SYO's house. But I do not think that will happen. SYO is pretty honest with me. And I see happiness here.


Saturday, June 18, 2022

made my heart sing

Of course, if you've ever read my blog, you know how much I love fabrics -  textures, natural, especially linen. Occasionally I spot a piece that makes my heart beat just a little faster. Has that ever happened to you?

Recently I was shopping at Five Eighths fabric shop in Charleston SC, as I often do when visiting DD. They straddle the themes of quilting and garment making, with a strong focus on cotton. On this occasion, I had already selected my fabrics and they had been cut for me when I took one last look around.

There in the (mostly) quilting cottons, I spotted this beauty by Marcia Derse. I have made garments with her cotton designs before and knew it would work for a garment. Plus it was just so very gorgeous, I had to have it.

After checking out, I told her not to worry about putting that one in my bag - I planned to admire and pet it on the way home. 

After much consideration, I decided I would love an Esme dress, one of the patterns in Lotta Jansdotter's book Everyday Style. I had made it as a top and wear it all the time. So I was pretty sure I would love it as a dress.

I added inseam pockets which I love.

I guessed at the length and it was a little short, so I made bias facings for the hem. Bias binding on the neckline and a simple turned-up hem on the sleeves finished it off.

Of course, I added a little something on the back neckline - this time a loop from a bias tube.

I am still crazy about this fabric. 

Friday, July 9, 2021

Old Favorites - Mimosa and Plaza

For an easy and very satisfying summer sewing project, I made the Mimosa top and the Plaza pants. These come from two older patterns from the Sewing Workshop. I enjoyed making them when they came out and I still do.

The Mimosa top is a variation of a simple kimono style. It has two identical fronts that are closed by over-lapping them and attaching them to the side seams. Wrapped tightly enough, that's all the closure that is needed. I hope.

My fabric is a slightly nubby 100% cotton shot that reads light-medium teal, but more blue.

The original Plaza pants have a front tuck down the center front and no side seams. By omitting the front tuck and overlapping to two pattern pieces, it makes an easy pair of straight-leg pants. I cropped the length too. 

I think this pattern is just right for a vertical stripe. The striped cotton is from the same line as the solid blue, both purchased at Five-Eighth Seams in Charleston, SC.

After my last head-scratcher, these were something of a relief. I had sewn both before, though it had been a while for the Mimosa top. The only challenge was that I was away from home, babysitting grandkids and so I was working in less-than-ideal sewing conditions.

I brought my sweet little Featherweight 222K and it was also a pleasure to sew with. I did have to improvise on seam finishes for the Mimosa side seams because I did not have my serger. With the little vent, it's hard to use either French seams or Flat-fell seams, my go-to seam finishes with this old machine. 

Instead of these options, I simply sewed 1/4" from the raw edge and then the usual 5/8" seam allowance. I may go back and *pink* the edges - another old-fashioned technique! They might not fray much though.

I used bias tubes to make ties rather than using buttons. 

There's not much to be said about the Plaza pants. I do like their signature flat front on the waistband though.

It's nice to have a fresh new ensemble for these hot summer days!

Friday, June 4, 2021

Whistle

The Whistles top is an older pattern from the Sewing Workshop, the companion to the Bells top. Two  entirely different tops in one envelope. I made the Bells shirt a while back and did not end up wearing it much, though it is an interesting top. It has a feminine shape and interesting sleeves. I think it is the most fitted of any of the Sewing Workshop patterns. I wonder where I put that...

For some reason, I did not pay attention to the second shirt in the pattern envelope - the Whistles shirt. I needed Linda Lee to point out how interesting it is. Now I see the light. She does an amazing job of directing my attention each Tuesday at 11 CDT. Do you watch these FB live sessions? She could sell ice to the Eskimos, as they say. And I go willingly because it's so inspiring. I might be making quilts and pillowcases otherwise!

Right now, the Sewing Workshop offers two kits for this pattern, each with gorgeous bold panel prints designed by Noelle Phares. Her work is beautiful and I'm tempted to order some panels from her. I was also tempted by the kits, though they are now sold out.

Part of what I love about sewing is making my own selections, so I have stubbornly refused to order any of the kits they are offering this year. So far.

But back to the Whistles shirt. It is a fairly simple shirt, much like the Now and Zen shirts, with a slightly dropped shoulder, straight sides with vents, and straight long sleeves. 

The Whistles has asymmetrical front and back seams that incorporate very cool architectural details. There are 3 wedge shapes arranged along the center front, some that hide buttons. 

And there are 3 similar wedge shapes along the back. 

The fabric is a cotton-linen blend from my local quilt store, the Cotton Farm. It is a *shot* weave, where the warp and the weft are different colors. It gives the fabric more depth and a richer color, I think. It washed and dried beautifully becoming quite soft. It does not seem to wrinkle much. And it is fairly light weight, nice for our warmer and warmer weather.

The front and back pieces must be cut single-layer, due to the asymmetry. When I initially cut out my pieces, I failed to properly label each of the wedge shapes and so had to go back and re-attach the tissue. Some of them look similar but each of the 6 wedge shapes is unique.

I interfaced all of the wedge shapes. Only a few of them have button holes and buttons, requiring interfacing. But I did not want some of them to look crisp and the others, wispy. I'm pleased with the resulting look, though it does feel a teeny, tiny bit heavy. Do you think so?

The collar is plain but can stands up crisply or can be folded flat if it feels too hot. I like having those options. I interfaced both top and bottom collars too. One slight issue with the neckline is the way the raw edges are finished. If you use a serger, as I did, it does not look finished when left open at the top. Of course, I could add a little bias binding right there. Maybe a little piece of silk that contrasts?

Next time I might finish that one edge near the neckline with something nicer than serging (see above picture). However, after Linda Lee's recommendation, I now use embroidery threads in my serger. It creates a much more invisible and soft edge because the thread is two-ply rayon. Also it doesn't melt under the iron!

The sleeves are plain. I knew I'd want to roll them up so I used French seams. If I make it again, I may add a placket and cuff, or some sort of detail to the sleeves. 

I think that this solid color allows the details to shine. The Whistles does create a beautiful top in those Noelle Phares panel prints, but I think that fabric would show even better on the plainer Now and Zen tops. 

This top lends itself to using coordinating fabrics for the wedge pieces. I came very close to using another cotton-linen blend in gray and white stripe for some of them. In the end though, I am very pleased with this new shirt. Maybe I need to go out to eat someplace and wear it now that I'm fully vaccinated!

I hope you are sewing something beautiful!


Thursday, May 13, 2021

Sweet Alabama


Now I get it. I've been to nirvana and back. And I want to go again. 

An Alabama Chanin workshop has been on my imaginary bucket list for quite a long time. An opportunity happened and I jumped on it. Yes, it's expensive. Gulp. And unlike that zip line course I did in Belize with the church youth group, I'm hoping this is not one-and-done.


It starts out so very low key. Look at their store front! I had seen this before when I visited with BSF Ginny but it still is surprising to see how laid back their operation really is, at least on the exterior.


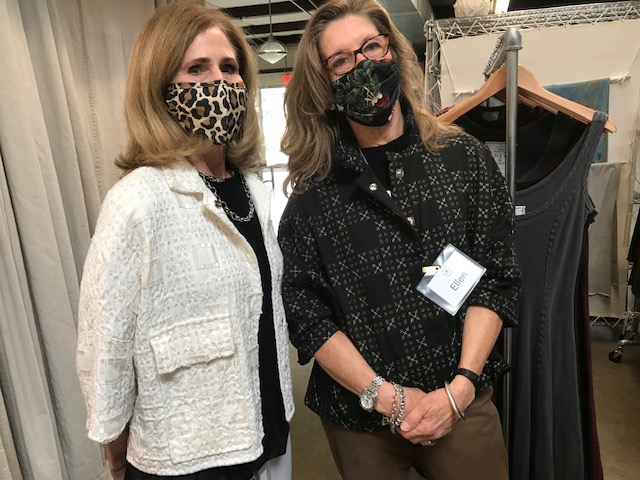
The workshop comprised three days of pampering, surrounded by women who also love hand-sewing and several expert thirty-somethings (our teachers) waiting on us and answering each and every question. And everywhere I looked, I saw more inspiration. Here are some of the garments worn by fellow participants, those who had attended other workshops, or simply ordered kits and made from home.


The Car Jacket, very different in different fabrics, stencils, and threads


The Factory Dress, stitched with silk ribbon

One of the days, Natalie Chanin came in and gave an impromptu talk on her experiences with her business during COVID, as well as some personal revelations she has experienced during this time. 


We had shared work benches with plenty of space for practicing as many techniques as we could squeeze in. There were stacks of 5" sample fabrics to use for practice. We received detailed instruction on each of these. 


The first morning was fast, as we needed to select our workshop projects, included in the price. We had received via email a description of maybe 2 dozen projects to consider well in advance but I had not decided. They started with a trunk show of many of the options (and options within options). Then we were set free to try on sample garments from multiple racks to determine exactly what we wanted. During this time the teachers were assisting us in determining size and finding styles to try. 

I chose the short version of their trench coat, called the pea coat

Many of us wanted adjustments to the styles - different sizes, added sleeves, raised necklines, and so on. All were possible. 


Once we had determined the style of our workshop project, then we needed to choose the fabric colors, one for the outer layer and one for the under layer that is revealed when portions of the outer layer are cut away. As you may know, the fabric is 100% organic cotton grown and manufactured in the US. And before noon that first day, we also had to determine the stencil we wanted to use from at least a dozen or so options. Whew!


When we arrived at our work stations the next morning, we each had a tidy package containing our workshop projects. The package contained each pattern piece cut in each color, carefully labeled (upper sleeve, lower sleeve and so on). The stencils had been applied and some of us were ready to start. Not me.


Because many of the participants had attended previous workshops they jumped in. There were frequent demonstrations by our teachers for newbies as well as those who wanted more instruction. And while we practiced, the sweet teachers floated around offering advice and answering questions. 


And, of course, one day we had a tour of their factory. That's always inspiring. Another time, the expert who makes crocheted snap covers for their clothing demonstrated her technique. It was like magic to watch her work. 

al

Another day we had a demonstration and presentation from her stencil designer. She showed how she creates the design and takes them through to stenciling on garment pieces. There was a charming one created in collaboration with Rosanne Cash. Cash wrote and produced a song about Alabama Chanin titled The River and The Thread. My new and lovely sewing friend Michelle played it for us as we drove from the workshop to the hotel and to eat dinner. That stencil is not available for home sewers, but you can order the tee shirt!

One of our teachers showing a variation on the basic dress

And meal time was elegant. We were served sit-down breakfasts, lunches and mid-afternoon dessert. Yes, we were totally pampered. 


My chosen project is their Pea Coat, a short version of their Trench Coat. Both the outer and inner fabrics are a dark blue. The stencil is black. I decided I wanted subdued design on this first (!) one. The stitching is high-contrast, so it's not totally knocked back. I think I'm going to love it.


In the meantime, I am totally loving the process of hand-stitching the motifs on each pattern piece. It is a time-consuming process, but I'm enjoying each step. I did not make one stitch on it while I was there and so was anxious to start when I returned home. 


The first step was to carefully baste the two layers of fabric together on each piece in the Pea Coat project. This is necessary so as to avoid any shifting during the process of stitching the motifs. The seam allowances are only 1/4" so there is no margin for being sloppy. And there is no waste. Project packages include a 10x10 square of the two fabrics, one with stenciling, one without, to allow for sampling of techniques. I am grateful for that. I am not being my usual jump-in-and-figure-it-out-later style sewist on this project. I promise.


I returned to earth (home) totally saturated with inspiration and a strong desire to spend every waking minute with needle and thread in hand. It was a time I will remember fondly.

Some of us after dinner at Odette's