Saturday, September 10, 2022

Closures

A few weeks ago, a sewing friend and I made a presentation on closures to our ASG neighborhood group, Citywide Couture. So, of course, the Ericson sewing duo was central to my part.

https://dianeericson.com/blogs/journal/i-ching-in-the-garden

I started with this closure idea from Diane Ericson's online journal. The pattern is the High Five, a joint production from Linda Lee and Louise Cutting. It is mostly rectangles, a super simple sewing project. I had made it as a jacket. This time I made it as a top.


The fabric is interesting, A fellow student in my Susan Brandeis class, Veronica, represents the Diamond company. She brought in her samples for the students to view. She sells to a local quilt store where I was able to find only a limited selection. 

From the limited selection, this deep burgundy with pink crosses spoke to me. I bought 1.5 yard on spec (the way I usually buy fabric). The crosses are formed with long floats on the back. This worried me for a while as they seemed to catch on everything while I was sewing. It does not seem to be a problem now that I'm wearing it. 

Per usual, I was short of fabric. So I used a remnant for the sleeves, as well as the closures. This piece was gifted to me by my then-future SIL, something he brought back from a trip to South Africa. I had enough for the sleeves and the bias strips that make up the buttons.

The "buttons" are formed by simply sewing a 3-4" strip to the spot where I button would be and then tying in a simple overhand knot. Diane suggested painting the ends to discourage fraying. I used a copper colored paint for that. It hardly shows, but was fun to do.

And, of course, I showed my fellow sewists at ASG some books by the undisputed queen of creative closure, Lois Ericson. Her publications are such a treasure trove of ideas - more than could possibly be explored in one lifetime. But she did!

The other closure I presented was the Spanish snap buttonhole as explained in this Roberta Carr publication. It has become my go-to for couture techniques since ASG Atlanta offered a class with her protege, Marla Kazell. 

As you may know, the Spanish snap buttonhole is actually just a faced buttonhole. By using a bias cut hole facing in a contrasting color, you create tiny lips that show on the inside edges of the hole. The "snap" occurs when you turn the facing to the inside and give it a snap to place it. 

It needs another faced hole on the garments back side for a truly couture look. My mastery of that part is not up to par yet. Or maybe I should find a piece of silk organza that matches the fabric better than my sample below does.

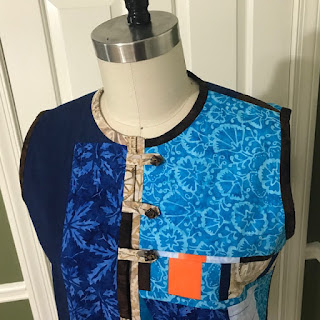
I still need to work on my bound button hole skills, someday. Right now I'd much rather spend my time on creative closure, especially closures using bias tubes.


Monday, September 5, 2022

Camp Shirt Happiness

Happiness is...

A 16 year old grandchild who loves the item you made, just for them!

First the fabric. I spotted it when I was lucky enough to visit Mulberry Silks and Fine Fabrics in Carrboro NC. Hubs and I were on our way to visit our grandson who lives in Raleigh NC. Our son plus wife and daughter rented a house there so that we all could visit and catch up. It was delightful. 

Back to the fabric. It's probably quilt weight but I don't care. I kept circling the store and returning to it. It came home with me. When I showed it to the 16 year old (SYO), there was a squeel of delight. I knew immediately it should become something for not-me. 

I wanted the print to be about foxes but it is definitely squirrels. Foxes don't climb trees, it seems. Oh well. 

Aren't the colors wonderful? We have a lot of squirrels around here but they are not this wonderful color. SYO has a sweat shirt the exact color of the fox-squirrels. 

After some consideration, I decided upon the Cutting Line Design shirt in the Easy, Ageless, Cool envelope. I had made it once before for moi and did not like it on me. But it seemed like the style SYO gravitates towards. 

Size was not a huge deal because this is a loose fitting shirt, but SYO is petite so I went with a size S. The size is just right!

The cutting of it was slow-going. I wanted to match as much as I could. I think I succeeded with the center fronts, as well as the chest pocket. I forgot to check the side seams before gifting it.

Making it was such fun. I immediately went into the zen zone. This style is simple - slightly dropped shoulder inserted flat, convertible collar, front and back facings to enclose the raw seams of the collar, side seam vents. It was totally meditative.

I made one tiny change to the pattern, converting the Louise-Cutting version of mitered corners (at the hem) to the Linda-Lee version.

I need to make another shirt now. It is so predictable and cooperative. And I love the top-stitching part, even when it doesn't show. The next time I make this, I expect I'll add a yoke. I do love that shirt detail missing from this pattern.

Before gifting it, I did try it on, just in case it got shoved into the back of the closet at SYO's house. But I do not think that will happen. SYO is pretty honest with me. And I see happiness here.


Saturday, August 13, 2022

Alder Dress

Grainline Studio drafts such nice patterns. I've been eyeing this one for a while. Lots of people made it early on as you can see here on Instagram. I finally found just the right fabric for it. I made the view with the gathered skirt.

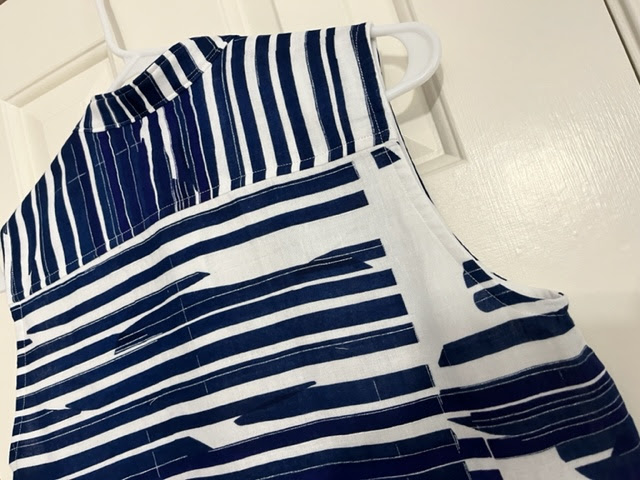
The fabric is a Japanese double cloth 100% cotton. Thanks to Kathryn Brenne, I now know the difference between double cloth and double faced fabrics. This one is double cloth because you can see the tiny threads that hold the two layers together.

Unlike some double cloth fabrics, this one has only one right side. The back side is solid white. Each is almost sheer on its own, but quite opaque together. They are similar to voile fabrics, maybe even lighter. This one has a large pattern with a striped effect.

This project included many mishaps. I am not even sure I remember them all. Thank goodness the print disguises the most ghastly ones. 

One smallish mistake I made was to cut the back bodice on the crosswise grain. It is always so tempting to play with stripes or directional prints. I like the way it looks but it does cause it to sag a bit. Also this choice made it challenging to keep the armhole from gaping in back.

The most regretful mistake was my attempt to insert inseam pockets into the front vertical seams (as opposed to the side seams). After I committed to this (that is, I made serious cuts in the fabric), I realized that there was too little horizontal space there to actually accommodate even the smallest of pockets. At first, I thought, oh, *!?@, I've ruined this Nani Iro fabric.

But, ever optimistic, I put it away for another day. When I returned to it, I decided that the print is so busy and irregular that it would be easy to apply a patch to my cut area and move on. And I did. Can you tell?

For gathering the skirt, I used this wonderful reference. It is full of other goodies and kind of fun to peruse from time to time. Even though I've been sewing for more than 50 years, I don't learn on a uniformly rising curve. And I forget! Gathers seem simple but I find that to make them smooth and consistent, the technique presented here makes a huge difference. 

One key to pretty gathers is use of a small enough stitch length. If it is too long, then the gathers tend to bunch up. Of course, if it is too small, then you cannot gather it at all. But over time, I've been surprised by how small the stitch length can be and still manage gathers. Another key is to make 3 rows of gathering stitches. And Roberta Carr says that the gathering stitches should not be removed!


I am particularly fond of the way the gathering plays with the uneven stripes.


This dress is too short for me and not as flattering as it might be if I had made it longer. Of course, I realized that after cutting it out. This led me to use a white batiste bias facing to finish the hem, such that it is.

But it is so comfortable and perfect for the dog days of summer here in the southeastern US. I've decided I'm OK with it. It feels like almost wearing nothing and it floats away from my body. And it does not wrinkle. How perfect is that for a summer piece?

Once I realized how short it would be, I tried it as a tunic with pants. 

Nope.

No way.

This was completed last month. As I look at these pictures, I am left wondering why I reach for it so often. 


Monday, August 8, 2022

Home Goods

 Pillows and Towels - seriously?!?

The Factory Dress


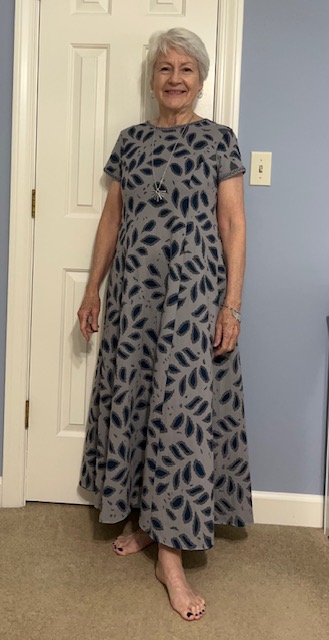
Such fun to have finished this Alabama Chanin Factory Dress. I started it in early April after another lovely workshop in Florence with their DIY crew. It *might* be interesting to know how many hours I have in it, but maybe not.


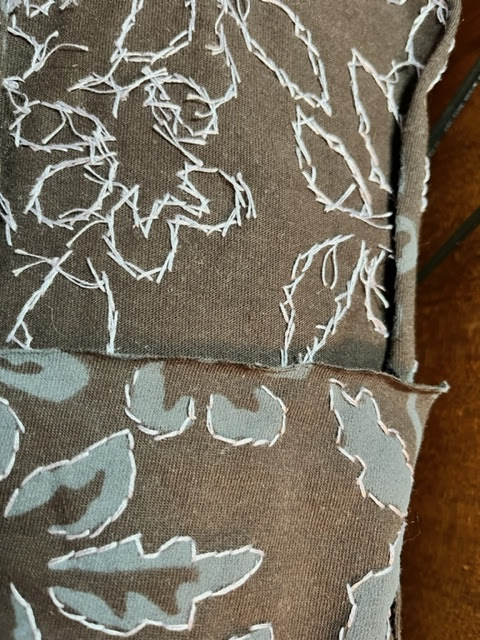
The process is quite meditative - repetitive and yet providing a sense of accomplishment. I used my good old running stitch to outline the stenciled shapes. My hands just work the stitch without my mind even kicking into gear. 


The details:
The Factory Dress, size s, with added length to the medium length
Outer Layer: Dove
Under Layer: Peacock
Cotton Embroidery Floss for embroidery: a dark blue-gray from stash, DMC floss - 2 strands
Embroidery stitch: running stitch
Buttoncraft thread for construction: Gray
Stencil: New Leaves

Based on a dress worn by one of the other participants, I lengthened the medium length dress by 7". Once I got started, I could see that would graze the floor on me, so I removed about 2.5".


There were lots of pieces! Due to the armhole princess seams, there are 3 front sections and 3 back sections. I chose short, almost cap sleeves. 


Sections of the dress traveled with me to Shakerag, and on several trips to visit grandchildren and other family travels. I struggled just a bit to find enough of the DMC floss I selected and ultimately was able to order it online. It is a shade of blue that matches the AC *peacock* knit fairly closely. I like that the underlayer picks up the color of the embroidery stitching.


During the April AC workshop, Linda Lee mentioned a great idea for attaching binding to the raw edge of a garment. She suggested basting it to the back side, then wrapping to the front and stitching the decorative stitch. 


The basting stitch is easy to remove once the decorative (and purposeful) stitch is complete. On previous garments, I've struggled to keep the binding wrapped tightly around the neckline raw edge while focused on the decorative stitch. This fixed that. So, thanks, Linda!


This dress is heavy. It weighs at least 2 pounds which may not sound like a lot. But it is. I'm good with that as it gives the long dress some nice drape and sweep.


Now I've started on the other kit I purchased while in Florence AL in April. This too is a dress - the fractal dress with a g-zillion pieces. The stencil is fairly intricate without a lot of open space for cutting away the interior stencil. After wearing the factory dress a couple of times, I realized that I did not want another heavy dress. This fractal one will be single-layer (giving me a bonus dress!) with the stencil outlined but not cut away. 

There are really a lot of variations on these kits.


And while on a knits kick, I made some panties! Yes, I made underwear. I've made them before but recently was gifted this yummy fair isles cotton knit - just right. I used my old, old Stretch and Sew pattern adjusted for my current body. Satisfying, quick, and fun. Great partner with these forever AC garments.