Tuesday, April 21, 2015

Travel clothing

Must contain (at least) one pocket:


And as Susan Brubaker Knapp pointed out in a recent Quilting Arts article, it is even better if you can continue to stitch it during your trip. Wear it; stitch it; wear it; stitch it. What a great formula.

Here is Susan's denim jacket:

hand embroidered art to wear brubaker knapp


Susan started with a thrift store jeans jacket that she embellished into an entirely unique piece, mostly using intense stitch. This traveling project took two years! I think it is just beautiful.

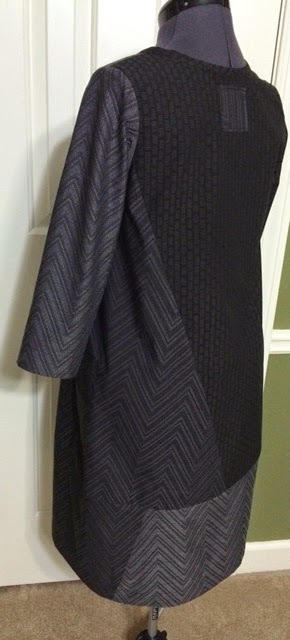
My travel vest started with a remnant of denim from my Sandra Betzina pants plus the Sewing Workshop's Peony vest. BTW, I see that TSW has it on sale for $12 right now. The current rendition of the pattern contains only the one vest. My version contained two, the Poppy and the Peony.

Line Drawing

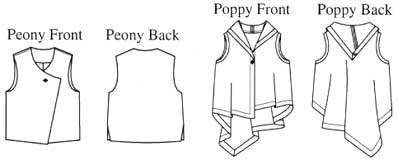
As you can probably see, the Peony is composed of just a few main pattern pieces - back, left front and right front. Because I was short of fabric, I cut two left fronts. I also extended the left fronts by about 2.5 inches down the center front, just because I had enough fabric to do so. I figured I could always cut it off later. I also raised the arm hole because it is very deep. It is still pretty deep.


Looking at the scraps remaining I decided to add a collar and a pocket. The collar had to be pieced front 3 pieces but it was fairly easy to line one seam up with the center back, and line the other up with my front top-stitching.


At this point it is ready to pack. It has one pocket, but I'll add more. It is finished and can be worn. It can even be worn after I start the decorative stitch. What fun. Thanks to Susan for a very clever idea.

Friday, April 17, 2015

V9081 LBD

Marcy Tilton calls Vogue 9081 her Block Dress. It contains a cropped cardigan for knits and a dress for woven fabrics. The dress has two views. One is sleeveless and the other has 3/4 length sleeves. They also have slightly different *blocks* so you have several options.


The cover photos show view C in a subtle and sophisticated combination of linen in three solid colors. I messed around with my stash, hoping for a pretty combination in linen. Linen is my hands-down favorite fabric to sew, especially during the spring season when I've become tired of winter fabrics.

Instead I realized that I have a lot of black cotton in my stash so I harvested two. Each is Japanese, one from Waechter's in Asheville, NC, and the other from Josephine's in Portland, OR. Each is a different weave, with dominant black and smaller amounts of white. Each piece has an interesting (and different) front and back. They are approximately the same weight and drape though one is much denser.

Back with a little square from the other fabric.

During the preparation of the pattern tissue, I confused the measurements on the outside of the envelope with the measurements on the pattern tissue. Yikes! What was I thinking? Of course, the measurements on the outside are body measurements suggested for each size. And the measurements on the pattern tissue are finished garment measurements. So I attempted mid-course to convert a size 12 to a size 14.

This was a good time to remind myself that I sew for fun and that this is only fabric.


Now that it is completed, I'm pretty jazzed about it. It is a dress that I will feel good in. And I look forward to making it again, perhaps using the right size. I am pretty sure the size 14 would have been just right with no adjustments.

Inset pocket
Some notes:
  • In her blog, Marcy described this as tapered at the hem. My bottom panel is a rectangle and not tapered. But I did have to ease it onto the upper part of the dress so that creates a taper starting mid-thigh. Probably I just misunderstood what was meant by a tapered hem.
  
  • The unique pocket construction was challenging and it seemed the instructions were a little light here. You have to insert a concave right angle into a convex right angle, much like a Y seam. I was glad I had done similar things before.
  • Marcy's blog mentioned something about the pocket being cut on the bias, but the pattern tissue for each pocket piece shows straight of grain. It probably made very little difference because the pocket is small.
  • The pocket is adorable and worth the effort!
  • As Marcy points out in her blog, this is also a great tunic pattern if you just leave off the bottom panel (or make it more narrow).
Here it is before adding the lower panel. I like this tunic too.
Another very cool design from Marcy Tilton!

Monday, April 13, 2015

Variations on a Theme

Recently I attended the American Craft Council show in Atlanta. It was chocked full of fiber art, and lots of it was wearable. I always leave over-stimulated with ideas that I will try some day. (I also left with a few purchased objects that I could not resist.)

I kept coming back to the idea of a single pocket in a garment. Now that's not much of a grand idea, is it? But seeing these gorgeous garments with a single pocket gave me permission.

When I made my Tabula Rasa jacket, I gave it one pocket. This was a simple patch pocket. I just followed Louise Cutting's approach to patch pockets for shirts. Easy. Sort of an after-thought.

Since then I've been working on variations to an old favorite - the Hearts A Flutter (HAF) shell from Cutting Line Designs. I have made this so many times, I've lost count. The design of the top includes the lower band - a nice spot for an inseam pocket.

I made this first one more difficult than it needed to be.

Linen HAF Shell with pocket

Green linen pocket detail


On the next version, I stream-lined the pocket construction. And I added sleeves.

Finished pocket

1. Stitched pocket bottom from the outside following the previous hem stitching.

2. Folded it into place on the wrong side and cut off excess length.

3. Pinned and stitched the pocket sides in place.

4. Stitched to top of the pocket from the RS following the previous line of stitching created when I stitched top stitched the raw edges of the SA under.

I added 3/4 length sleeves using a pattern piece from a Marcy Tilton design. I recut the the armcye on the the shell after completing the bust darts so that it would conform to the dress pattern. I forgot that her sleeves are sometimes too snug for me. So I got to unsew the sleeves and add a bias strip to the underarm seam. 

I rather like this little shell with sleeves.


These are low-risk, high-fun projects. I think I'm ready to do something more complicated now.

Sunday, April 5, 2015

Happy Day

For me, this is a happy Easter day. I hope it is happy for you whether you celebrate Easter or not. Here is my small contribution to Easter festivities: two shrugs for one of my darling grandgirls:


This little shrug challenged my patience as it was like sewing a cobweb. I managed to sew seams by putting silk noil bias binding next to the feed-dogs, and pattern tissue directly under the foot. After removing the tissue I wrapped the bias binding around the edges and hand-stitched it in place, completely covering raw edges. 


The machine sewing was a nail-biter, as was all the cutting and fabric manipulation until raw edges were tamed. The hand-sewing was zen. And the sweet smile makes it all worthwhile. Even though she has it on inside out.

Because our weather is still so cool, I made her another long-sleeved shrug:


I don't think she likes it quite as much. 

Happy day to you!