Showing posts with label vest. Show all posts

Sunday, February 25, 2024

E-Vest Re-Make

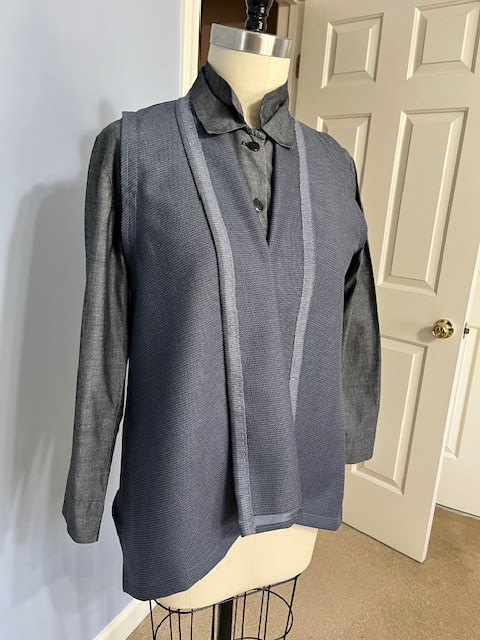
This is a make from last year that I never used as the subject of a blog post. It was perhaps because I wasn't sure I liked it that much. In fact, when I came across it recently I could not remember which pattern I used. At first I thought I had used the Valencia jacket and omitted the sleeves. But, indeed, it was from the Sewing Workshop eVest pattern. And here is why I thought it was the Valencia.


Online description: The easy-to-make eVest is an adaptation of our popular Valencia Jacket pattern. The loose-fitting vest has soft fold-back lapels and angled front drape. The wrong side of the fabric shows. Options for hemming or binding edges are included in the pattern download.

I think that the adaptation is just that the sleeves were omitted. Maybe. The Sewing Workshop folks are champs at reworking a pattern, I think.

I remember it as an easy make, probably from a short cut of fabric I had acquired - too little to make much of anything but a vest. But I like the fabric and NOW I think I really like the vest.

Version 1:


The selvedge was nice looking so I thought I would just fold it back and stitch in place with a running stitch. I used a silk tafeta remnant to finish the armholes and the lower hem.


The result was OK:


Version 2:


Next, I cut off the selvedge down the front and used more of the silk tafeta to finish the front lapels. I also added a patch pocket to the right side front.


Last week I fished it out of the closet and wore it. I love vests when it's cold here. We don't turn the indoor temps particularly high so I like the extra layer. This light weight wool drapes nicely. Also it is not itchy and so I can wear it with almost anything.

I felt like it needed another re-make, so here is the maybe-final...

Version 3:


I removed the silk tafeta binding from the lapels and the front hemline. It is not soft and does not roll nicely even on the bias. I also *improved* some sloppy finishing on the armholes. And I replaced the binding with this rough weave silk piece from stash. 


I have no idea where and when I acquired this piece of silk. It is only 14" wide so probably a kimono remnant I picked up at Sewing Expo years ago. I really like the way the stripes in the bias binding work with the colors of the wool in the vest. Now it is in my rotation of favorite vests.


It goes with a lot of things in my closet. Here I am wearing it with my very old gray silk charmeuse Plaza pants (another Sewing Workshop pattern from years past). 


I think those Plaza pants may have come back into style. Or (more likely), I am just in the mood for loose silk pants.


I did not resist the urge to add a patch to the back neckline.


I am pretty crazy about this eVest pattern now. Maybe I want to make a long version next. It's still chilly here, especially in the mornings.


Monday, January 29, 2024

The Vest Version of Vogue 1970

After completing the jacket version in pinwhale corduroy, and wearing it a bunch, I knew that I had to make the vest. There is not much that is different about the vest beyond omitting sleeves. The package includes a slightly different collar for it, but all else is identical.

Vogue 1970 by Marcy Tilton

Since I found the jacket neckline to stand a bit far from my neck on the jacket, I made an easy adjustment, bringing it closer to my neck on the shoulder seams. The pattern description describes these as companion or nesting pieces, but that did not turn out to be the case for me. Anyway I do love a vest during the winter months here in the southeastern USA. 


I had this primitive table runner from Common Threads in Taos NM that needed to become something. BTW, that is such an interesting store. They sell some fabrics by the yard, and lots of table linens, scarves, and a few simple linen garments. The pieces are from overseas with lots from India and Central America. The owner gives a little discount to those of us attending Diane Ericson's Design Outside the Lines. I attended one in September 2023.

This piece is actually narrow (maybe 5") loomed pieces that were hand-stitched together, almost 36" wide. A black thread with a simple overcast stitch was used and it's a little rough in places. This also meant it was a bit fragile to handle. So I carefully cut each piece out, one at a time, taking each to the sewing machine and stitching around each piece at the stitching line. I also carefully serged the edges. The combination seems to have given it enough stability to sew.

Since it was still soft and fragile feeling to me, I underlined it with Thai silk remnants from Laura Murray. I'm sad to report that she no longer sells that fabric. And she no longer comes to the Sew Expo here in Atlanta. Boo.


The underlining gave it just the right amount of body, I think. Also, due to my choice of *fabric* I folded out the little pleats over the hips. I am glad I did. The look is much smoother and more appropriate to this fabric.

I used some remnants of another piece of Laura Murray's Thai silk to make bias facing for the armholes and the hem, as well as front facings on the straight of grain. And I used some cotton batiste remnants for the pocket. That's right, just one pocket. 


While cutting the pieces out, I was careful to preserve a longish piece to fashion into a collar. The collar is the width of three of the strips hand-stitched together and the length of the circumference of the neckline. This meant that I had selvedge on both edges of the collar, making it easy to stitch each edge to the neckline without a lot of bulk. 

After a few tests, I was brave enough to make buttonholes in the front, using some funky buttons purchased years ago, probably at a Sew Expo. I placed one button at the neckline, attached with a Thai silk bias tube. 

I am pretty pleased with this. It has a nice weight to it, but is soft and comfy. Like the green jacket version, I'll have to be careful to avoid wearing it every day!


Monday, September 19, 2022

The (Sub)urban Jacket

This was quite the snake-bit project, primarily of my own making. A while back, I admired sewing friend Charlotte's rendition of this unusual design. She described it as seriously challenging and even shared her modifications created with a Butterick pattern. I sure wish I had a picture of hers. It is fabulous with its hood and long sleeves.


In the beginning, I was optimistic, sure of myself. I even have fabric in stash that is similar to the fabric on the front of the pattern envelope. I was sure that I could do this!


Yes, the instructions were a bit of a conundrum to me but I pre-disposed myself to thinking "This will be difficult." Attitude is everything.


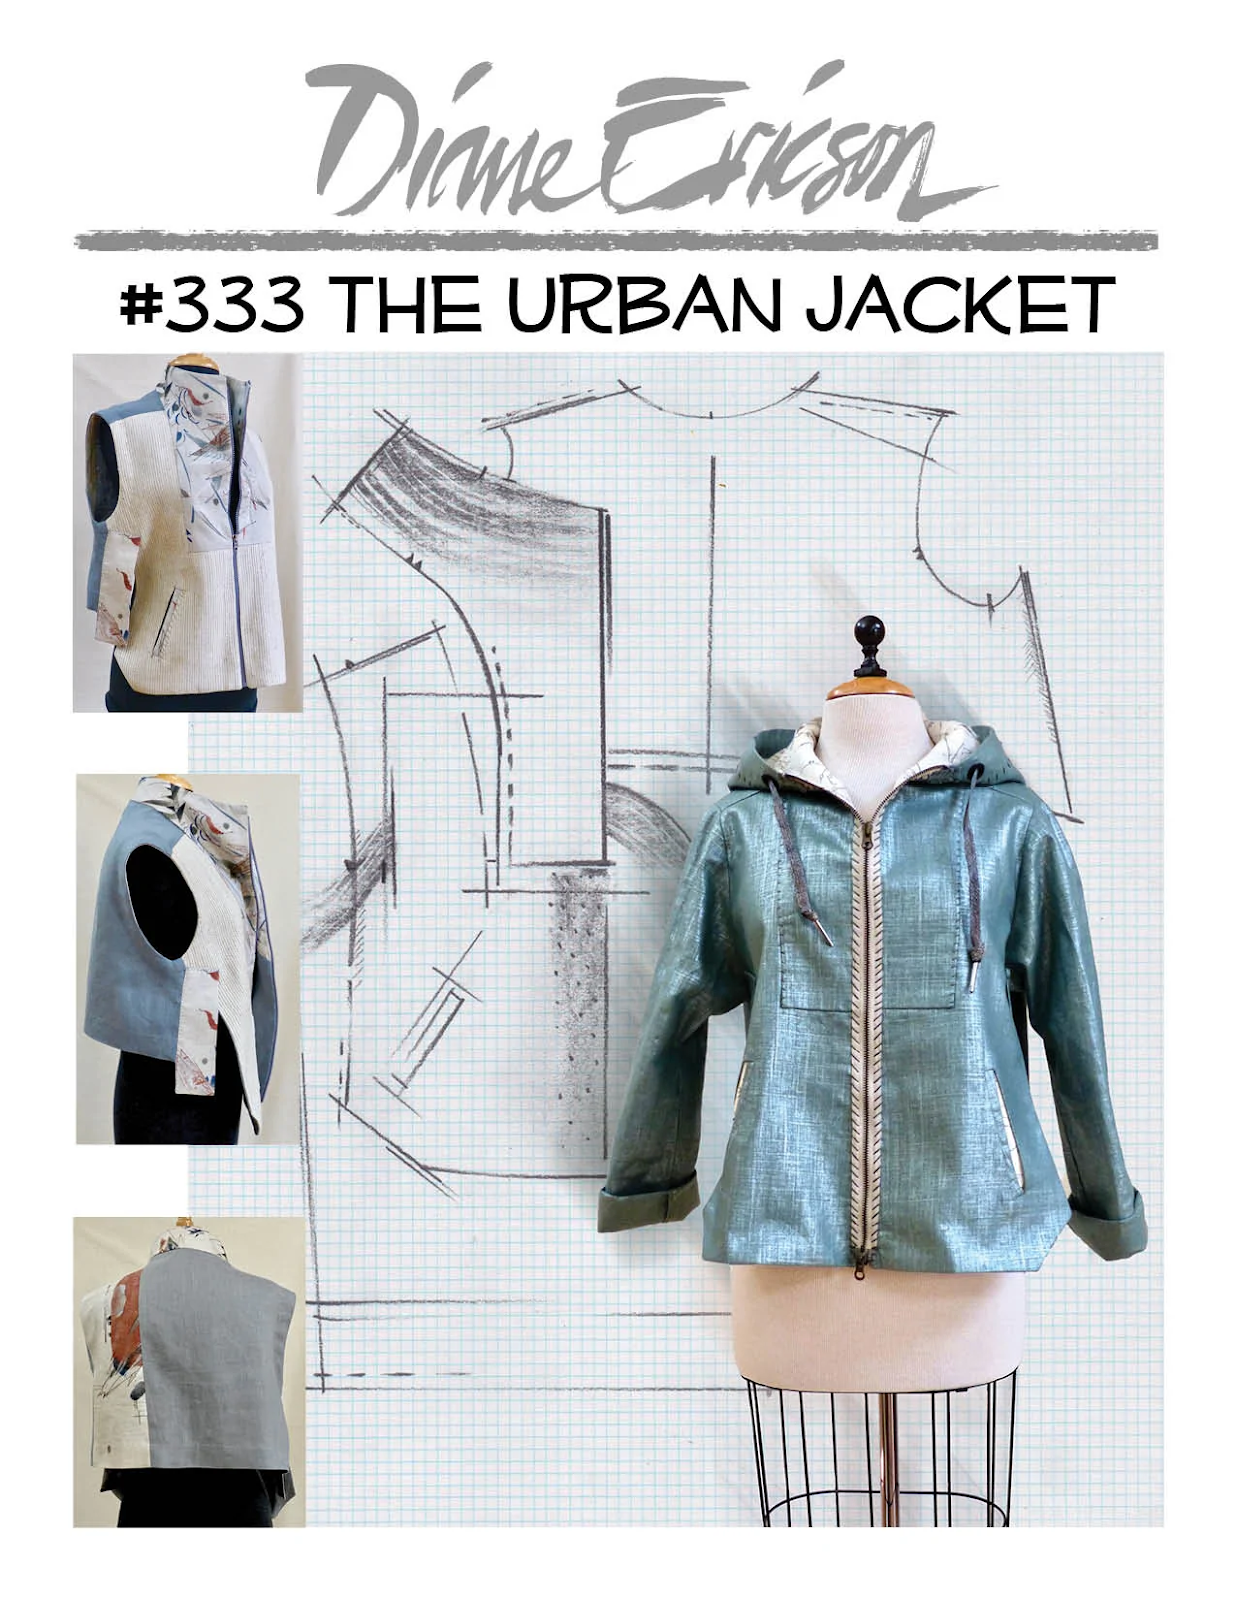
This is a Diane Ericson design. I do love her work. I drool over her journal entries every time one drops in my email. Much inspiration! I think to myself - I can do that too.


But I made so, so many mistakes. I don't think I can remember them all to include in this post and who wants to see all that anyway?!?


One mistake I made that tripped me up was cutting 2 of the collar/facing piece when I really needed 4. That took me for a long ride that included other related mistakes.


The design includes welt pockets, a close cousin to bound buttonholes, as I'm sure you know. I played around with some samples and decided that a real welt pocket would introduce too much bulk for my taste. I made a simple faced pocket opening and used the pattern pocket backing to finish it. And, after all, this was intended to be a wearable muslin.

(I do like this picture a lot. I like the way the flange causes the back to swing to the front)

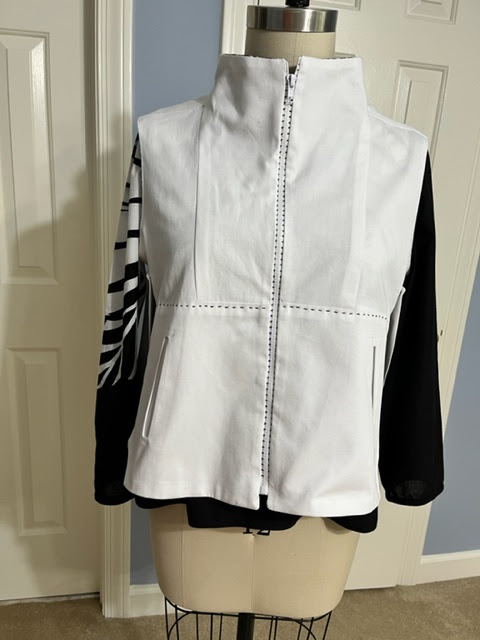
As always, I had a limited amount of this while denim. I thought I could cut out a sleeveless jacket, keeping the hood and other details. If I had paid attention to the number of needed collar/facing pieces, I might have actually done that. Or maybe not.


When I finally sorted out the collar/facing error in cutting, I had to harvest another piece from the hood. That "other piece" turned out to be a lining piece that I did not use, as I had no intention of lining a wearable muslin. I guess that once I decided I would struggle with this, I made sure that I struggled with this.


Oh well, I did get the experience of making the hood before that debacle. No pictures of that.


I had fun decorating this separating zipper. It's just a white zipper with black permanent marker applied to it. An idea from Diane, I'm pretty sure.


I still did not have enough for 4 of the collar/facing piece. So you can see that I used the black and white print. Not bad, I said to myself. I can live with this.


The black and white was also useful for creating bias binding for the armholes. The armholes never did completely sort out for me. Perhaps they are good with sleeves, but there was a funny way that it cut away from my body at the base of the armhole. I just reshaped it to my satisfaction.


This was an interesting project and the wearable muslin idea has served its purpose. This is not a good silhouette on me. Seriously I don't think I like a boxy short vest over a longer top. And I definitely do not tuck in shirts these days. 


I'll chalk this up to a learning experience. I've got my attitude back under control.


Which of Diane's patterns should I make next? I can do this!


Tuesday, November 2, 2021

Sewing with Love

As a grandma of 11, I have sewn items for all the grands - one quilt each plus the occasional PJ pants and other items. That activity has dropped away as they've grown older and more aware of their own styles and wishes. I used to go nuts around the holidays, trying to make something special for each one. Now I'm a bit more selective.

The youngest grandson just had his 6th birthday and made a special request - a Paw Patrol shirt. How could I refuse? The only down side is that I had to buy that fabric from the big box store that I do not like. They have exclusive licensing to fabrics of that sort. It was not too painful, though.

For children's clothes, I have an nice collection of Ottobre magazines. When the grands were coming fast and furious, I invested in subscriptions for several years and kept them. 

I'm glad I did. I also kept some of the pattern tissues cut out for an older cousin of approximately the same age, allowing me to make an educated guess as to the size for this 6 year old.

One time, I made a grandboy a darling plaid shirt in his team's colors complete with plackets, collar, collar band. He outgrew it in about 10 minutes. That made me sad. I wanted to avoid that this time so aimed a little larger than needed.

These Ottobre patterns are a good starting place for me. The instructions are extremely brief and they sometimes employ non-traditional construction. I chose a sort-of camp shirt, thinking to avoid all the messy (but fun) details of a dress shirt. 

For this shirt, the raw edges between the collar and the body of the shirt were to be covered with a bias binding. I knew I would not like that for a camp shirt because the neckline is kept open, so the binding would show, as would the wrong side of this printed fabric. 

I pulled out one of my husband's guayabera shirts, a lovely silk twill camp shirt. Based on this shirt, I drafted a front facing to enclose the raw edge where the collar is sewn to the shirt. In the back, I was able to enclose all the raw edges by rolling the outer collar edge under and slip stitching it in place. That probably makes no sense, but it worked!

And the shirt is too big. That is a win! Perhaps he will still be able to wear it when the weather once again returns to spring-summer. I think he looks adorable in it!

I'm wearing my fave Peony vest in cashmere-silk

At the same time, I had been visiting with my local grandgirl who was planning a Halloween party with friends around the pirate theme. She had a vision of the costume she wanted to create and began to shop the thrift stores for a vest. She is quite petite and that proved futile. So, of course, grandma to the rescue. And I had just the right pattern, one that I had never opened. I don't remember buying it even - might have been something someone gave me. It is one of those classic Folkwear patterns.

Even though she is local - only a mile away from me - I worried the whole time I was making it that it would not fit. Her mother is also petite and I never had much luck making fitted garments for her due to the need to shorten the torsos of everything. This pattern was just right without those kinds of adjustments. Hooray!

From my stash, she selected the outer fabric and the lining. I did not have enough of the print lining but was able to squeeze two fronts from it. This vest traditionally has a back constructed of two layers of lining, but that wasn't the pirate look she was seeking. 

I basted the shoulders and side seams together and ran over to her house. It was so tiny I could not imagine that it was right even though I had taken careful measurements. But it was very close. I had to let out the back and the side seams at the bustline. I also needed to scoop out the armscye but otherwise it was just right.

This basting led me to screw up the actual sewing of the vest. I came home and made all the adjustments I noted above, and then made duplicate adjustments to the vest lining. That's when I actually consulted the instructions. Oops. The lining was supposed to be attached to the vest while the side seams were still open. My fabric was fraying a bit and I did not dare take it apart again.

Instead, I attached the lining to the vest all around the outer edge (hemline, center front seams, neckline), leaving an opening for turning on the back hem. I carefully stay-stitched the armholes for both the lining and the vest and trimmed the SAs down to about 1/4-3/8". Then I rolled both SAs to the inside and slip-stitched them together. All good!

Then I realized I had omitted the back belt. Dang! Sometimes I just need to slow down but Halloween was looming. To fix that I partially opened the side-seams and slipped the ends into the seam, restitching securely. Whew.

The vest pattern includes 4 welt pockets, each big enough for a quarter. I marked these with tailors tacks and pondered whether to make them, or maybe just the pocket flaps. In the end I omitted them and I'm glad I did. No need to press my already frazzled luck, really. And welt pockets are dicey in the best of times for me. 

Making 7 perfect buttonholes reminded me how much I love my now old Bernina machine. It really came through for me. I returned to the big box and bought D rings for the back belt and the vest was complete. 

And it fits her perfectly. She says she'll wear it in the future too. She looks adorable in it. I am maybe a little biased but not much.

This Victorian pattern from Folkwear was gratifying to sew. It made me wonder if I would wear a fitted vest like this one. Nah. 

But these makes were very satisfying.