
For the past several months, I have been researching the concept of zero-waste sewing and zero-waste patterns. The research was part of my preparation for a presentation to City-Wide Couture, a neighborhood group in the Atlanta chapter of the American Sewing Guild. Within this group, we rotate around the membership, presenting topics of interest.

My first stop was my recently pared down stash of sewing patterns. While none claimed zero-waste status, there were a number of them that qualified. You know the patterns I'm referencing - the ones based primarily on rectangles, like this:

There are the ethnic garment patterns reproduced by Folkwear. The history of garment construction is based on materials available, as well as climate. Often the materials were woven on hand looms, and so restricted by the width (weft) of the loom. The raw materials were precious and the process was intensive so there was strong desire to use everything produced. The bog coat is a well-known example.

A favorite of mine is the clever monpei or field pants from Folkwear's #112 Japanese Field Clothing. I have made PJ pants from this pattern for a number of years, not to save fabric, but because I love the clever way a wedge is removed from the back leg to create the crotch in otherwise rectangular fabric. This technique appears in a number of their other ethnic patterns, so perhaps was a trick used across cultures.

And I used that technique one time when I goofed while cutting out Cutting Line Designs One-Seam pants in a fabric with a noticeable right side. I managed to cut 2 left legs. I fixed it by chopping off the crotch curve, adding a seam, and flipping it over. There is no way to see that seam in normal activity.


Right now there are a number of Zero Waste pattern designers out there. They are working hard to produce interesting designs, not just rectangles with armholes in the sides. Some are quite complex. I decided that as part of my research, I should try one, a simple one to start.

As a follower of Liz Haywood, one of hers was the natural choice for my first ZW project. I chose the Ursa dress to test. The size chart is quite expansive, especially for a ZW pattern. I chose my size from my bust/hip measurement, noting that the pattern indicates 7 inches of ease.
Now the muslin/toile conundrum - it is generally wise to muslin a new pattern before cutting into precious fabric, but that flies in the face of ZW philosophy, doesn't it? I chose the middle ground with a fabric I received free from the sewing guild, one that I'm not that crazy about. It's a rayon cross dyed in yellow and pink. The resulting color is sort-of muddy.

The making process was great fun. And I tried to be meticulous, pulling threads to make sure the grain was perfectly straight. My fabric was wide and the Ursa is designed for 42-44" wide fabric. I cut off the excess fabric in order to simulate her exact instructions.

The dress is basically a tube with the length-wise grain going around the body, head and legs out of either end. The tube is created with a CB seam, so CF is on a fold. A wedge is cut from the hem of the front fold to create the two underarm gussets and a safety patch for the top of the CB vent. I really like how the gussets attached.

The shoulder seams had me scratching my head but I finally got it worked out. The design cleverly shapes the shoulders, rather than simply creating horizontal seams.
The design also creates a slight cowl neckline. I like how this looks in Liz's wool version worn as what I would call a jumper. I had my eye on some plaid wool in stash that has been there forever.
But then I slipped it on over my head. Hmmm... My head was too large to fit through the neckline. That was easy to fix by simply letting out the shoulder seams until it fit. I think I took it out a total of an inch, maybe a bit more.
Then it would not slip over my hips. My hips are the largest part of my circumference. This seemed odd, given the 7" of ease. I measured my finished garment and it measures an inch less than my hips. I fixed that by letting out the CB seam which was 3/4" anyway.

I remeasured everything and even checked Liz's measurements (which are spot-on). I don't know for certain what happened, but I have a suspicion. Because the crosswise grain hangs vertically, and because rayon misbehaves anyway, I think it worked like one of those Chinese finger toys and pulled up tighter, particularly at the top of the CF wedge removed.
UPDATE: What I failed to check was the possibility that I rotated my fabric and ran the warp lengthwise instead of as instructed. Yikes! That's exactly what caused my too-tight tube. Liz was kind enough and patient enough to walk me through it via email, even though we are separated by half the planet. I cut my fabric 41x50.75 inches. I constructed it with the 41 inches (less SAs) going around my body, instead as intended. And I thought I was so careful!

And I know I will not wear a dress like this. I should have known that up front. I did try a little to style it, adding a belt, jewelry, and even shoes.

I am very grateful to Liz who responded quickly to a post I made to her blog about my planned presentation. She generously provided me with a number of links to resources, including a video of her fashion exhibit at an art gallery, available here.
Aren't sewers the best?
For my next experiment, I tried the Lawrence jacket. Having waded into the ZW arena with a simple dress, I felt ready for something a bit more complicated. And it too shows up in interesting variations online. There are two views and only two sizes. This is a generously fitting, boxy shape so the two sizes are not serious limitations, IMO.

For my first Lawrence, I used muslin. After my trials with that rayon, I knew I needed to try a more predictably stable fabric, so a white cotton muslin was just right. And it too was free, given to me by who-knows.

Because of the size of my muslin, I chose the shorter viewB . The finished garments online do not show it with pockets but the ZW design calls for patch pockets.
This too was a fun make. If you read my blog much, you may know that I do love trying new patterns. I often reuse patterns for specific wardrobe items, but I especially enjoy the first time through a set of good pattern instructions.
My first challenge was understanding the finished measurements. The bust range is 32" to 44" for size 1. The finished measurement is shown as 29". What? You know, it's the silly things that trip me up. Of course, this is half of the finished measurement, measured flat.
Like most of ZW patterns I found, this one does not come with pattern tissue. Instead the purchase provides you with a PDF document with precise measurements. So if you like a little simple geometry (I do), it's fun. Here is my muslin marked up and ready to cut. I've highlighted a mistake where I did not cut the front neckline deep enough.

Because this is zero waste, a mistake in one area creates a problem in another. My neckline mistake was revealed when my back vent facings were too short. After my problems with the Ursa, I delayed cutting anything on the bias until I absolutely had to. You can still see the neckline as I prepared the pleats along the shoulder seam.

The doubled yoke makes use of the burrito method that I like. Here you can see the front and back neckline cut before completing the yoke. The front neckline is cut as a triangle and the back neckline is scooped.

Those two scoops from the doubled yoke are IMO handled in a kludgy fashion.

One was forced into a back facing (the shape is wrong), and the other is used to create a loop for the back neckline.

It's not much fabric to waste. I removed mine and threw it in the trash.
The sleeves are nicely drafted making use of a gusset. Here is how it looked before sewing the side seams. You can see the deep patch pockets. They are sewn before the side seams so as to catch one side of each in a side seam.

Once I sewed the side seam and started adding the facings for the side vents, I realized my previous goof with the neckline.

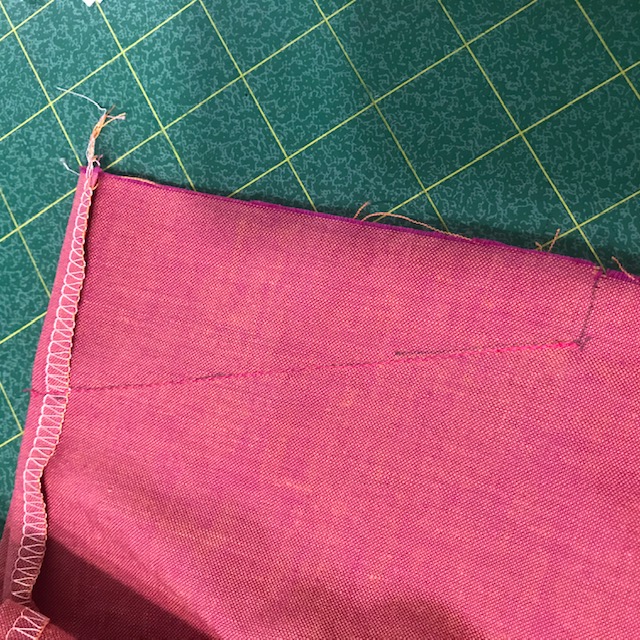
I also noted an odd method for top stitching the front facings in place. It creates a new vertical line through part of the pocket. I contacted the designer to see if I misunderstood the instructions. She directed me to a tutorial she put online to help people with pocket construction. Even there you can see the odd vertical line.

As I mentioned above, none of the ones I saw online added the pockets.
And the placement of the pockets is also odd. They fall right under my armpits.

I think this design has possibilities for a future real garment.

I might make the longer one and avoid the pocket issues. The longer one features inseam pockets, a nice touch. I will say though that it appears to have an odd horizontal line of top-stitching on the surface.
For my 3rd and final experiment, I decided to draft my own ZW pattern. This stems from my nostalgic longing for a Mexican dress from the 60s-70s when I was living in Texas. Everyone had a couple of these in the closet, perfect for the hot weather. Here is one I kept.

When Folkwear came out with their version of this, I was pretty excited. Unfortunately my PJ version of it did not live up to my hopes for it. Their design is simpler than my vintage garment and that probably accounts for my disappointment. The sleeves stick out, I think.

My vintage version was easy to measure even though the shapes were somewhat torqued after years of wearing. You can see that it is composed of these rectangles: yoke, sleeves, sleeve gussets, front, back.

I got out some graph paper and started calculating a way to make it ZW. After a few tries, I determined measurements that would allow me to cut all pieces from a single rectangle. I could not get a dress out of it without compromising the ZW idea, but a top was possible.

For my first version of the Mexican top, I used a remnant of pretty cotton yarn dyed plaid. This too is ZW. I enjoy having remnants around for design play.

This meant I had to add some seams to use the remnant. I added a CF seam, inserting a bias strip to avoid matching the plaid. I like the effect.

The yoke in the vintage garment is a rectangle with an oval cut in it. Striving for zero-waste, I created a seam across the shoulder part of the yoke. It was easy to just leave a gap for my head. Yes, it's a little kludgy.

It was easy to make. The only slightly challenging part was the use of the squares for underarm gussets.


Next, to make sure it was really ZW, I cut this from a rectangular piece of white muslin. It too was an easy make. The only kludgy aspect of my attempt at zero waste is my handling of the oval cut from the single yoke:


Here are some of my final thoughts on ZW patterns:
- The design is challenging, particularly for designers trying to scale up and down. It's one thing to make a single-size pattern, as I did. But it's another level of challenge create a scalable design.
- Because of the this, many of the pattern designers ignore the difference between length-wise and cross-wise grain. These differences can matter, but not as much as I thought, given my mistake. When a loom is loaded, the warp is laid in very tightly. Then as the weft is added, it is typically looser. So there is more give in the crosswise grain. We sewers use this to good advantage running it around our bodies. It allows for more movement.
- Zero-waste patterns do not come with pattern tissue. Rather you purchase a set of instructions for measuring each piece.
- As with most indie patterns, some of the nomenclature is non-standard, as are seam allowances. This is just something to note.
- I admire the people who decide to create these patterns for home sewers. It takes patience and persistence.
- Personally I enjoy having remnants as I like to incorporate them into other garments. And I learned that you can compost natural fibers. Of course.


