Showing posts with label linen. Show all posts

Tuesday, December 5, 2023

'Tis the Season

To be frazzled and overwhelmed, yes? I am trying to manage this more deliberately this season by keeping my expectations low. In pursuit of that, I'll start by admitting that a recent project was less than satisfying.

version 2 a.k.a. final version

Diane Ericson's pattern, Fault Lines, has some wonderful details and it's not your everyday ho-hum design. 


As mentioned in several previous blog posts, I am crazy about the sleeves and will most definitely draft that onto the next top I make. By repositioning the underarm seam on the sleeves, and an amazing design for the hemline, the result is elegant. Even though the grainline is similar to most ordinary set-in sleeves, it just seems to hang better.


One front piece and both back pieces are cut on the bias. The other front piece, and the sleeves are cut on the straight-of-grain. I have had some good success with bias but it is not always predictable.


As posted in a previous post, I made the undershirt version of Fault Lines in a light weight linen. Bottom line, it was really too thin to work effectively without something over it. 

I was quite enamored of the trim on the armholes. Sometimes details catch my eye and trip me up. 

that sleeve, oh my.

The main reason this project was faulty was that the fabric was too thin. After talking a bit with Diane about it, I decided to try to retro-fit it with a silk organza lining, similar to one Diane made. The silk organza, really an interlining on hers, gave the shirt just the right amount of weight to work well as a stand-alone top.

version 1 a.k.a. the wadder

Ultimately I gave that idea up. It took me a while to wad it up and put it away, but I'm so glad I finally did so. And then I pulled out a very similar, but heavier linen and remade it with no lining or interlining. I mostly like it.

version 2

The reason for the failure I think emanates from the fact that so much of this piece is bias-cut. Had I started out with it interlined, it might have worked. Or it might have failed in any case.

version 2 worn with matchy-matchy Capitola pants

As I've learned, woven fabrics have two distinct bias grainlines. Depending on the position of the warp thread, it will drape a little differently. Standard advice is to let a partially finished garment hang a day or so to allow the bias to settle into place. I found that helpful, trying to align the two bias pieces - light weight linen and silk organza - sucked the joy out of the project. After way too many hours, I gave up.


Now that I have one wearable top from all the messing around, I am not completely sold on the style. It is different and I have worn it, but...maybe I just wore myself out.


I have to say that I still rate this pattern quite high, and I'll probably make it again. I think it's particularly lovely with both layers, as you can see in my muslin version.

Now, this double layer might have worked with the too-light linen

Meanwhile I am enjoying the colors of the season and have a new project up my sleeve!


Friday, October 28, 2022

Autumn Color and the Chopin Blouse

A kind of mood board from June Coburn

Now moving into autumn - I do love those colors - burnt orange, chocolate brown, burgundy, deep teal. I have a nice little pile of these in stash. It's been fun pulling them out and planning some pieces and ensembles. 

Patterns: Pearl jacket, Bristol top, Helix pants

Fall also puts me in the mood for shirts and all the details that accompany a shirt. An old Sewing Workshop pattern, the Chopin blouse, caught my eye somewhere, probably on the Sewing Workshop gallery. And then I discovered that I do not have it in stash. So how did that happen?!? I tend to collect all their patterns, but particularly the old ones.

The older ones have all the interesting details and shapes. The Chopin blouse came out in 1999 so it's of millennium vintage. In the illustration it looks kind of 90's, doesn't it? The shoulders look wide (and they were) and the proportions are very 90's, as well.  

So I queried my local ASG chapter and Beth (thank you, Beth) donated her copy to me. She said she doesn't want it back, but if you change your mind, Beth, you can have it. I traced my size and so the tissue is still intact. 

Oh, my, the details on the Chopin blouse! I kept some and omitted others, especially all that ruching! There is a collar band with a ruched collar above it. I just dropped the ruched collar and kept the band, something I often do with shirts anyway. The cuffs on the sleeves were deep and also ruched. I liked the depth but drafted a new cuff. 

Cuff facing, placket, cuff and other placket

Right and wrong side of cuff after assembly

Cuff ready to attach to the sleeve hem

I really love the shape of the sleeve. It is slightly bell shaped. The very deep cuffs angle back in to the wrists creating a narrow shape at the bottom. And the cuffs present a cool place for extra buttons. In the end I used 3 buttons on each cuff.


Finished cuff

Those pockets! Too bad they don't show up at all in this brown and white linen. I'll have to incorporate that idea into another shirt some time. I think it would be fairly easy to draft them onto a different pattern since they are simply overlaps top-stitched in place.

And there are godets in the side seams, giving the appearance of a waist. I think that would be flattering on lots of people.

Lastly there is the pleated back peplum. I goofed and inserted it backwards so mine is a box pleat instead of an inverted pleat. I might go back and fix that but probably not.

The silhouette was a problem. The pattern as drafted is quite oversized as most 90's shirts were. I am wondering if shoulder pads were intended. The shoulders on the size S definitly fell off my shoulders by a good inch.

And it was too long. I shortened the overall body by 3". In the back, I shortened it by 2" at the top of the peplum and another inch along the hem. I shifted the godets up a couple of inches after adjusting the horizontal seam on the peplum. Then I cut the remaining hems to be even with the back hem. The resulting hem is straight, instead of a shirt-tail hem.

I narrowed the shoulders and reduced the side seams on the shirt, as well as on the sleeve underarm seam to accommodate the shoulder adjustment. 

There were no lengthen/shorten lines on the pattern pieces, so I just had to wing it. Because it worked out, I now think of it as fun. It was quite nerve-wracking in process, though, because I was working with the fashion fabric rather than a muslin. 

I know. I know. But I was channeling Diane Ericson the entire time. She has such a playful approach to design and typically works with the actual fabric, adding and subtracting as the design and fit require. I aspire to be that experimental. 

And I got lucky this time.

Thursday, February 24, 2022

Hudson Hack


It has been over a month since I blogged. What happened? I have been sewing but not really much for myself. Rather I finally forced myself to finish a project I started in November for my church. I will recount that in another post, primarily in case I make such liturgical pieces again! I'll want to avoid repeating all my mistakes. And there were lots of mistakes to avoid.

This past Sunday, I took it all to church and declare it DONE. Then I got right to work sewing for ME!

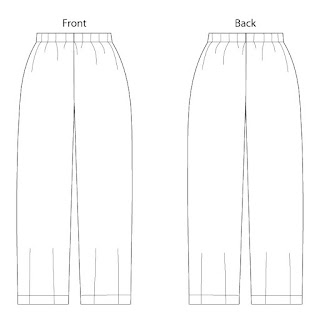
First up was the February project for Sew Confident! from the Sewing Workshop. In my previous blog post I described the new rendition of the Quincy jacket, now called the Sterling jacket. This year in Sew Confident! the theme is wardrobing. The Sterling jacket was for January and a hack of the old Hudson pants was introduced as the February project.

Original Hudson Pants


Hudson Pants Hack

The Sewing Workshop offered kits and I chose a dark navy linen version. The lovely thing about a kit in this situation is that I was sure it would match the Sterling jacket which I also purchased as a kit. The navy blue linen did not disappoint. It is one of those lovely soft linens that looks good when it wrinkles, especially after washing and drying. It is a nice medium weight fabric that was great fun to cut, sew and press.

The Hudson pants are a basic pull-on pant with only two pattern pieces - the front and the back. It is interesting because of the vertical hem darts. The addition of the darts slightly alters the overall silhouette and shape. I've made them a number of times but not recently.

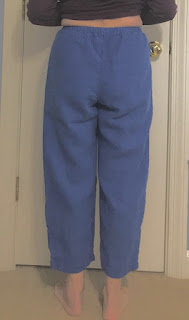
an old shot of me in linen Hudson pants

The hack for February includes eliminating the hem darts, creating a separate waistband, and adding pockets. The pants are shortened, then overlapping panels are added to the bottom of each leg. The final piece has a silhouette similar to the original Hudson pants, I think. But it was more interesting to sew.

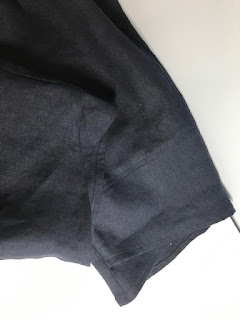
Dark navy is hard to photograph but maybe you can see the sweet overlapping panels.

There was also an emphasis on pants fitting for February so I took the opportunity to re-evaluate my older Hudson pants to see what I liked and what I did not. I lost some weight about a year ago now, so I took in the side seams to create a more slim look.

Recently adjusted for my current size.

I made a serious attempt to *read the wrinkles* in the back, but also consulted a bit with Linda Lee via email before making the new pair of Hudson pants. The separate waistband gave me a late-stage opportunity for better fit than the original cut-on waistband did. 

I made some tweaks and then added extra height in the upper portion of the pants. Before adding the separate waistband, I pulled them on with a knotted elastic at my waistline. Once I adjusted the position of the elastic band, I marked the elastic position with chalk. I stay-stitched along the chalk mark and cut off the excess fabric. Then I added the waistband and inserted the elastic.

For elastic waistbands, I like to mark the two ends with Sharpee so that when I insert it, I don't twist it. The elastic provided with the kit is softer and more stretchy than I'm used to sewing with and required a number of tweaks to make the pants fit closely enough. I may need to remove just a little more but it's pretty good for now.

I do love the pockets. They are lifted directly from the West End pants, an older TSW pattern. They are simple and fool-proof to add to any garment with side seams, I think. The result is a pocket with very little bulk.

This is a super comfortable ensemble and really puts me ahead in my spring sewing. The jacket is made with cotton jacquard from the January project kit. The pants and tank are linen from the February kit. There were lots of color ways from which to select a kit. I'm pleased with my navy pieces. Just right for spring in Atlanta.

MixIt Tank top with Hudson (Hack) pants

I cannot decide if I like the overall length of the pants. I may take the lower panels off, shorten the main body of the pants, and then re-attach the panels. They seem just a little longish for cropped pants.

Through careful placement of the Hudson pattern pieces, I had enough fabric left over to make a little shell using the MixIt tank pattern. Yay!

I adjusted the hem so that it is a sort-of shirt tail. I used the navy linen for a bias facing around the neck but created a more light weight bias facing for the armholes using a not-silky silk from stash. I used it in the Sterling jacket too.

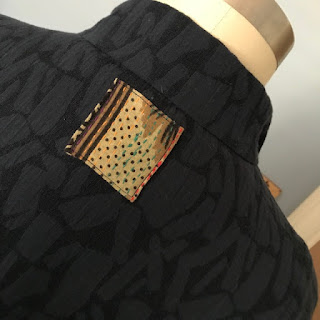
I added a little patch to the back neckline (of course) using my shrinking stash of remnants purchased from Mieko Mintz. I'm sad to report that she no longer sells her remnants, as far as I know. Too bad. They are so pretty.

And now I have an ensemble! Maybe. Should I shorten them?

Monday, August 30, 2021

Bias Work - the Emerald Top and Dress


After I read Patti's review of the Emerald Dress and Top, I needed it. It is still hot as Hades here and I do love a linen dress.


This shift dress is composed of 4 panels - two fronts and two backs. This is necessary to in order manage the bias cut. The direction of the bias is mirrored across the front and across the back. It provides a flattering vertical seam down the front and back.

First I made the top in a beefy linen that I thought of as hot pink. DH called it red and it does read red too. After all, what is deep pink if not red? Either way I find it to be a delicious color, and it makes me feel good to wear it. I bought it at my local wonderful Gail K on Cheshire Bridge Road in Atlanta.

Patti made it clear that the top was very cropped. I knew that would not work for me, as my bottom pieces, by and large, have elastic waistbands. This is not a pretty look. Plus I do like a bit more coverage. She added 2" to the pattern pieces and so did I.

It is still a little short at the sides, but not bad. And adding 3 inches might have made it too long in the front and back. The hem is dramatically curved, similar to a man's shirt. 

I love, love, love the drape of bias cut linen. It makes me feel feminine, yet comfy.

Next I pulled out a nicely aged black something-or-other I purchased at my local ASG tag sale a while back. It is at least 60" wide and I think I started with about 4 yards, plenty for the dress. And something else too.

The burn test and the selvedge read rayon, but I think there is something else mixed with the rayon, maybe cotton. It is lightweight, not transparent though. The drape is just right for a bias cut garment, I think. Maybe I said that already. This pattern benefits from some pretty drape.

The dress and the top have deep facings for the armholes, the neckline and the lower hem. These are top-stitched in place adding a nice design detail and serving a good purpose. I especially appreciate the deep hem facing with the light weight black fabric, as it adds some needed weight to the bottom.

The dress includes in-seam pockets and a novel (to me) manner of insertion. It is actually easier than the way I usually insert in-seam pockets. The directions have you attach a single pocket to each front side seam and each back side seam separately. 

Then you align them for stitching of the side seams. I'm not sure the result is as flat as my usual method. This one requires that you press the side seams to the front, something that feels a little off to me.

I am also not thrilled with the finishing on the lower point of the armholes. It finishes nicely on the right side, but not as cleanly on the inside. 

The instructions were not as exacting there as I would have liked. On the top, I just winged it in the absence of specifics in the directions. 

On the dress, I lined up the dots and only stitched between the dots, thinking that might provide a clean finish inside. Ultimately it made no difference. The inside is still a little unsatisfactory.

All of these points are picky, picky. It is a beautifully drafted pattern with clear directions. I think it would be instructive and helpful for even a beginner. 

And I think the shape is just darned nice.