Madrid is a beautiful city, clean, open, modern. And it contains some of the best examples of Picaso's later work. So inspiring and even disturbing during his blue period.
 |
| the two sides, black on top of blue |
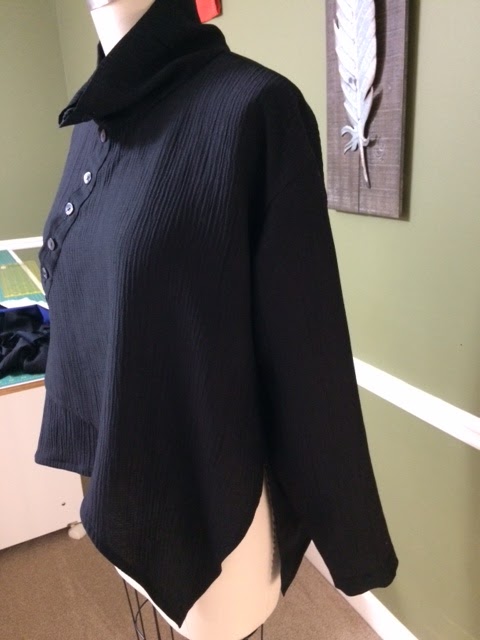
The fabric I used to make this Madrid shirt (The Sewing Workshop) is black on one side, deep navy on the other side. I purchased it at The Sewing Workshop in Topeka KS about 18 months ago. The navy side is so dark that it looks black until you compare it to the black side. It is 100% wool, something I questioned until I steam-pressed it. It is a fine double-weave, so fine that it has a glimmer like silk. And it is crinkly. It was mostly fun to sew and I love how it feels.
Initially I thought I'd make up the Madrid in a window-pane black and white plaid. In the process of planning that I realized that the curved seams in the front and in the back are design-only. So if I do make it up in something requiring matching, I'll just overlap the curved back pieces and cut as one. I'll do the same for the right front pieces. That way, I'll have no need to unnecessarily match plaid on the curves.
Since this is a solid colored piece, I followed the pattern closely. The curved seam in the front does create a stable base for the buttons. And it adds pretty lines to the garment, I think.
I like almost everything about this pattern. The uneven hems are attractive and they float over my belly. The sleeves are quite tapered which I think is a pretty shape. I am rather enamored of the curved band that contains the buttonholes.
But. I am not crazy about those dropped shoulders. With this puffy fabric, the sleeve cap is not as smooth as I like, though it contains no bubbles in the sewing. I guess I just prefer a sleeve cap that sits directly on my rather square shoulders.
Next time I may add some fabric to the hems. The pattern assumes that you will finish the raw edges of the fabric with a serger, I think. But I chose to use French seams throughout and did not want to use the serger on the hem where it might even show. There is only a 5/8 inch hem which becomes a 3/8 hem when you fold the raw edge under. This led to some tiny miters, not quite as pretty as deep miters.
This was a fun make. I almost always have a great time following a pattern for the first time, especially with patterns from The Sewing Workshop. And I see more potential for the Madrid shirt. I probably will not make the pants, a re-issue of the Zigzag pants. These pants are meant to fit like jeans with tight crotch and low waistline, so not my cup of tea.
I am checking my mailbox daily for their re-issue of the San Diego jacket.