Monday, August 31, 2015

Lucille Ball Cuffs

Today's post is a very small tutorial. After a recent post showing these cuffs added to Marcy Tilton's block dress (Vogue 9081), I was asked how the cuffs are constructed. It is a super simple technique and I like the resulting cuff.


Lucille Ball Cuffs:

1.  Cut the cuffs 1 inch wider than the unfinished lower hem of your sleeve pattern in order to create a 1 inch overlap. Because both the sleeve and the cuff are unfinished, you only need to add enough for the final overlap. I like 3 inch deep cuffs, so the raw cuff piece needs to be 7 inches deep. I use a 1/2 inch seam allowance. My finished sleeve is 14.5 x 6 inches before folding the cuff into position. Each cuff is cut 7 x 15.5 inches.

2.  Interface the cuff pieces as needed based on the fabric (*).

3.  Fold each cuff along the long side right sides together. Sew short ends of cuffs using 1/2 inch seam allowance. Turn to right side and press. At this point each cuff measures 14.5 x 3.5 inches.


4.  Mark placement for the cuff overlap on the sleeve hem: My pattern includes a continuous bias vent, so I just used its placement. If there is no other guide on the sleeve, then I suggest dividing the raw hem of the sleeve into thirds. Clip a mark at 1/3 of the way from the BACK seam allowance. This is pretty close to the usual placement of any conventional cuff opening.


5.  Sew the sleeve underarm seam together, as usual.

6.  Pin cuff and sleeve hem wrong sides together. Stitch together using 1/2 inch SA.

7.  Repeat for second sleeve but make sure that the overlap of the second one is the reverse of the first one.


8.  Press seam towards shoulder of sleeve (up).

Seam between sleeve & cuff is exposed when cuffs are folded down. The seam disappears when the cuffs are folded in place.

9.  Fold cuff back into place. I do not press this fold because I like to keep it soft. When it is on my arm, it stays in place better than it does on my armless dress form, so no further stitching is needed.


*This fabric is quite different from the crisp medium weight linen used in Marcy's block dress. Because it is a very soft cotton, I interfaced each cuff piece completely with cotton batiste. For the orange linen dress, I did not need any interfacing.

This idea was inspired by a collar a friend used on a t-shirt. Her collar finished at about 3 inches deep and it probably overlapped a bit more than an inch. I *think* she said the pattern for her collar came from Pamela Erny's web site, Off The Cuff, but I cannot find it. It looks so soft and pretty as a collar and I look forward to using the technique that way too.

This shirt is the Cortona shirt from The Sewing Workshop. I have made a few goofs along the way but it is now moving in the right direction. Stay tuned!


Sunday, August 30, 2015

Wabi Sabi

White linen is an example of wabi sabi, I think. Imperfect, impermanent, incomplete.


It also lovely to press, fold, stitch and shape. 

These are pictures of one of two pillows I made for my daughter for her birthday. It is a technique from Stitch Magic by Alison Reid. This is beautiful and informative book, as is a similar one, The Art of Manipulating Fabric by Colette Wolff.

Linen is so cooperative and open to suggestion that I did not even use an iron, except to square the starting rectangles and to square up the finished rectangles. Finger pressing achieved just the right look in these intersecting tucks. No sharp creases, instead soft folds along the grain lines.

Though it was tempting to leave the intersecting tucks as seen above, I was unable to resist the urge to complete the technique by pulling the small flaps back on themselves to create the impression of knots:


I forgot to take a picture of the pair together. The other one was the same size (12x18) but the tucks are more scattered. What a fun and satisfying small project.


Tuesday, August 25, 2015

(Small) Six Pocket Tote

This free pattern has been available at the Better Homes and Gardens website for a while. I made it a number of years ago for my daughter. Today I finished one for my granddaughter.


Both times I was surprised at the size. Somehow the finished measurements did not register. Either time. It just looks larger than 8 x 10 x 4 in the pictures. Or maybe it's the word *tote* that throws me. I think it's more of a medium size purse.


I might try it again someday with larger dimensions.

It's quite a good tote pattern, especially given that it is free. They recommend 1/4 inch seam allowances which seems too small to me with all those layers. Mine are more like 3/8 inch seam allowances.

Here is the BHG version compared with mine:

BHG version - super cute fabrics, right?


It started with a visit to my son's house last month. My granddaughter selected some fabric at a local quilt store. We played around with hexies which are all the rage in one of my groups. She produced this little flower shape before she became bored. So I promised her I would make her a tote with that on the outside.

Hope she approves!

Wednesday, August 19, 2015

Tremont Jacket

Just now finished my first Tremont Jacket from The Sewing Workshop (TSW). I like it quite a lot. And there is much to like!


This pattern has not yet been released but Linda Lee allowed participants in the July Sew Kansas to trace a copy. She tells me that the final version is off to the printer and should be available in about 2 weeks. I think this will prove to be a very popular jacket for TSW.

There are some small differences between my jacket and the final version of the Tremont Jacket. My tissue contained separate cuffs and I was short on fabric so that was a good thing. The final version has cut-on fold back cuffs.

Also I have mine crossing left over right which of course is the wrong way. This is OK but you cannot see that the left and right fronts are different. Here is how it looks with the left and right fronts positioned correctly:


The things I love include a sleeve design that sits right at my shoulder. That is my favorite sleeve. The armhole is deep and it is not a set-in sleeve but that will allow easy layering without a blouse sleeve ever bunching under my arm.

I also love the neckline. A lot. I think I've seen this in another TSW pattern. The back collar is actually part of the front pattern piece(s). You sew the shoulder seam and back neckline in one continuous seam. This creates a right angle seam right where the back collar and the shoulder seam meet.

The right angle is not terribly difficult to sew in this stable cotton Ikat. However, this right angle became a fun feature because I got to apply another technique from Marla Kazell's recent lecture at an ASG event in Atlanta. It is also found in the Roberta Carr techniques book. The advantage to the technique is that it strengthens that gap that is created by the 90 degree angle in the seam.

I also used Roberta Carr's mock Hong Kong edge finish as well as the real Hong Kong edge finish. I found I needed the real HK finish on the seam connecting the sleeves to the jacket body. Elsewhere I just used the mock version.

Yet another feature that I like is the opportunity to use Linda Lee's signature mitered corner:


The side seams have deep vents that create a acute angle at the vertex. The result is a lovely drape along the hips, I think.


Lastly I tried my hand at the Spanish Snap Buttonhole. Let me just say that I am feeling very courageous right now. If this had failed, I would be scrambling to fix a hole in my Tremont jacket. Whew!

The Spanish Snap Buttonhole is new to me, but I see lots of related posts out in the blogosphere. Most give credit to Roberta Carr. I highly recommend her book:


The Tremont jacket gave me just the right opportunity to try out a new buttonhole method. It only calls for one button. I wanted to use a relatively large one, too large for a standard machine buttonhole.

I followed her instructions carefully and after 2 samples, I put one in my newly finished Tremont jacket.

Here you can see the wrong side of the jacket front (top part) and the wrong side of the facing (bottom picture). Actually this was sample number 2 but the real version looks just like this. I used red silk dupioni for the buttonhole facings (or lips).

Here is my finished sample.

And here it is buttoned on my finished jacket. I like that the red peaks out just a little.
  
The front side and the back side look identical IMO.
Now I'm just waiting for the temps to drop down low enough to justify a jacket.


Tuesday, August 18, 2015

Pattern Organization and First Guest Author!

While attending Sew Kansas recently, I was introduced to an easy, attractive and useful way to organize my many patterns. This idea came from Valorie Sanborn who graciously agreed to be my first-ever guest author on Now Sewing.

Here is what you will need:
  • tape
  • 10x13 inch white envelopes
  • baskets or filing cabinet for storing the envelopes
  • patterns, of course
  • inexpensive light weight fusible interfacing
Right now, I have my patterns quasi organized into the four drawers of a smallish dresser. The drawers stick. The patterns get crunched because they don't fit. The envelopes are different sizes. Of course I have the usual problem of exploding pattern tissue once I open the pattern envelope. And they tend to tear from multiple uses.

I have just begun to organize my patterns using Valorie's storage method. My plan is to gradually introduce this, maybe by cleaning out part of a drawer at a time. Or I'll convert each pattern to this system, as I use it.

Before:


After:


Here is what Valerie says about her method of organizing patterns.


I reuse my patterns over and over again.  I have patterns that I use regularly that I have had for 20 years.  I alter them; I change collars;  I lengthen them and change or remove sleeves all together.  The result of all of this was I needed a system for preserving and storing my patterns.

The first thing I do with a new pattern is that I cut out the pattern pieces from the tissue leaving an ample amount of paper surrounding the pattern piece.  I then lay a thin fusible interfacing, glue side up, on my ironing surface and position the pattern pieces on the interfacing.  I then iron the pattern pieces onto the interfacing and cut out the individual pattern pieces.  For the interfacing I prefer to use Pellon Apparel Interfacing - Basics:  P44F JAS Fusible Interfacing.  The cost is $ .99 per yard; I wait for a coupon from Joann's and buy it by the bolt.  Do not use a stiff interfacing.

Now that I have my pattern pieces, I need to store them.  I purchase 10 x 13 white envelopes from the office supply store.  I take my pattern envelope and cut the front and back and place them side by side and tape them to the envelope.  I use the reverse side for any notes.  I store the envelopes in wicker baskets on shelves in my sewing room. A file cabinet would work also, but I like  the baskets because when I am fabric shopping online I place the basket next to me so that my patterns are handy.


Many thanks to Valerie for sharing this! Another reminder how much we learn from fellow sewers.


Monday, August 17, 2015

Technique: Hong Kong Finish

In keeping with my current theme of Better Sewing, I was curious to see what Roberta Carr recommends for the Hong Kong seam edge finish. I learned that the HK finish I've been using is really called a Mock Hong Kong finish.


Truthfully, my seam allowance finishes typically must adhere to a ready-fire-aim approach to sewing. That is, I sew the seam and then figure out how to finish the raw edge. In my Better Sewing mood, I considered and finished the raw edge before even sewing the seam.

Yes!

And so I learned about the actual Hong Kong finish. In this case the mock version is a better choice, according the Roberta Carr.

In the mock version, you place 1 inch bias strips on the raw edge, right sides together. Then you stitch with a 1/4" seam allowance. Next you wrap the bias strip around the raw edge and stitch in the ditch. Lastly you trim off any excess from the bias strip before sewing the regular seam.

I used a silk neck tie from the thrift store for the bias binding. You can get several yards out of one tie.


In the actual HK finish, the excess is not trimmed away. Rather it is folded under and slip-stitched so that there are really no raw edges at all. It is identical to a standard quilt edge finish. Who knew? Not me.

The mock HK finish results in less bulk and so was the best choice for this medium weight cotton Ikat fabric.

By the way, I am working on a version of the soon-to-be released Tremont jacket from The Sewing Workshop. Linda Lee allowed us to trace it while attending her July 2015 Sew Kansas.

Next step - add the back piece


So far, so good...


Sunday, August 16, 2015

Techniques: Hong Kong binding and Single welt pocket

Friday I attended a lecture by Marla Kazell, couture sewing teacher. Her lecture was information rich. She lectured and illustrated one technique after another. Some I knew and had forgotten. Some were just what I needed. And some I just have to try out soon. It got me thinking.

There are sewing teachers who inspire creativity (Diane Ericson, Mary Ray). There are those who inspire style (Linda Lee, Marcy Tilton, Pam Howard) I want to copy. Some just make sewing look like great fun (many). But I'm always on the look-out for a new technique. Aren't you?

So here are two I've tried recently.


Single-welt pocket


At Sew Kansas Linda Lee demonstrated the single-welt pocket. I've seen welt pocket demonstrations before and I've even made a few myself. None that I really loved. None that inspired me to cut into a nearly finished almost perfect garment and hope that everything would be OK.

After watching Linda Lee, I knew I had to try again. This one creates a clean finish on the inside of the pocket, as well as on the inside of the garment. It works equally well on lined and unlined garments. And of course the exterior looks darned good too!

Like all good sewers, Linda Lee preached the making of samples. Something I do not usually enjoy. This time though I decided to add some fun to it by using pretty fabrics and then decorating it:


I took fairly good notes but did not have time to try this on my own until weeks after I learned from Linda. I was really glad that I decided to purchase Sew Confident from Linda Lee, as it provides the details of this pretty pocket. Sew Confident contains not only techniques but lots of inspired style. If you like the style and techniques applied in The Sewing Workshop, then you will love this monthly series of tutorials and eye-candy.


Hong Kong Finish on a Sleeveless Top:


As mentioned above, Marla Kazell's lecture was chocked full of techniques. I came home wanting to try them all. First up, the Hong Kong finish on a sleeveless garment.

Many times I have substituted binding for facing, especially on an unlined garment. I've used one of these binding techniques:
  1. Cut the seam allowance off. Sew bias binding to the garment edge, right sides together, usually with a seam allowance that is 1/4" up to 1/2". Wrap around to the wrong side and slip stitch in place. This is just a standard quilt binding technique that can be varied by folding the bias wrong sides together before applying it. This adds bulk but is desirable for durable quilt bindings.
  2. Same as the above, but sew the bias to the wrong side of the garment. Wrap to the front, folding under the raw edge. Top-stitch on the right side. In both techniques 1 and 2, the binding shows on the right side.
  3. Leave the seam allowance and apply a bias binding sewing (right sides together) on the seam line. Trim seam allowance as desired. Wrap binding to the back so that none of the binding shows on the right side. Top-stitch or hand-stitch in place.
Marla presented a variation on the 3rd technique. Once finished the binding is only visible on the inside. 

As it happens, I had a top with exterior binding that I did not like anyway, so I replaced it, trying out her technique. I am very pleased with the results even though I could not find any remnants of the original fabric. I used a blue batik.

First she cut the bias strip. Then she sewed it to the armhole right at the usual seam line (5/8 inch). Next she trimmed the seam allowance to 1/4 inch. After that, she wrapped binding around the raw edge and stitched in the ditch from the right side. At this point I was scratching my head, thinking, but the sleeve will be too tight!

There was more. She trimmed the raw edge of the binding on the wrong side as closely as possible and then wrapped the binding to the inside, one more time. At this point the binding is entirely on the inside. I pressed it in place and top-stitched. Pretty cool technique, Marla!

Binding is inside. Only top-stitching shows on the outside. You can barely see the blue batik I used for the binding, and since I have arms, it will never show.
This is the way it looks before it is folded a second time.

Pressing the binding to the inside before top-stitching


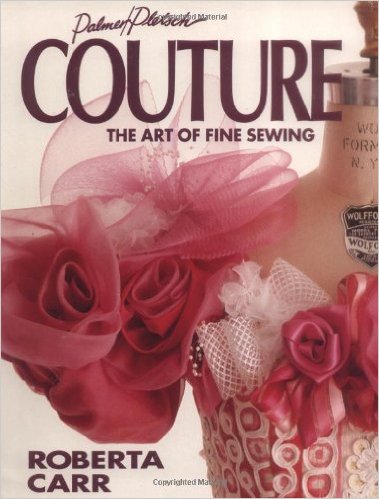
Marla was the technical consultant for this well-known and well-loved book by Roberta Carr on couture sewing:


Marla worked with Roberta Carr for many years before she died. In fact, Marla was bequeathed her closet! Several of Roberta's garments were used to illustrate couture techniques during Marla's lecture. 

If you ever have a chance to hear Marla speak, do so. She is the real deal on couture sewing and like most good teachers, she is generous and articulate. Marla Kazell also has a bi-monthly newsletter that is available for free. 

Also if you do not have this must-have book in your sewing library, I recommend it to you. I cannot wait to try more of Marla's (and Roberta's) techniques.

Marla's lecture did not inspire me to buy more patterns or more fabric (my usual response to an enjoyable class), but it did inspire me to sew better. And that's a good thing.