Saturday, January 21, 2017

Classic Shirts

Pam Howard is about to teach a local class on The Classic Tailored Shirt. Unfortunately it is sold out but I think you can still register for her class on Craftsy. It is a wonderful class, no matter how or where you take it. I've been lucky enough to do both.

Pam started my fascination with classic men's shirting details in feminine tops. Although I have to miss her local class, I decided to participate in spirit! I bought these 3 pieces at Gail K.

Brown: cotton sateen
Cream: Pima cotton
Gray: cotton shirting
Using an old favorite pattern, I started with the gray cotton. It was so easy and fun to sew. The Hibiscus pattern is an old favorite because it's a little different and it's a little puzzle. I do enjoy a pattern puzzle.


It takes a bit of time to cut it out because so many of the pattern pieces are cut singly. Here are the only ones I could cut on doubled fabric:


The sleeve has some interest with the inset at the hem. That oddly shaped piece fits into the corner cut out. The pattern includes a collar and collar stand, signatures of classic shirting. But I decided to make the collar stand wider, and omitted the collar. That's a look that I find comfortable and flattering.

There are definitely some tricky parts and so I was glad to have my first version of it handy:


I did cut out the gray one backwards so it mirrors my first one. Here is the most tricky part, IMO:


Before it is hemmed and top-stitched, it looks like this:

before

after (on the inside)
I found it helpful to hem the bottom before top-stitching the overlay. Speaking of the overlay, here is how it looks before the top-stitching. It creates a slight peplum all around the bottom:

before
after. (I love the little pocket.)
All in all this was a fun make. I've intended to get back to it ever since I finished the first one. This one is so plain that, of course, I added sashiko. 

The buttons also came from Gail K. They have such great selection.


Tuesday, January 17, 2017

That Hoodie

For Christmas I made my granddaughter a new coat. She had been over to my house wearing a coat I made several years ago for her, only the sleeves are now barely 3/4 sleeves and it is rapidly becoming a shrug.

The pattern is from this issue of Octobre. In fact, it is on one of the two covers:


As you may know, Octobre is a European (Finnish?) subscription magazine that includes the patterns in each issue. I have loved having some of these for making clothes for the grandchildren. It requires tracing the pattern from a page like this and then adding seam allowances:

Always a little daunting!
The instructions are brief but fine as it is a pretty straight-forward make. The hoodie attaches with an inset corner but otherwise it is a very easy pattern to put together.

My corner on the inset was a little wonky so I covered it with a label.
The fabric is a cotton-linen blend I purchased at Sewing Workshop this past summer. Because it is a jacket, I quilted it, using cotton flannel as the batting and a rayon lining as the back side. Then I assembled it as a single layer.


I used a separating zipper that I've worried is a little stiff. It was a bit fussy to install but not terrible. I inserted elastic in the sleeve hems and a draw string in the hoodie, as well as the coat hem. I used a cotton batik (light blue graphic batik) to finish edges on the inside. It was really quite fun to make.


And here is where the story takes a sad turn. It is not her style. And I get that. I really do. I like to select my clothing too. So, lesson learned. I need to engage her in the selection of pattern and fabric, and even the sewing next time.


Maybe she should just keep it a while. By the time it fits her, she might like it. Or not.


Saturday, January 14, 2017

Fiber-reactive Dyes

Recently I purchased The Art of Cloth Dyeing from Craftsy. It is taught by Jane Dunnewold and is a blast! I must confess that I became impatient watching the video and missed a step, I think. The key to dyeing the Dunnewold way is heat and time, as she says. I think I short-circuited the heat.

cotton sateen - cobalt blue
It is a very low stress way to dye with chemical dyes. And it is not messy at all. I did it in the laundry room and did not dye anything accidentally, as far as I know. I used my tea kettle to make sure the water was hot enough, but otherwise did it all in my utility sink. The rinsing process was very easy - I used the utility sink for the cold wash, then my washing machine for the hot rinse. No renegade dye anywhere!

Generally I prefer natural dyes. However I purchased some of these fiber-reactive dyes a few years ago and decided I should use what I have. Of course, I'm addicted now and so will probably be purchasing more.

I used the cobalt blue for most of these. I added a pinch of the Kelly green towards the end. I can see the difference.

Homespun cotton, started out cream colored (see tiny original), used cobalt blue.

Hanji paper takes the cobalt blue beautifully. It is fragile during the rinse step and I tore the dark one quite a lot. The *plaid* one was folded tightly and wrapped with a rubber band. The paper started out bright white.

Old linen shirt from the thrift store. Here I added a pinch of the kelly green,after I had been using dye stuff containing only cobalt blue. The change was small and patchy. It was not completely submerged in the dye, as it was an afterthought.
I used it for clean-up first.

You can see the effect of the pinch of Kelley green added after I started using the dye.

You can see the old dyeing I did - probably tea, but maybe rust.

Silk noil, started life a natural color, seen below in the small piece of the original.


In sum, I am most enamored of the Hanji paper.  The color is so rich! It may migrate onto my hands when I stitch it, but maybe not.

Thursday, January 12, 2017

Simple Zen Vest

Yet another piece from my current favorite pattern, the Now and Zen from the Sewing Workshop:


Fabric: a remnant I purchased at Gail K, 1 3/8 yd (60 w) for $17. It is a wonderful medium weight wool - soft to the touch, easy to sew, even nice next to my neck, and a beautiful rich navy blue. It's so dark that it does not photograph well.


Changes I made:

  • omitted sleeves and used silk dupioni to bind the raw edges.
  • added patch pockets on lower fronts.
  • stitched to back pleat together for about an inch at the waist line.
  • reshaped the front facing so that it does not fold twice; rather it folds once, creating a wider front facing.

This was a fairly easy make as it is unlined. I did hand-finish the raw edges on all the seams but otherwise it came together quickly. 

Things I like a lot:
  • the back pleat
  • the collar that can be worn folded back or up to keep my neck warm
  • the overall simplicity of it
  • the color and weight of the fine wool
Now I'm trying to decide if it needs buttons. I don't think I'd really button it but maybe that would give it a little more pizzazz. It's plain but I like that it will go with so many things I wear.


This is a fun collar. It is a tube with the ends (at the front) open. I suppose you could slip a scarf through it. The raw edges of the collar are easily tucked away with the top-stitching. You can just barely see the top-stitching above.


I thought about using the collar from the Now shirt. It is a double collar where the inside collar is more narrow than the outside collar. But it does lead to 4 layers of collar - too much for this wool. Overall, I call this a success!

Hope your sewing is going smoothly in January.


Sunday, January 8, 2017

Pegged

This post documents an episode in my continuing search for the perfect pants. Perfectly fitting pants are the holy grail for most garment sewers and I am no exception. I keep thinking I've got the perfect pattern but then I become disenchanted. Note: I'm looking for good looking pants for non-stretch fabrics. Stretch pants are easier, I think, but I generally prefer woven fabrics.

My last make of pants used the Quincy from the Sewing Workshop, their pattern for narrow-leg pants using non-stretch fabrics. I've made them three times now, most recently on New Year's Eve. The last pair was made from a drapey rayon twill. They feel delicious.


But I need to admit that they are not flattering on me.

They are a little too big on me (I think) but the more significant problem is that narrow pants can create a pegged look that I do not think is attractive. You see them everywhere on women large and small. I'm not sure I even like them on small people, but that is not my problem.

So I made selfies in a number of favorite pants. It is a bit difficult to see the silhouette since I almost always make dark pants.


These are the Hudson pants, from the Sewing Workshop, made in a medium weight denim. The funky hemline makes them a bit distinctive and the style calls for slightly cropped length. I love these in the warm months but they are little odd with socks and dark shoes, I think.
In sum, I like the shape and the overall pattern a lot. I'll give these a
B+

***************************************************


These are tapered one-seams from Cutting Line Designs. I've made these a lot and they are wonderfully comfortable. The fit is as good as possible. The silhouette is not bad but the manner in which they are tapered leads to some twisting of the grain. I can see it because these pants are a discretely striped wool. Probably no one else can tell at all.
In sum, these are OK. I'll give these a
B

***************************************************


And here is the Quincy pants pattern from the Sewing Workshop, made up in my nice drapey rayon. I took this picture over and over again thinking I had the angle wrong. These create a pegged look that I like less. Admittedly they could be narrowed at the side seams and I could shorten the hems some.
Bottom line, these are my least favorite. I'll give these a
C

***************************************************


These are the Plaza pants from the Sewing Workshop, pretty close to a straight-leg, or stove-pipe pant. I think I like these best of the lot especially when I'm seeking a trouser look. They are comfortable; they have a center front seam which serves only to provide a vertical line and a pretty pleat. Time to remake these!
A

***************************************************


These are a pair of jeans-like pants made from a medium-weight denim. It is an old OOP pattern for Vogue by Sandra Betzina, fitted on me by Sandra herself! It's good pattern to tweak because each leg has 4 vertical seams - side seams, inseams, and princess seams down the center front and center back. It allowed her to adjust for flat butt, thighs (I have them), tummy and high hip fluff. These pants require a zipper and are more close fitting than the others. I like them a lot but not for all fabrics, and the silhouette is still pegged a little. The jeans fit requires sturdy fabric, I think. For narrow pants in non-stretch fabric I rate them
A-

I have some nice stash wool I hope to use for Plaza pants very soon! So what are you sewing?

Saturday, January 7, 2017

Zen again

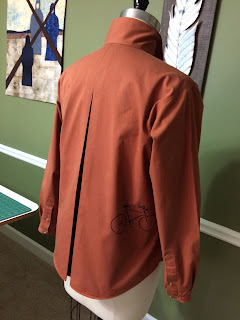
For the past 36 hours I have been experimenting, off and on, with shirts I purchased for $2 each from my local thrift store. And what have I achieved? I have converted a shirt into, yes, a shirt.


It's hard to look at the result and see how much work went into it. That's what we do as sewers though, isn't it? And enjoy (almost) every minute.

This started as a man's shirt size XL. I was able to reuse the button band and buttons on the front, the plackets on the sleeves, portions of the hem, and the chest pocket. I'm convinced that I could have made this from scratch more quickly. But, of course, that was never the goal.

Here you can see the original shirt, second from the left - a classic man's shirt.


First I removed the collar and the cuffs. Then I removed the yoke. By keeping the shirt tail hem, I was able to cut the back from the back and the fronts from the fronts. For the fronts, I simply aligned CF with the buttons and buttonholes. The hem had to be reshaped in the final sewing, but I did not lose any fabric to hem allowances.


The yokes provided enough fabric for the final collar, and the side seam excess provided fabric for my narrow cuffs. It looks like I don't have enough space to cut out the sleeves, but by adding a narrow cuff, it all worked out just right.


You can see that I moved the chest pocket to hip level, much more useful IMO. And I added a little screen printing and stenciling on various pieces.


And here it is on me.


Thursday, January 5, 2017

Playing in the New Year

Happy new year to you.

Since the first, I have not begun any significant sewing projects. I'm playing and healing. That is enough for now.

Today I played by thrifting for fabric. I've done this before with mixed results. It is never a large investment and I always learn something or at least have some cheap fun. And today my favorite local thrift store had shirts priced at $2 each. Such a deal for these lovely cottons:


Each shirt is a men's size L or XL so as to be able to harvest the maximum fabric. First I'll toss them in the washer and dryer, though three of them still had laundry tags on them. Then I'll cut the pieces apart. I've learned that it's not generally worth the trouble to harvest from the collars or cuffs due to the fusible interfacing used. But I'll see.

I have some favorite patterns in mind but really should wait to see how large the pieces are. If all else fails, I'll just play with the pieces in some kind of an art project. I like how the colors play off one another.

In addition to playing with these thrifted shirts, I have discovered a new material - hanji paper - and a new technique - felting with hanji paper. Cornelia in my fiber art group introduced us to this cool stuff Tuesday night. Cornelia is Korean-American. She told us that in Korea, this has been used for clothing, even armor (before bullets). Bonus: it is yummy to hand-sew:


We started with two large sheets of white hanji paper and several small pieces of colored hanji. I cut profiles (or a vase, depending on your perspective) from the blue hanji and sandwiched the blue between the two white sheets. To felt you mist it with water and accordion fold it. Then it is squeezed for what seemed like hours but was really about 5 minutes. Then it was refolded in another direction, accordion style and squeezed some more. I squeezed it all the way home in the car but it was not really felted even then.

On the other hand, the blue color had transferred to the each white sheet. When I pealed it apart, the blue pieces stuck to one of the pieces of white hanji paper. And I had two versions of my design. You can tell in the picture which portions contain the blue paper because it is darker blue. The lighter blues are just the lovely bleeding. The blue pieces were just barely attached, so I hand-stitched them down. I also hand-stitched the two pieces together.

Then I ruined it experimented with writing on it. Great fun, but I don't like it as much. The poem is Mirror by Sylvia Plath.


I have ordered a roll of hanji and cannot wait for it to arrive. Lots of playing left to do.

Meanwhile, I am using a modified Jude Hill technique to add on to a quilt. It started with a signature block from the family reunion in August. Some of the kids also traced their hands onto the white muslin. The piecing is a bit unsettling but the hand-stitch makes it better, I think.

It started out quite small and so was easy and fun to hand-quilt. Jude's approach is a kind-of quilt-as-you-go. You start with what will become the center of the quilt, build the quilt sandwich and quilt it leaving some space around all edges.

To add on, I peeled back the top and the back to show about an inch of batting. Then I hand-whipped another piece of batting onto the previous batting.

adding on new batting

After that I pieced a new portion for the top, and hand-stitched it on using a felling stitch. And then did the same thing to the back.

new portion of the back

the new sections on the right is ready for some slow hand-quilting
And then more quilting but it is always around the perimeter of the quilt. I have always struggled hand-quilting a quilt of any size because the center is so hard to handle. This eliminates that problem. It is slow sewing, but I like to have a slow project on hand at all times just to pass the time sitting by the fireplace.

So what are you sewing in 2017?