Saturday, December 28, 2013

Grand Kimonos

And on the third day of Christmas...
finished these sometime during the 11th hour.

The first one is unlined, constructed with quilt cottons. I used a kimono pattern from one of my old Ottobre magazines. Here it is almost finished.
It is for my tallish 4YO grand. Here it is finished with the cotton knit tee and leggings I blogged about previously..

Next up is the one for my 7YO grand. Hers is lined with a horse-themed linen dish towel. It got lined primarily so that I could incorporate that dish towel. In fact, it's reversible which is easy to do with the cross-over ties. Lining is much more fun to make than facing. I should have realized that.
Face fabric is quilt cotton with carousel horses and letters.

Lining with horse markings (she already knew them, as it happens)

And then of course kimonos for the dolls:

And this makes my heart sing.

Tuesday, December 24, 2013

Grand Sewing

Last-minute, still a pleasure though, these are pieces made for my Grands. Luckily we don't celebrate until the 27th so I still have a little time.

Four pair of leggings were made out of cotton jersey - two for grandgirls, two for dolls. Actually the versions for the dolls are not true leggings. My first attempt were more like clam diggers. The second attempt produced slim cut pants, but still not true leggings. Finally I decided that true leggings would be hard for little hands to manipulate, even if I could really make something useful that tiny.


I know about people who make Barbie doll clothes. I admire that. So gorgeous, Sharon!

At one time, many years ago, I made Barbie doll clothes for my own dolls. American Girl doll clothes are sufficiently fussy for me today.

The leggings for real girls are made from an old Ottobre pattern. I make clothing for the grands based on their recorded heights. It works out mostly fine. I did complete the elastic waists in the old-fashioned style so that it will be easy to adjust once the grandgirls are here and can try these on.


The T-shirts are also from the old Ottobre patterns, based on the heights. Because these pieces are all made from knits, fit can be a little off and still be fine. And I've got my fingers firmly crossed.


Next up, kimonos for two grandgirls and two AG dolls.


Monday, December 23, 2013

Bags and other vessels

Every year at this time, I find myself making small gift bags. I think it must be frustration with the reality that there is no time to make actual gifts. Something about small bags beckons to me.

Here is a draw string bag I made for a pair of fold-up scissors. It was a gift to take to a sewing group party.

Sewing these circular draw string bags is easy, starting with a tracing of a dinner plate. Trace and cut two circles. Use a dessert plate to chalk in the line for a channel, about 2 inches inside the outer circle.

The face fabric on this one is a scrap of cotton batik. The lining is a luminous silk scrap.

The first sewing step is machining two button holes on the outer/face fabric. I make the two button holes on opposite sides of the circle aligned with the tracing for the channel . Because this is just one layer of fabric, it helps to slip some stabilizer under the buttonhole area before machining the button holes.

Next I sew the two circles right sides together with a 1/4 inch SA, leaving an opening wide enough for my hand in the bias area. After turning these inside out, I steam press the circle. Then I invisibly stitch the opening closed. I find it easier to complete a smooth arc on the opening when I hand sew on the bias rather than the straight of grain.

Next I sew the channel. making it about 1/2 inch wide, centering the button holes on the channel.

Lastly I thread the cording, usually rayon rat tail, because it threads so smoothly. I make sure the cording passes through the channel twice as that makes it easier to use as drawstrings.

Sometimes I tie the ends together and make it decorative. Other times I machine stitch them together and make sure they are inside the channel and not visible.


Here is a gift bag I made for the gift certificate we gave the fabulous leader of that group. The gift certificate, an idea that I resist, needed a fabric vessel. This was an opportunity for sashiko, sort of. I love this primitive stitch.

The face fabric is silk dupioni; the interior is quilt cotton. The face fabric was interlined with cotton flannel to support the hand-stitch. The quilt cotton was beefed up with fusible interfacing. The interior has one plain pocket and one zippered pocket. The edges were finished with a standard bias binding.

I've made several draw string bags that are winging their way to the bottom of a Christmas tree. And then a few nights ago, feeling restless with a need to create, resisting the need to shop, I made this machine quilted bag.

Black silk dupioni, machine quilted with a rayon thread


Lastly there are these little fleece gloves made for 4YO grandson. Another vessel for the treasure of his cold little hands.


I think I'm done with vessels for the moment. Time to move on to the really last minute hand-made gifts.


Saturday, December 21, 2013

Marking Winter Solstice

Marking
Then cutting
Now sewing


Wednesday, December 18, 2013

Liberty Classic


Some years back, I made the Liberty Shirt from The Sewing Workshop. I love it and still wear it often. And, as is often the case when I love a pattern, I said to myself, I will make this again. But I didn't. Then Linda Lee came out with a Craftsy class on sewing with silk. And it features the Liberty Shirt. I signed up for that and said to myself, I will make this again. But I didn't.

Finally I wanted something new to wear to a sewing party. This pretty piece of silk had been in my stash a while, washed and ready to cut. It is silk dupioni but has finer finish than some I have sewed. In fact the first Liberty I made had washed (and dried) gray silk dupioni. Much rougher than this. I'm happy I didn't machine dry this lovely blue piece. This way, I can still wash it when needed and avoid dry cleaning. And it retains that lovely sheen.

It was a dream to sew. I just had to have a light hand with the iron. It responds to hand pressing like a good linen, and doesn't produce many wrinkles, again like a good linen. I'm sure I bought it a Gail K.

And then it needed pearls. Shell buttons in a pearl shade. And then the necklace.

That is probably old lady jewelry, but I am fond of pearls. I bought these in Hong Kong back in the 80's when my job took me there. They are light and warm to the touch. And at 63, I've earned old lady jewelry so I guess I'll just embrace it.

Great pattern, I really should make it again.

Some things to like about this pattern:

  • The back wraps to the front with mitered corners at the hem.
  • The collar is almost a Peter Pan collar when folded down, but ripples nicely when up.
  • The sleeves are simple but have a vent so that it looks good folded back a little.
  • By stitching down the facing, a princess seam is produced. Vertical lines are my friend. 
Here is the favorite old version of the Liberty shirt:
Back was an interesting printed ombre cotton
Left side - silk dupioni; right side printed cotton


Saturday, December 7, 2013

Before and After

Weaving it together, adding small pieces
I've always been drawn to make-overs, and viewing the *before* and *after.* Guess I'm always hoping to see something I can do to completely revolutionize the way I look. Best not to hope for that though. Could go badly.

This before and after stems from an experiment dyeing with pomegranate peel. It's not a pure process with me. First I used an aluminum pot, the only one I have right now dedicated to such experiments. Then I added some rusty nails and other rusted bits. Still, I was surprised by the colors that emerged.

Jude calls these additions the *saddening* of the color. These are certainly not bright cheerful colors. Made me a little sad. So I added some bright pieces to the weaving. Still working on the stitching.

Here are the Before and After pictures, in case you too like that sort of thing:
Cotton

More cotton

Linen

Silk noil, herringbone tweed

Silk dupioni, over-dyed


Tuesday, November 26, 2013

Art or Craft

The latest issue of American Craft magazine contains an editorial on the question of the difference between art and craft. The term art may carry more panache than the word craft. Yet, craft has its own place with its sometimes implied ethnic edge.

The editor provided one interesting difference between art and craft that carries no stigma - craft is more often associated with usefulness whereas art is ... well, I don't know ... what is art?

I won't settle that question, but I will put forward as a candidate for both art and (fine) craft these sleeves designed by Diane Ericson in her Fault Lines pattern. They are brilliantly designed so as to capture the 3D aspect of a garment, as well as the expected softness. 

Aren't they just lovely? And look at how they hang once inserted into the armscye:

A well designed sleeve will sometimes have an elbow dart. See how that dart is artfully integrated into the seam that wraps from back towards the front? Just brilliant.

I must admit that I was dubious about the instructions. And intimidated. It's only fabric so I let go and followed them, but set the stitch length just a little longer than usual. And I was glad I did, because my first try failed ... not because the instructions were wrong. No, I second-guessed Diane and went my own way and learned my own way. rip, rip, rip.

Diane's instructions for the construction of this sleeve are spot-on. And a wonderful little puzzle.

In the picture below you can see how the front piece (the longer of the two) gets wrapped around the finished corner of the back piece.
Sleeve on top shows the finished back corner pinned to the other sleeve seam, before the front piece is wrapped over it. The front piece (with black interfacing) is wrapped over it in the sleeve on the bottom, and you can see that the vertical sleeve seam has been stitched down through all layers.

And here is how it looks before the lining is attached. You can see how the wrapping causes the seam to be pressed towards the front (the longer portion of the cuff).

The fabric is a medium weight linen which is just a dream to sew.

I will look forward to making this sleeve again now. I hope you will too!

Monday, November 25, 2013

Threaded Potpourri

Organic Fibers
Now sewing. Various projects, all feeding my need to make.

My interest in reverse applique is continuing with the triptych. There is a detail of its progress at left. The applique is probably complete so now it is a meditative way to just stitch, outlining and decorating.

5X7 Challenge in silk and linen
Fiber Art Fusion has a 5x7 challenge each December. We eat dinner and exchange the little pieces. It's a good way to see what people are doing with fiber. For me, it had to be applique augmented with stitch.

Even a non-sewing project like changing the chair covers. I was surprised by how satisfying this was.
left-old; right-new

A friend in my book group brought in four quilts from her husband's family, a nice viewing given that we were reading a book about relationships formed over needle and thread (Prayers for Sale). Then she said that they were no longer wanted in her family. I was so fortunate to take home a 7 foot by 7 foot whole cloth piece with lots of lovely appliqued poppies, scalloped edges, a few stains and tatters. I'm thinking of replacing the very worn binding as that is where the bites are located. I cannot decide what to do about the stains. The colors are amazingly bright and the batting is white flannel. Can this really be from 1937???
Someone loved making this.

Speaking of old quilts, this one was made 25 years ago by my daughter. A kind woman in Princeton gathered a small group of 11 year olds and taught them to quilt. Free form. Not many rules. Great opportunity for them to express themselves. And she has used it all these years, now putting it on her own daughter's bed. 

It had become frail and torn in some places and, because it was tied together, it was a bit lumpy. She entrusted it to me to repair so that granddaughter could continue to sleep under it. I added butterflies to cover the places where the batting (an old blanket) was exposed. And added quilting lines plus a new binding to hold it together for maybe another 25 years. I like that thought.
Daughter loved making this.


And I continue to work on Diane Ericson's Fault Lines pattern. This is a pattern that looks simple but is not. It is a puzzler and so I work on it only when I'm fresh. The undershirt is composed of 4 pieces and looks so basic, yet I sewed and unsewed many times to get the inside finish and outside look the way I wanted it. It will change more once the jacket is further along. It is a lovely design and a great way to stretch myself. Working with bias is magical.


Wednesday, November 6, 2013

Vogue 8934, perfect after all!

View B
In my last post, I listed two errors in view B of this pattern. I stand corrected. Now that I (maybe) understand the construction of the placket, all the pieces fit together. Thanks to Dixie of With Needle and Brush for gently helping me understand.

It is a clever hidden placket, in fact. I may have to make this a third time just to try that cool hidden placket.

You can see in the pattern instructions (picture at left) that the outside vertical band goes all the way up to the neck edge, whereas the inside vertical band (really the fly for the placket) stops at the collar's lower edge.

So, the outside collar piece has to be shorter than the inside collar piece, Now I get it. You probably got it a long time ago, if you have worked with this pattern.

And...the error I mentioned in the lining for the front of B...totally operator error. Oh, my.

So, so sorry for documenting errors that are not there!

Bottom line - this is a GREAT pattern. Now go buy it, if you haven't already.

Monday, November 4, 2013

Vogue 8934, the jacket version

Do you see the 3 pockets?
Vogue 8934, version 2, continues to be great fun, especially now that I have my sweet Bernina 440 up and running again. This piece is almost finished; button auditions are in process.

My first version of Vogue 8934 was a hybrid of the two views. It was lined like view B, but I omitted the hidden placket and instead used buttons like that shown in View A.

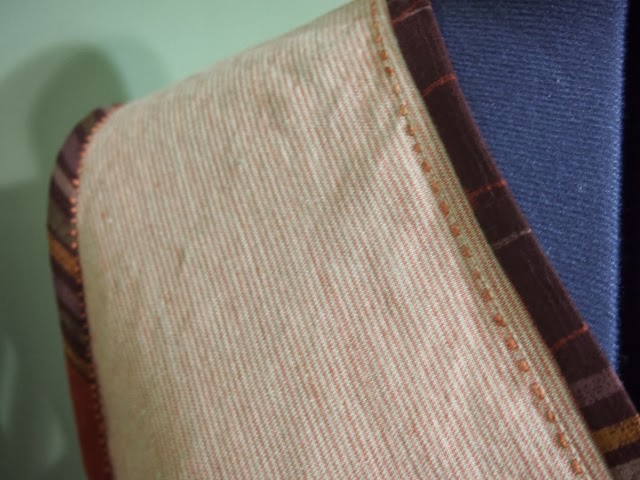
This second version is loosely based on view A. The face fabric is a medium weight black linen that is soft from washing. I interlined it with radiance (a blend of silk and cotton) by channel quilting the two layers together. This was done after cutting but prior to construction, so it was constructed as an unlined jacket. Two discarded men's ties and some remnants of an afternoon of fabric dyeing give the interior a little color via a Hong Kong seam finish.

Jacket interlined with silk-cotton radiance
I cut it as a jacket, rather than a coat, omitting the distinctive hem darts. It retains the face-framing collar and front band, a favorite feature of this pattern. I cut my hem straight across so that it would drop down a bit on the sides, creating a slight flare or swing.

A small piece of  black-and-cream mud cloth has been languishing in my stash for number of years.  It was about 3 inches by 18 inches. I've wanted to use it previously, but found it was too small to be useful. As little accent pieces, there is just enough. In fact I have one small square of it left over.

Mud cloth strip down the back

The accent piece on the lower right is also a pocket. And the diamond shaped pieces on the sleeves are pockets (that is, open on one side, but let's face it, I'm not stashing a twenty in either of the sleeve pockets). As I look at the pictures, it looks like those sleeve pieces might be better a little higher up. Maybe like elbow patches? Or maybe not.

This jacket has reached the wearable stage but it will likely evolve a bit more. Though it is still a little plain, it does go with black linen pants made back in August (Vogue 7881, my TNT fitted pants thanks to Pam Howard). It creates a kind of casual suit.

I pinned the two chunky white buttons on to see how they look. I think they might work if there were three, but I only have two. If I go with such large buttons, then I'll use large snaps, not machined button holes.


Vogue 8934 is one of those styles with very classic, lovely lines. Good bones, I think.

Errata for Vogue 8934 view B:

Piece 18 (front lining B) is almost unnecessary. I recommend cutting the front lining from piece 1, just as the outer fabric. In fact 18 is smaller (dips down at the neck edge) than the piece (1) it lines. The only helpful difference is that the darts in 18 are more shallow, leading to some helpful excess in the lining..

Piece 22 (collar facing B) seems to be unnecessary also. It is so much larger than the piece it faces that something would have to be whacked off at the center front, or you could layer it under the front band. Instead of piece 22, I recommend use of piece 11 (Collar A, B) for both collar and facing. Interface the collar. I would consider using lining for the facing if the outer fabric is something like a scratchy wool.

Nov 5, 2013 update: I now *get it.* The placket is interesting and clever and I am easy to confuse, at times. Sorry.


Friday, November 1, 2013

7½ weeks

That's how long it took for the broken part on my Bernina 440 to come in and be installed at the local Bernina dealer.

48 hours - that's how long it took for the new Ott light bulb to arrive from Amazon, and it only cost $11. Yippee!

I am a happy sewer today: The sun is shining so I can see the black thread and fabric as it goes under the lovely 440 foot. The new Ott light bulb is installed so when the sun goes behind the clouds I can still see.

So I shoved all the mess in my sewing room to the back of the closet cleaned and organized my sewing room to welcome the 440 home. I should apologize to several patient sewing friends who have listened to me the past weeks. And I should be grateful that I have back-up.

The B-team:
Has some nice features like a walking foot but not-so-nice buttonhole feature and it's unreliable.

Seriously sweet and totally reliable. No walking foot nor buttonhole feature.

Thank you, thank you, thank you. Yes, it's a good day in my neighborhood. How about yours?

Wednesday, October 30, 2013

Vogue Pattern Sale

There is one of those wonderful sales over on ClubBMV. And these are the two winging their way to my house...
Vogue 8954 - Marcy Tilton's Vest - might be great with some special remnants

Vogue 8966 - Marcy Tilton - really like the smallish hat.

Meanwhile I'm working on View A of Marcy's coat pattern, Vogue 8934, this time as a jacket. I'm using a small piece of mud cloth as accent, loosely following the patched version on the envelope.