Wednesday, April 21, 2021

Square Foot Challenge

Southeast Fiber Arts Alliance (SEFAA) here in Atlanta hosts a Square Foot Challenge each spring. I've missed some years but do like to participate when I can. It's such great fun to see what everyone makes. The invitation is open to all comers, so no stress. It must be no more than 12 x 12 x 12 inches in size and use fiber in some fashion. They also need to be able to attach it to the wall with push pins.

cotton flannel base

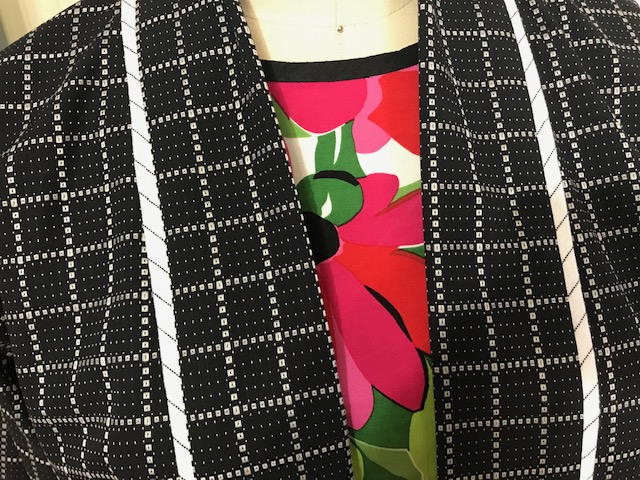
This year they offered free silk kimono remnants to anyone who was willing to make a sq ft piece using those items. Of course, I signed up! A few weeks later a little package arrived with the remnants. Here is what I received:

Just like every time I work from a challenge, I panicked. What on earth would I do with these mostly fragile pieces of kimono? OK, maybe not no-stress. 

It is good to be constrained. I know that. And they were flexible enough to allow us to use our own fabrics, just as long as at least 3 of their pieces showed up in the final piece.

The blue is a kimono silk from stash, as is the eco-printed cotton sateen. You may be able to see the prints from my Japanese maple tree leaves in the picture. The print was mostly lost though. I liked the color of the piece and was not really interested in highlighting the leaf prints.

I did some tests and decided it would be necessary to fuse the large orange piece to light weight interfacing. It worked great and was much easier to cut and manipulate. The interfacing made it easy to fussy-cut part of the orange print. I left it raw-edged.

Now I have finished and delivered it. I used something of everything they sent. It is titled Ravel, Then Unravel. 

Of course, I covered it in hand-stitch. I love doing that. It is so very calming and satisfying to me. I was able to use some of the techniques I learned recently in a class with Ekta Kaul on kantha stitch. More about that later.

I auditioned color for the frame of my 12x12 canvas by photographing the finished piece on dark blue, and then trying it out on bright orange. Bright orange was the winner.

Originally I viewed it like this.

But I like it better viewed like this. So that is the way the hardware is attached to the back of the canvas.

Because I volunteered to use SEFAA's donated kimono pieces, I was allowed to enter two pieces. Here is my other piece:

Grandmother's House was constructed from an old soft cotton pillow case my grandmother embroidered decades ago. I have a number of these and finally decided it was time to stop using them as pillow cases! They are so soft and tempting but becoming quite fragile. 

Grandmother, like me, needed to stitch by hand. Maybe it's genetic. She was in an old folks home at the end and bored, so she stitched on pillow case blanks. I suspect I'm not the only grandchild with a few of these. I love them not just because she stitched them, but because I can tell when she began to go. Her stitching starts out crisp, sweet daisies with petals and leaves. At the end, it's a jumble of stitches. I like that one just as much as the earlier ones. Maybe more.

I took a piece of one pillow case and added other fabrics. Then, following her lead, I began to practice the feather stitch all over the piece. Now I am crazy about the feather stitch, especially with French knots added to the tips. 

It is a vague memory of Grandmother's house. Granddad bought it in the 30's because it was walking distance to Texas Tech University (not a university then, I'm sure). He wanted his kids to go to college. Grandmother and Granddad were divorced and he lived in another tiny house across town. I thought that all grandparents lived separately. 

It has since been bull-dozed and replaced by condo's and apartments. Too bad. I would love to see it again. There was a little house in the back that she rented out for *pocket* money.

Oh, my, I am getting old, aren't I? Actually this is the best time in my life, doing things I love. I just finished a 2 day hike with my daughter and granddaughter.

And here's the new, old me, wrinkles and all!


Friday, April 16, 2021

The Mending Pile

My mending pile seems to be growing. Maybe it's continued spring fever, but I keep spotting things I just know I'd like better with a tweak or two. Often I'm pleased with the results.

First up is an Ivy top from the Sewing Workshop pattern, Odette and Ivy. I made this in black organic cotton from Alabama Chanin. It did not stay black long, and given that it is their organic cotton, I'm not certain it was ever all that black. 

The neck band never sat properly on my neck, probably because the AC knits don't have a lot of stretch or recovery. I removed the neckband and tried to decide how to finish the edge. After this, the neckline was stretched out and even more unattractive on my neck. 

So I dropped it in a pan of old black walnut dye. I figured that I could not hurt it. I was right about that.

Winter set in and I ignored that big pot of dye sitting on the deck. Now, some 6-8 months later, I have retrieved it. No harm, but it's definitely dark brown now, rather than black. I love a good chocolate brown.

I decided to sort-of fill in the stretched out neckline, using some AC remnants. I also added this off-white knit to the binding on the sleeve hems. 

I like it better, but honestly, I don't love it. 

Next was a tee shirt my son-in-law made to honor the victims of that mass shooting in Charleston, SC at Mother Emanuel AME church. It was a pretty standard man's fit.

Using the Lark Tee pattern, I reshaped it into a more feminine tee. I expected it might be challenging at the armscye. That has been a tricky spot every time I've remade a man's tee shirt. The armholes are too low. That's the reason I did not cut the shirt apart before laying out my pattern pieces. I wanted to preserve as much fabric as possible.

I folded the tee shirt onto itself, so that there was a fold down the center front and center back simultaneously. That may be visible in the picture. 

Next I chalk-traced the Lark front pattern piece on the front of the tee.. Then I flipped it over and traced the back pattern piece. I carefully cut each side, flipped the first side along the fold, and then cut the second side by following the edge of the first side.

Then I cut the sleeves at the underarm seams so that they would lay flat. I used the Lark cap sleeve with some success. 

Rather than obsess too much over the sleeves, I just left the original finished sleeve hems alone. 

I did, however, have to include part of the original shoulder seam in the cap of the sleeve.

Now that I look at the picture, I see it's not that bad. But I ripped it out, removed the shoulder seam portion, and re-stitched it. 

I used my hip curve to recut the hem so that it has a shirt-tail hem. It's more flattering than a straight-across hemline, but also a bit more fiddly.

Hmmm... Rather subtle changes, I see in the picture. The mirror lied.

Next in the mending pile - spring-summer pants.


Thursday, April 8, 2021

Hey, Spring!

When I first moved from the northeastern US to the southeastern US, I noticed that no one said "Hello" or "Hi." Instead, people said "Hey." I think it's very southern. And now I say "Hey."

Hey, spring. I am grateful for spring this year, as I hope you are. It feels long-awaited after the year-plus of COVID. And I am loving color. Rich, saturated, vibrant color.


This ensemble jumped out of stash because I wanted color to fit the season. I have a number of other tops and bottoms that work well with these two pieces.

The top is the modified Liberty Shirt from the Sewing Workshop, a technique I first learned from Elaine of the Curvy Sewing Collective

Hers are primarily knit tees. My first version as a pull-over was in a rayon-wool boucle with some stretch. 

This fabric is mostly silk with a touch of lycra. I tend to avoid such combinations but, somehow, there it was in stash. Probably I could not resist the colors and pattern. They are glorious, aren't they?

The shirt is quite plain with a simple jewel neckline bound with bias-cut black silk dupioni, as are the sleeves. It fits over my head though a bit snugly. I may enlarge the neckline at some point, but it is not a struggle.

The angled front seams that create an uneven hemline are the best feature of this pattern, IMO. You can almost see the black piping I inserted using the same black silk dupioni. 

The pants are also made from stash fabric, a nice medium weight linen, the kind that rumples but does not wrinkle. That color in pants is a bit bold for me, as I tend towards black, navy, dark brown bottoms, but this had to be. 


Linda Lee mentioned that the Sewing Workshop's new jogger pants were drafted on the Kinenbi pants which, of course, I have in stash. I made them once.

I re-cut them to my new size and added fun pockets. 

The kinenbi pants have a cut-on waistband. I removed that and used a separate waistband. I prefer this method with most pull-on pants, because the waistband can be cut on the lengthwise grain. This makes insertion of the elastic much easier because there is no somewhat-bias cut edge to finagle. 

As I finished these, I noticed that the front of the Kinenbi pants is wider than the back. Evidently I did not notice that the other time I made these. It's a little strange so I double-checked the tissue. 

Yep, the front waist is more than an inch wider than the back.  I wonder if this was deliberate, perhaps done for stylistic reasons?

This does cause me to do some slight contortions to use my pockets, but it's OK. I probably won't use this pattern again for pull-on pants. From the Sewing Workshop line, I prefer the Quincy pants. But I do really like these pants. They are loose without being sloppy, I think.

This ensemble welcomes spring for me. How are you welcoming spring, if you are in the Northern Hemisphere, or autumn in the Southern Hemisphere?


Monday, April 5, 2021

Ikina 2

Ikina 生名村
a village in Japan that has been combined with another and no longer exists alone

Is it a kimono? a haori? a yukata? Well, perhaps none of these. Clearly it is inspired by Japanese clothing aesthetics and I am always enamored of that. 

Haori made for my daughter using Folkwear's Japanese Field Clothing

I was lucky to visit Japan for a couple of weeks 15 years ago. I would go back in a heart beat. It's beautiful and the people are lovely and friendly. But the biggest draw to me is their love of simple beauty, sometimes not as simple as it seems, always beautiful.

My favorite haori from Folkwear's Japanese Field Clothing

The original Ikina from the Sewing Workshop was a short jacket with interesting side flanges. 


I made it twice. The first time, I lengthened it almost to the floor. I made the side flanges slightly shorter, and the front collar band shorter still. It came out of a workshop here in Atlanta with Nancy Shriber's guidance. We brought fabrics that inspired us and she guided us in planning an artful design.

The second one was a trip back to the weeks leading up to my mother's death from liver cancer, more than 20 years ago now. I bought her a 3-piece ensemble from her once-favorite dress shop in Dallas, hoping she would be able to wear it and feel pretty. The pieces were unlined coordinating linens, fresh, pretty. I think she wore it for a while just to please me.

This second one omitted the side flanges, so it is most similar to the Ikina 2, recently released by the Sewing Workshop. I cut up the 3 pieces in Mother's ensemble and pieced this jacket together. I seem never to have anything to wear with it, but I will not let it go.

Another haori from Folkwear's Japanese Field Clothing, this one made in silk jaqard from SF's China town.

The 2021 Ikina 2 is about 10 inches longer than the original Ikina, in addition to eliminating the side flanges. Little else has changed, as far as I can tell. 

In the drawing, it looks more like a conventional set-in sleeve, but it is decidedly a kimono sleeve, with a slightly shaped sleeve head, much like a man's shirt. Except for the collar band, none of the Ikina pieces are rectangles, as they are in a traditional Japanese haori or other kimono-like garment. The shoulder seams are also shaped and there are neckline darts in the back. There are separate cuffs.

my Ikina 2

The original pattern called for cutting the front collar panel on the bias, taking up a lot of fabric for very little effect, I think. The new version has a more narrow collar cut on straight-of-grain. It hugs the neck and sits in a more flattering manner than the original did.

I did like those flanges, though. Such an interesting take on an otherwise simple garment. I may need to make that version again.

For the Ikina 2, the Sewing Workshop is promoting kits with printed rayon challis. This creates a feminine, relaxed, yet chic look. My first choice was a rayon challis I purchased at Gail K here in Atlanta.

Then, in the middle of the night, I remembered a piece of crisp cotton in stash. During early spring, I enjoy wearing a light weight third piece that I can shed as things warm up in the afternoon. This cotton piece will better fill that role for me as it coordinates with so many of my existing pieces.

Ikina 2 with Liberty pull-over and kinenbi pants

The black and white fabric is a crisp cotton, possibly Japanese. The weave reads window-pane checks and has floats on the back that may prove problematic. I'll see how it wears. I may decide to line it, though I prefer it unlined.


Linen black and cream pin-stripe became piping, after trying out a few others:

This silk check was nearly invisible next to the main fabric.

The pin-striped linen is *vintage* stash fabric. Before cutting large swaths of bias for the piping, I cut out a Eureka top to make later. That may prove foolish as this fabric is ideal for trim and not really a great color for an entire garment on me.

I did not have white rat tail on hand and so this piping is flat. I'm actually happy with that, as there is less bulk to deal with at seam intersections. 

Here, sewing the front bands, starting with the lower front hems and meeting at center back.

Inserting the piping took some time. I wanted the plaid to match across the jacket fronts and collar bands. Also I wanted the piping to spiral in opposite directions on left and right fronts. I took it slowly and did not have to use the seam ripper overly much. That's good because those floating threads can be challenging to avoid when ripping.

As I worked on the front collar bands, I considered how I might use piping on cuffs or even faux cuffs. In the end, I was worried the jacket was beginning to look like a bathrobe and thought the additional piping on sleeves would tip the scales. There are moments when I hold back on details. Less is more. Sometimes.


I have 3" deep hems on the 3/4 length sleeves, as well as the bottom hems. I faced the side vents, smoothly covering the side seam transition and giving the vents some weight. It was an opportunity to use Linda Lee's method of mitering, a go-to technique for me.

For seam finishes, I used a mock flat-felled approach. I have a tuck on one underarm where the 4 seams come together. I worked the flat-felled seams from each direction, meeting at that intersection. It's one of those cases where you are sewing into a hole.

I'm not surprised that a tuck resulted. At least it did not happen on both sides. I'm still carefully removing stitches until I can find enough room to ease everything in. It may all be hand-work. It is hard to control the sewing machine in such instances, I think. There is always a blind side in machine sewing.

I have a few details to add. It needs a back neckline patch. And pockets, too. I'm very short on remnants but may be able to squeeze out 1 or 2 pockets. I'll only do so if I have enough to match the pattern. 

There will be no sashiko on this piece. The weave is too dense. It was difficult enough to hand-stitch the front collar panels down.

True confession - I did not purchase the new Ikina 2 pattern. Instead I modified my original Ikina pattern, lengthening it and re-drafting the front collar band. It was not difficult. And I had such a good time making it!