Monday, November 20, 2023

High Five

I made something! An actual garment. And I am pretty crazy about it. But it is not for me. It is a gift. Oof. It's hard to let it go. And, of course, I don't have to do so. But I want to. Really, I do.


This super-cool, amazing fabric was a gift from a fellow University of Texas longhorn fan. Actually she's a much more loyal fan than I am. Though I have 3 degrees from the humongo university in Austin, I don't really follow them the way she does. Over the years, when she would visit her sister in Austin, she'd bring me a little momento.


The most recent gift was this very nice cotton piece of fabric. It is not your standard cotton-with-a-logo which is printed on very cheap almost-quilt-quality cotton. This is more of a fine pique. It was a dream to sew.


This lovely friend has developed tremors and cannot sew now. And her sister died. And, yet, she still thought of me when she was cleaning out her stash. I said thank you and gave her a hug.


Then I decided to make something for her, a little jacket for *game day.* I know in my heart of hearts that she will enjoy it more than I ever could. At least, that is my sincere hope. 


The pattern is the High Five, one of the Shapes patterns developed by Louise Cutting of Cutting Line Designs, and Linda Lee of the Sewing Workshop. They jointly developed a series of easy sewing, easy fitting garment in this line. The High Five jacket, is the best one.


And it is stinkin' cute, in this rather unique piece of fabric.


In her honor, I will watch the big game this Friday. I will visualize her cheering them on in this jacket.  We will share some joy or sadness with the results. I am lucky to have a friend like this, for sure.


Sewing friends are the best.


Shifting, Mixing and Splitting

The small piece that generated some interesting and informative larger pieces

The fun continues with Jane Dunnewold's online class, Dye Mastery: From White to Wow. I've learned and learned and learned. I am unaware of some of the lessons I've learned. And there is more.

Meanwhile, this sweet cactus is about to show off in my kitchen window.

The class end is near and I will miss it. So I will probably fix that longing by signing up for Jane's next class, whatever it is. This series has been time consuming, labor intensive, and deeply satisfying. I am so tickled when it's time to open the bundles and begin the arduous process of rinsing. And then when it dries, oh, my.

At the beginning - preparing undyed silk noil for dye bath 1

Here is my favorite at the moment:

Actually it's 3 pieces, all inspired by the smallish piece above. One is 1/2 yard; one is a full yard; one is 1.5 yard. Boy, did I learn something. In the future, I will limit the size of my pieces even when I hope to make a garment. That 1.5 yard piece just about did me in. And it is flawed, probably a reflection of the difficulty in handling a larger piece in this low-water immersion technique. However, there is enough to cut around the flaws, I think. 

In the picture above, you can see the flaws pretty clearly on the left hand side. Do you see the red speckles? It looks a bit like undisolved dye. I don't think that's what it really is. Rather I think it was a problem with my rinse out. 

Pieces being batched (bathed)

Lesson learned: the smaller the piece, the less likely I am to create flaws.

The 2 smaller pieces (1/2 yard, 1 yard) after Bath 1 - I used a cool yellow pure dye

DH says it does not look bad, just different. Hmmm...

The larger piece after Bath 1 - I used a warm yellow pure dye

Now I am day-dreaming about what I will make. Will it be a button up shirt, or a loose pull-over, or a jacket. Actually, I've eliminated the jacket idea.


The Hudson tunic from the Sewing Workshop is a real contender for these soft silk noil pieces.

First step in the rinse-out after Bath 2, all 3 pieces.

I have made and worn tops made from that very simple pattern many times. I do love the older Sewing Workshop patterns and reach for them time and time again.

I used the same combination of dyes for Bath 2, so they are beginning to look more similar.
Top piece is my inspiration

I definitely need to get all my samples organized into some kind of a notebook. I'm trying to determine the best way to store them. For now, I like having them out in the sewing room. 

After Bath 3, they seem to fit together though each is a bit different.
I am especially fond of the splitting that happens when pure dyes are mixed.
That is what I will be working on for a while, I think.

I am thinking maybe a loose-leaf binder with page-protectors to contain the dye recipes and small samples of my results.

The two smaller pieces. What can I make with a 1 yard piece and a 1/2 yard piece? Not much.

Perhaps these pieces need a 4th bath before becoming something...


Monday, November 6, 2023

TDF

Poor little blog. No October attention. And not a lot of sewing either. I'm in the middle of Jane Dunnewold's Dye Mastery which started in October. At the same time I was taking a live watercolor painting class and did some travel. So, not much sewing.

The Dye Mastery is terrific. It has challenged my organizational skills. I tend to approach my crafts as a seat-of-the-pants operation. With dyes, that means that nothing is predictable and some of my dyed fabrics and clothing have not been good. I do have the occasional win, but it's not predictable and I don't really learn from the experience.

Jane has inspired a new way of approaching dyes. And I have had a blast. Very, very few fails, and even those generated some knowledge I'll use in the future. It is physically hard work and I note that I'm fighting some lower back pain, as well as a tricky thumb joint.

It is SO worth it!

The approach is low water imersion, something I have limited experience trying and zero knowleedge, at least when I started.

We have some choices in materials. I chose to follow Jane's advice closely, rather than going rogue or even working with alternatives she offered. So I'm using silk noil for all samples, and PRO Chemical and Dye powdered dyes in the colors she lists. 

After a few mistakes - well, maybe more than a few - I've pretty much created a planning and recording regimen that is helping me to do two things. I am producing fairly predictable results and I am learning solid basics with this type of dyeing. In our most recent unit, we were given more lattitude in creating samples, so that we can learn from the previous lessons what happens and what we like.

I've taken several online classes with Jane. I always learn so much. She is an excellent teacher and truly understands her audience. We receive each lesson in 3 formats! And there are periodic Q and A sessions that are live. Lessons are released 1-2 weeks apart. 

First I created a 12 part color wheel. And then I knew I was hooked.

Next we overdyed - a concept I thought I understood, at least vaguely. I did not. So many interesting and surprising (to me) results.

At the end I'll have lots of samples and documentation to place in a notebook for deliberate dyeing. So far, the results are truly To-Dye-For.

Lower right corner is the Blue control; others are over-dyes of that blue.


Friday, September 15, 2023

Fault Lines

DH and I visited Taos October, 2022

For a little while now, I've been preparing for a trip out west for Diane Ericson's Design Outside the Lines. 

pre·pare

/prēˈper/

My method of preparing: I started out crazy excited, then briefly wondered if it makes any sense, then realized the money was spent, then worried about how to prepare and what to take, what to mail ahead of time, and now 24 hours before I leave, calmly drinking a cup of tea, knowing the light will come in, no matter what.

Mabel Dodge Luhan House where DOL is held.
DH and I stayed there one night.

Diane Ericson is full of light. And I'm looking forward to meeting and learning from her invited co-teacher Susan Dillon, fiber and mixed media artist. So many possibilities with these two. And then there are the other attendees. Remembering my previous DOL experience in Sisters, Oregon with Diane and Marcy Tilton, I know that the attendees are also likely to be full of light.


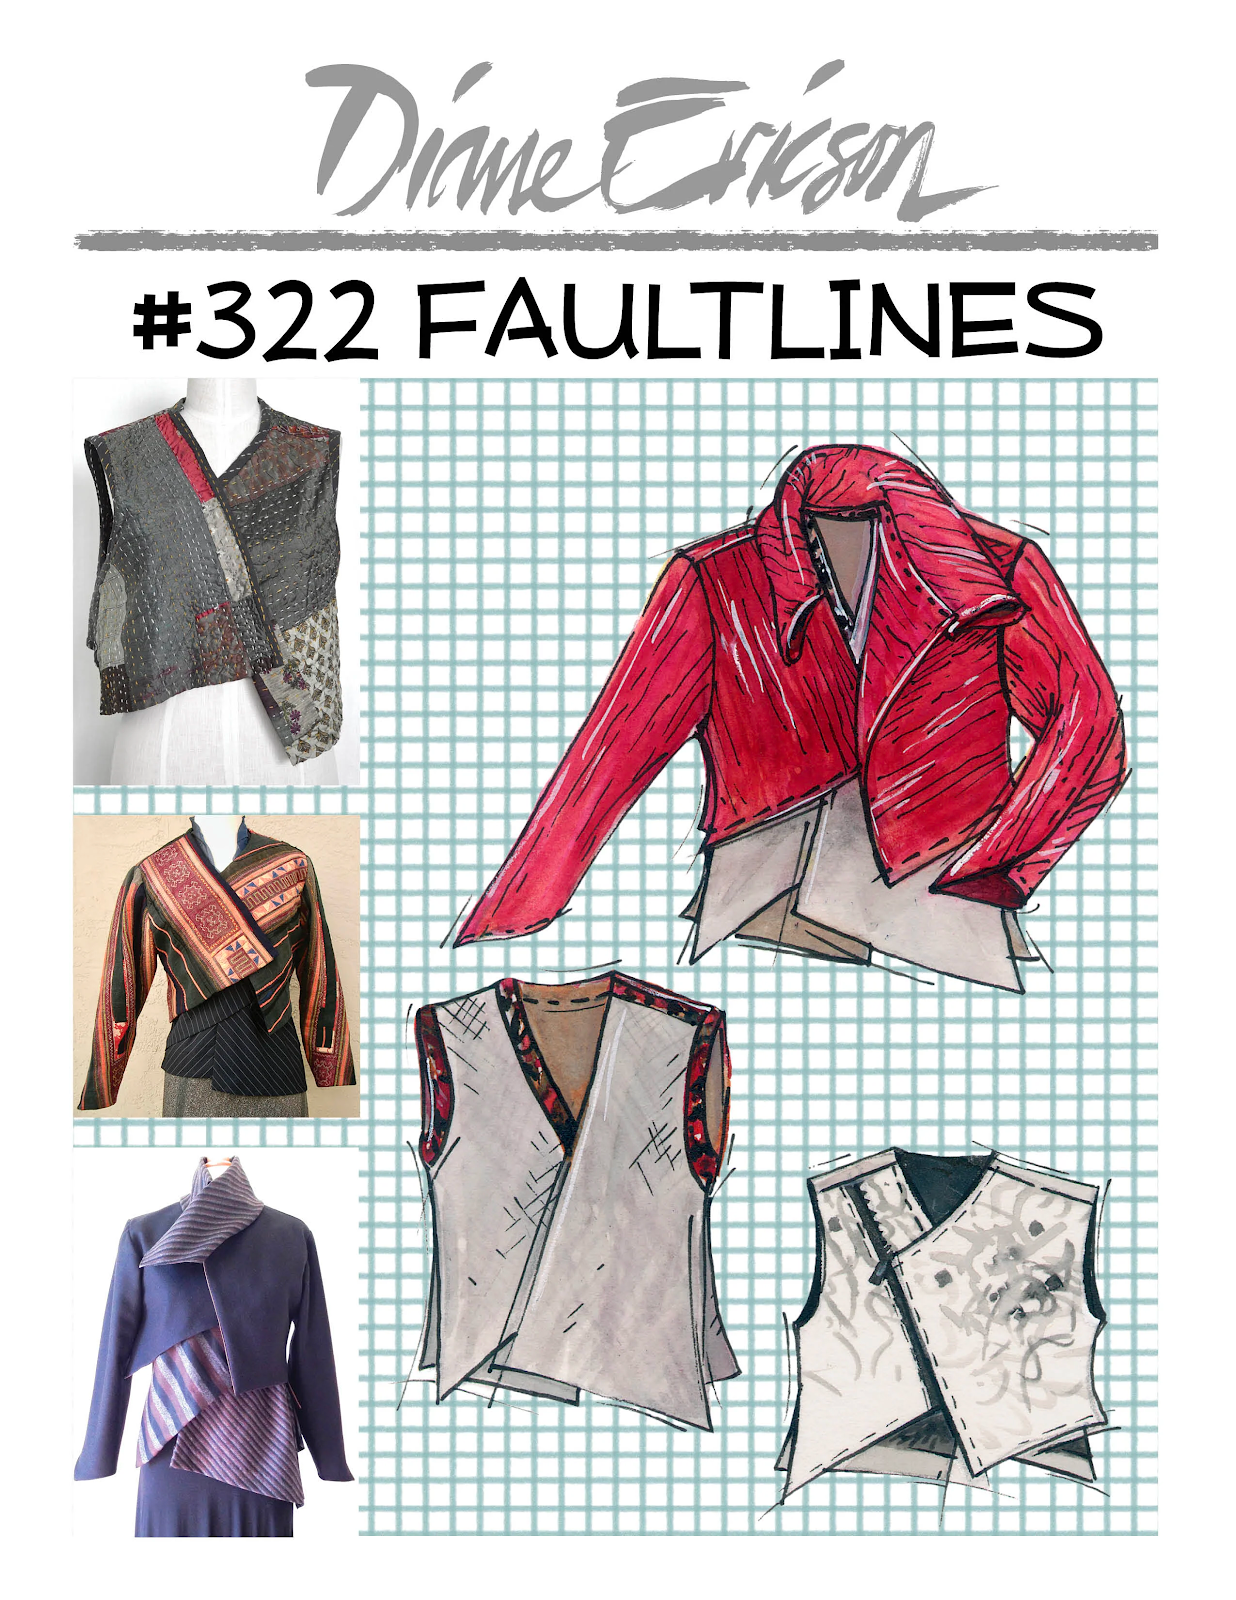
Years and years ago I tried Diane's Fault Lines pattern. It contains tissue and instructions for two garments - a cropped jacket and an undershirt. This is a very cool pattern with so, so many design and stitch possibilites. And it has the most elegant sleeve I've ever sewn. 

Behold, the sleeve!

Undershirt with a sleeve

Because my body has changed in the intervening years, I decided to make up a toile of each, using an old cotton bed sheet. The undershit is sleeveless, but the instructions indicate you can fold out the fullness in the sleeve cap and insert it into the undershirt to make that long sleeved.

Undershirt toile

My experience was that the sleeve fit perfectly into both the undershirt and the jacket without any change. 

Toile for undershirt and jacket

The jacket is designed for shoulder pads. I did not want a garment that structured, so I watched a couple of youtubers on how to alter a pattern to remove or reduce the shoulder pad. After that, I simply pinched out the excess on my toile and was happy with the change. Of course, I have not made up the jacket in proper fabric yet, so I may formalized that process a bit. Or not.

Undershirt back. Note the lapped center back seam. Lovely!

Next I cut into some light weight linen from my local wonderful fabric store, Gail K. The color does not photograph well, but it is a yummy medium blue with a tiny touch of black. Opaque but quite light weight. It reminds me of the sky right before a storm. It's been delightful to sew.

Left side, undershirt

Right side, undershirt

The undershirt is composed of 4 pieces - two distinctive fronts, and two slightly different backs. One of the fronts, and the two backs are cut on the bias, which adds to the fun. After cutting carefully and stitching the shoulder seams, I let it *rest* for 24 hours. 

I'm finished with my first undershirt. The closures are simple sets of ties - one set inside and the other set outside. 

I've added a bit of hand-stitch. 

Now it's time to pack. Stay tuned!


Tuesday, August 29, 2023

Sewing, not Seeing, Red

Christmas prints on cotton, some with a little gold sparkle


A dear elderly - that is, older than me - friend keeps cleaning out her stash and giving me quilt cottons. Though my quilting activity is low, my traditional quilting activity is non-existent. Recently she gifted me a stack of red Christmas prints. I said Thank you.


Now I do love red. My dear sainted mother used to say that red is her neutral. When it's cold enough, I wear a long red wool coat bought at Talbot's decades ago in her honor. Red has a special place in my heart.


My local ASG has issued an art-inspred challenge to sew something - anything - inspired by Klimt's well-known Lady in Gold. The story behind the painting, particularly as portrayed in the movie staring Helen Mirren, is riveting and inspiring. I read a bit further about the painting and became curious about the dress the Woman in Gold wears in the painting.

Emilie Flöge shown here with Klimt

Emilie Flöge is the clothing designer behind the beautiful garments worn by those Viennese women in Klimt's colorful paintings. She has a storied past that piqued my interest. She was a companion of Klimt's, a hippie in her own time, a free spirit. Her designs are works of art, detailed, exquisite. 

Back panel


Her personal choice of clothing led to my response to the ASG challenge. I imagine such a linear dress as the one above might have been seen as radical in her own time. And Klimt is dressed similarly. You can see more of her designs here.


I chose a favorite pattern from Folkwear: 104 Egyptian shirt. I have used this pattern at least 4 previous times. There is something appealing to me in its rectangular lines. My most worn version is in an interesting white linen weave. Extended full length, it is called a galabia.

104 Egyptian shirt from Folkwear

By combining so many red prints, my hope was to get away from the Christmas theme. Some of the pieces were 1/2 yard; a few were a full yard. I cut them into 8" x 18" chunks. I created fabric, sort of, by sewing them together along the short ends, making one very long 8" wide strip of fabric. There was no plan to the order in which they were sewn together, except to avoid sewing identical fabrics together.

Center back panel of the Egyptian shirt

I chose the 8" width based on the size of the front and back pieces in the Egyptian shirt pattern. Along the way, I wondered if I needed to break up all that red print, perhaps with something like a black and white print piping. That did not work out - it looked more like Little House on the Prairie than it did Turn of the Century Vienna.

one of the sleeves


This pattern introduced me to the idea of flipping an exagerated facing to the outside of a garment. I have used that idea many times since on tops. I especially like the lines of this particular facing flipped to the outside. It reads exotic. I imagine that Emilie liked exotic. Perhaps this traditional Egyptian look would have appealed to her. 


For the facing, I used a remnant of red silk dupioni, sashiko-stitched in vertical lines. I backed it with cotton batiste. Once I had completed the garment, I thought to check to see how the shoulders lined up. Of course, I needed to do a little after-the-fact sashiko correction.


I added an interior back facing of the red print quilt cotton so that the back side of the cotton print does not show when it is hanging. I am pleased with how it looks hanging on the wall of my sewing room. 


The Egyptian shirt pattern resembles the lines of the Fit for Art Tabala Rasa pattern, another I've used multiple times. It also resembles the Sterling pattern from the Sewing Workshop. Good design is present in all cases. This traditional design includes clever and easy pockets in the side panels. 


My long-term plan for this piece is to use it as a summer weight robe. While at Shakerag this summer, my sweet roomie demonstrated the need for such when she accidentally locked herself out of our room following a shower in the communcal bathroom.


This piece already has a few stories sewn into it.