
The Picasso Top and Pants pattern is the latest from the Sewing Workshop. When they sent out an email teaser, I was instantly enamored. The pants are cropped with lantern shaped legs, similar I think to one of the blog posts on their site. I have long admired that remake of their Trio pants but never got around to following their directions for modifying the pattern. At this point in my sewing life, I know I would much rather follow a pattern than draft one. So, thanks for drafting these pants, TSW!


The fabric is a chocolate rayon crepe - very drapey - ordered from Stone Mountain and Daughter. Rayon is not my favorite fabric but it works here as it has great drape and is light weight. It's still summer here in the southeastern USA. And this brown will wear beautifully on through the fall.

During the hot summer months, I am drawn to loose pants that are cropped like these. It is so much better than shorts on me! And they feel great.

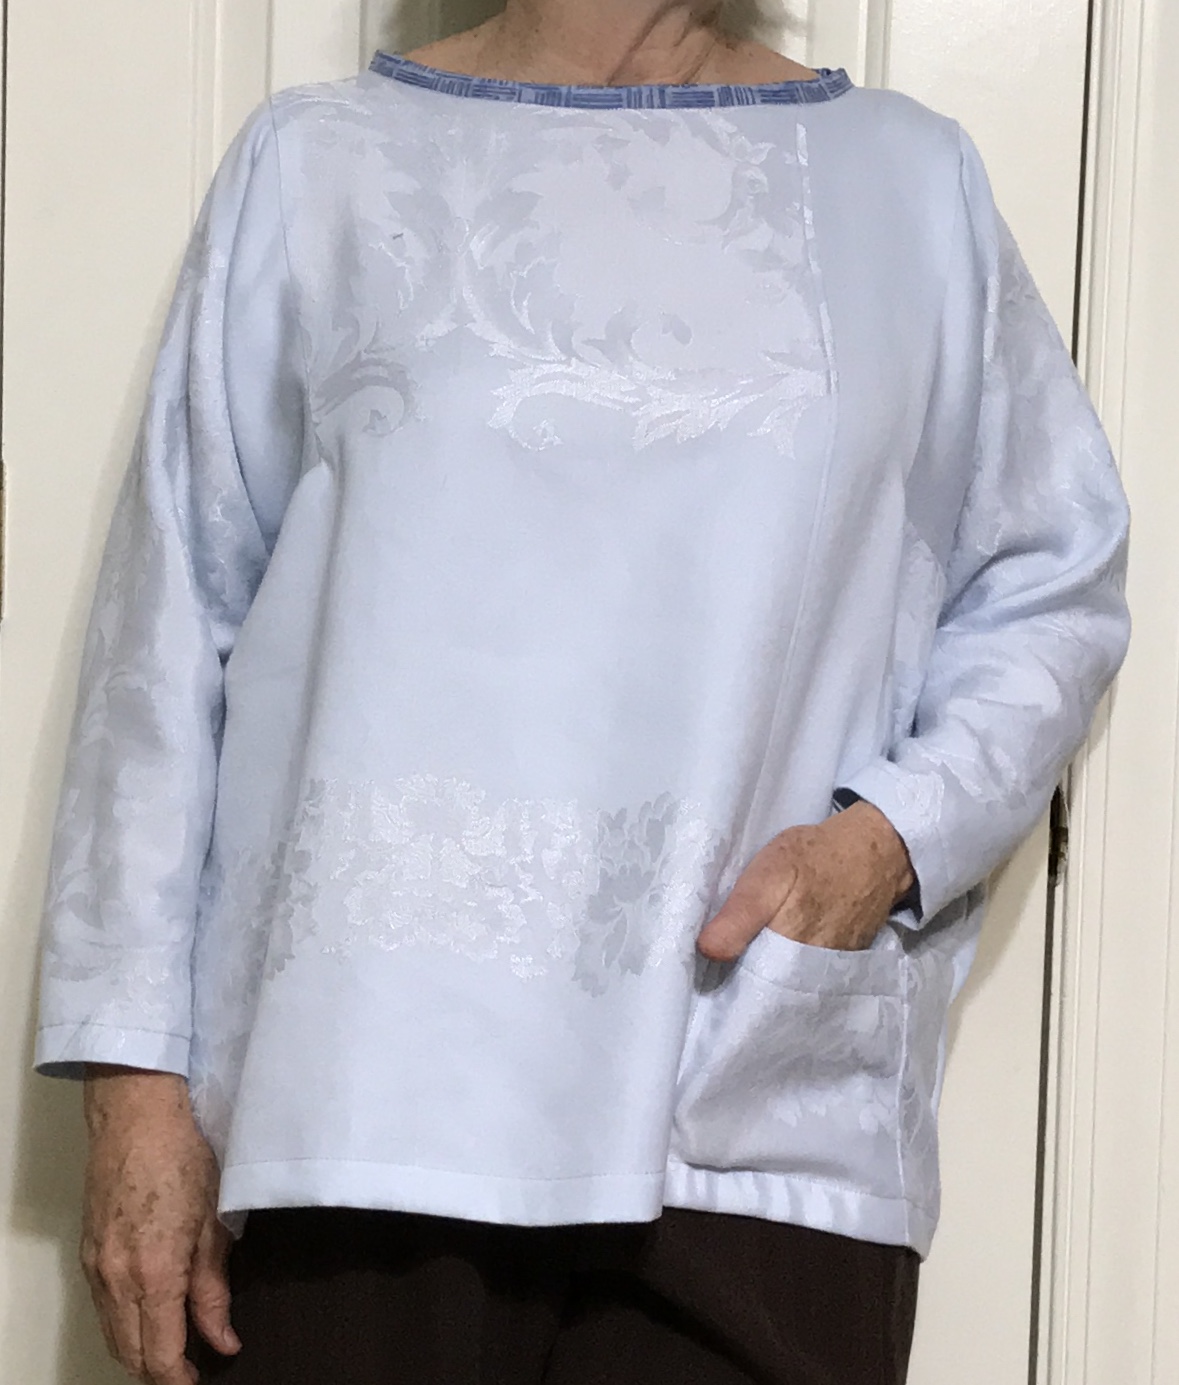
The top is also interesting. I like the asymmetry in the front and the cute little pocket. I've started adding a single pocket to many of my older garments. And aren't those square arm holes great?
So far I've only made a toile or muslin of the top. I often skip this step as I cannot stand to waste the fabric. I did skip that step with the pants but I took careful measurements and traced my size onto tracing paper rather than cutting into the original pattern tissue. They fit perfectly. Yep. I was lucky.

Having said all of that, I took a bit more time with the top. I began in my typical it's-only-fabric pants-on-fire manner. I usually cut a size M in this pattern line, but I started thinking about how this was probably oversized and I could cut a small. I was so cocky that I cut right into the pattern tissue on the size S lines.

I washed and dried the fabric. I began to imagine how I might lay out the pattern pieces to take advantage of the placement of the markings on the fabric. And then I happened to glance at the suggested fabrics for the top. Knits with 2- or 4-way stretch. What?!?

Sure enough, a tissue fitting revealed that a size S would be too small, at least in the lower sleeves. The lower sleeves are probably drafted with negative ease to make it easy to push up the knit sleeves to 3/4 length. Of course, there is no such thing as negative ease with a woven fabric.
Whew!

I dug through the stash and found an old cotton jacquard tablecloth to use as a toile. Then I graded the pattern tissue out to a size M. Cutting and constructing the toile was quick. I'm quite pleased with the fit. The shoulder seams fit me perfectly. The sleeves are probably a little short but I'll likely roll them up anyway.

I am now looking forward to making the top in real fabric. The table cloth is OK but a little heavy for a top.
I'll make the next one with my re-graded size Medium. I learned I need to make a minor change in the finish of the neckline. The neckline has a sharp curve at each shoulder, making it difficult, even with a bias strip, to create a smooth finish. Next time, I'll finish the front neckline and the back neckline before sewing the shoulder seams. I find that often works best on a boat neckline like this one. In fact I think that's what I'll do even with a knit.
 |
| My neckline is finished with a bias strip of quilt cotton. It looks smooth here but it tends to pop up at the sharp curve. |
So will I make a muslin with the next new pattern? Hmmm... Probably not.
Love the outfit Martha. I have the trio pant pattern and when I saw the new one I passed as I did on the Picasso top because it was for knits. You've given me inspiration to give this a go in a woven fabric which is my choice always. Some of those Jinzenji prints are lovely. Have fun with it!
ReplyDeleteBeautiful top, and very nice crop pants! Genius to use the tablecloth for the top --- very nice texture to it. Good for cooler weather!
ReplyDeleteOoh, thanks for the tip on the waistband elastic on those flat-front pants. I’ll have to try that! I’ve also recently used a linen tablecloth for a wearable muslin. After I dyed it in indigo though!
ReplyDeleteDyeing mine would be fun. Thanks for the idea.
DeleteWhat a marvelous outfit! I really like the pants and the top made from a tablecloth is quite nice.
ReplyDeleteLove that tablecloth! I was hoping that you had made the pants, too, and was glad to be able to read about them. Really nice ensemble.
ReplyDeleteI've been looking for a pants pattern which is loose fitting with tapered legs. I saw a lady in the grocery store with the exact pants I want and I should have asked her where she got them, but I didn't. I started searching this website and found your review. I think those pants are perfect. Plus I had to laugh because the date of your review was August 19 which is my birthday. Maybe some things are meant to be!
ReplyDeleteThis comment has been removed by a blog administrator.
ReplyDeleteHi Martha, what type of seam finish did you use for joining the top pieces together? Did you use the overlapping seam method shown in the instructions or something else?
ReplyDeleteHi, there! I used ordinary seams, not overlapping. Because of the square insertion, I stay-stitched the corner right at 5/8 and clipped very close to the stay-stitching. Then I sewed it in two passes, just to make sure I did not make a pleat at the corner. HTH!
DeleteHi Martha, Thank you for the response! Can you tell me what exact seam finish you did to join the different front and back top pieces? I'm having a difficult time determining which seam finish I want to use because the overlapping seam it tells you to do in the pattern instructions leaves a raw edge.
ReplyDeleteFor example, on the last image you have shown (close-up on the neck/shoulder) what seam finish did you use to join the front pieces together?
DeleteAnother example would be on the images were you showed the pocket. What seam finish was done there to join the pieces together?
Thanks,
David
OK. Just pulled it out and looked! It's a standard 5/8" SA, right sides together, then serged, then topstitched from the outside. It's sort of a faux fell seam, given the use of the serger. HTH!
DeletePretty good post. I just stumbled upon your blog and wanted to say that I have really enjoyed reading your blog posts. Any way I'll be subscribing to your feed and I hope you post again soon. Big thanks for the useful info
ReplyDeletetrousers