Another Splice top: As soon as the pattern was published, I knew I wanted to use this fabric with it.
It's a linen-cotton blend from Craft South. It is perhaps a bit too heavy for this pattern but it's striped. Stripes are great fun to sew, especially one like this that is perfectly symmetrical and in a neutral color. The stripe that reads gray is a shot weave in black and white. And I'm almost always drawn to a shot weave.
As described in my previous post, the Splice top is a blank canvas. It is a loose-fitting, drop-shoulder shirt with 3/4 length sleeves, side panel pieces and an uneven hem. The weave of this fabric places the stripes vertically, so I was mighty tempted to make pants, but in the end, I knew that this was not the kind of stripe that makes flattering pants. The stripe is too bold for that (on me).
This stripe was perfect for a cross-grain cut on those small splices in the sides, with the body following the usual lengthwise grain. The weave is quite stable.
 |
| before top-stitching the hem |
I made one additional change to the pattern. It is very loose fitting. The earlier versions were all size M, my typical for Sewing Workshop tops. But I was curious about making a size S. The finished measurements are plenty generous for my hips. I cannot actually tell any difference between the size S and size M, probably because the fabrics are so different.
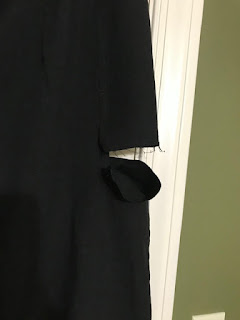
In other sewing news, my latest *fix* (hack?) was to add a pocket to a pair of Picasso pants. I was short on fabric when I made this last pair and had to piece one of the side panels. Each pant leg has three panels so I figured, the additional seam was a good fit with the style, even though this one is horizontal.
As I wore them, I realized how perfect that would have been for a pocket. Inserting a pocket into the seam would have been super simple if I had thought to do so during construction. Inserting the pocket after finishing construction was a bit time-consuming but not difficult.
BEFORE:
AFTER
 |
| Inside - pocket was attached to the upper and lower seam allowances, top-stitched at the bottom. |
At the same time I've been increasingly interested in a pattern hack I see on Instagram - the Clyde pants hack.
 |
| Original Clyde pants for Elizabeth Suzann |
I did all the pattern work for this hack, starting with Cutting Line Designs One-seam pants.
And then I realized. Duh. The Picasso pants are perfectly suited for interesting pockets. And they are loose fitting, a must with deep side pockets. The shape of the original Clyde pants is more narrow than the Picasso, but otherwise, just right.
So now I'm thinking about a future pair of Picasso pants with more cool pockets. Or maybe I'll make a pair of pants using the One-Seams I hacked into Clyde pants. I can always use another pair of comfy pants!


I love your style; it is so YOU. You've inspired me to make a Splice top but I'd need a full bust alteration. Do you see any problem with that?
ReplyDeleteThanks! No, I don't see a problem. You might be able to add a dart between the side panel and front.
DeleteAs always I love the top now I have seen your version whereas quite ambivalent when the pattern was released. Am off to check out your earlier versions now.
ReplyDeleteWonderful post, Martha!
ReplyDeleteExcellent idea..I added inseam pockets to my Picasso pants.. and they worked okay!
ReplyDelete