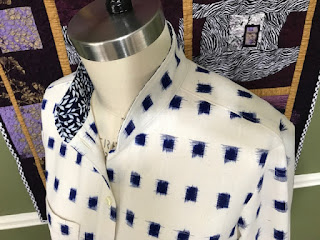
 |
| Fear not; I'll wear this with a jacket. |
It would hard for a pattern to be easier and still worth the trouble. There is one tricky bit, but otherwise it's a straight-forward make.
It is composed of a front piece cut on the fold, a back piece cut on the fold, and an optional pocket. I did cut out the pocket but then decided to omit it.
 |
| a pocket from one of Marsha's sample tops |
I chose fabric from stash for the class version. Both the purple and the black are cotton lawn - light enough to make a reversable shell.
The tricky bit is the clever way you attach the armholes of the two layers. The two layers are constructed as separate shirts through bust darts and shoulder seams. Then they are joined at the neckline in the usual right-sides-together method. Next the two shirts are attached in the arm holes, using a burrito method. I had seen this done with vests where the two sides of the fronts allow you to pull things through the shoulder opening, but I could not visualize it without the front openings. The geometry is counter-intuitive.
The vents and hemlines are to be joined together so I decided to leave the layers loose. I like that the other color shows.
It is a nice basic pattern and I like having those in stash to retrieve from time to time. It does not take much fabric so it's perfect for remaking an old garment.
A while back I made a tunic from this bright red linen. And then I seemed never to reach for it. Time for a remake.
 |
| This version looked most interesting in the scarecrow pose. |
I was unable to cut either the front or the back on the fold which turns out to be a good thing. More vertical lines; more opportunity for sashiko.
It's plain. I think these will be good layering pieces and an opportunity for jewelry or scarves.
One tip: the front armscye includes clips for the dart legs, as well as a third clip for attaching the sleeve (or pocket). I managed to confuse those and only discovered it when I tried to match the sleeve notch to the garment notch. Next time I hope to watch for that.


