Showing posts with label clothesline. Show all posts

Saturday, December 31, 2016

Goodbye to 2016

December went by me in a blur of travel and illness. Luckily the illnesses were not serious - just temporarily debilitating - the flu and shingles. And the travel was fun - one trip to NH to see our son and family and then on Christmas a trip to Charleston to see our daughter and her family. Both great trips.

But I sewed very little this month. And here it is the last day of the year and I'm finally back in my sewing space making clothes for me! We have some fun plans tonight and so I'm making Quincy pants to go with a top I made a while back. The top is Vogue 9063 and I see that it is on sale today over at ClubBMV. I made it from one of those interesting Asian silks - actually 2 pieces that seemed to go together.

The Quincy pants are made using this mystery fabric. It's been in my stash so long I do not remember buying it and I have no idea of the fiber content. Seems a bit like tencil or some other kind of rayon. Drapey. Soft.

Vogue 9063 made over a year ago. I just love the fabric!

The Quincy pants are from the Sewing Workshop (TSW). They are narrow leg pants which leaves me hoping that I do not end up looking like a top-heavy golf tee in them. TSW also has the Helix pants - narrow leg for knits. The Quincy is intended for woven fabrics and so should work this tencil (?) fabric. I've made the Quincy pants twice before - once was unsuccessful due to poor fabric choice but the second pair was more useful. I have high hopes for this 3rd pair.

I'll be omitting the artsy buttons on the outside seam this time, but it is kind-of cute, isn't it?


I did manage to make a few more clothesline bowls as gifts, many wrapped in pretty cotton batik fabric. But I still like the naked ones. Have I mentioned that these are entirely addictive to make?


This one was given to daughter but her MIL liked it so I re-gifted it to her. It'll be no problem to make another!

This one I kept. I like the beehive-like structure and use it as a tissue holder.
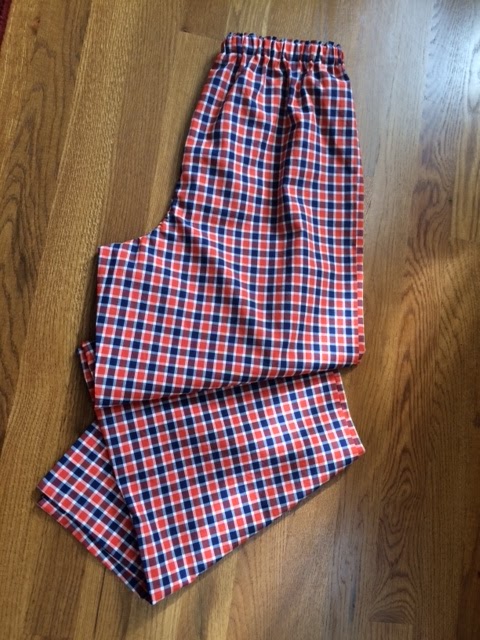
Lastly I made PJ pants for two grandsons, and a jacket for one granddaughter. Then I ran out of time.


Onward to 2017! I'm closing out 2016 with a wish that we all spend more time making and creating in 2017. Life is shorter and shorter - here's to being happy where we find ourselves each day.

Martha

Monday, November 28, 2016

Like prayer beads

And better than nail biting...


This one will last me a while.


cotton batik remnants wrapped around clothesline. I like the lip on it.


Playing with the 5x7 idea in preparation for gift exchange at Fiber Art Fusion:

Paper rust dyed, stenciled, and hand-stitched together

Paper dip-dyed in black walnut juice. I'll do this again.


Silk leaf sewn by hand to fabric fused onto heavy interfacing and attached to navy blue paper

Friday, November 18, 2016

Joy in Color

These colors give me joy.


This, too:


And the Christmas cactus is about to burst with red blooms


Thursday, March 3, 2016

Clothesline bowls: Some thoughts


As you probably know, there are all sorts of tutorials and inspiration on the Internet concerning fabric bowls. My primary inspiration came from Flossie Teacakes,  a delightful blogger. 

For what it's worth, here are some things I have discovered that work best for me:
  1. Thread - 100% cotton. Polyester is stronger but you cannot (easily) change your mind. And it will not take dye. That might be a good thing. It's good to have full bobbins when you start but it is easy to stop and start. The thread does not end up showing much as long as it is pretty close to the color of the cording.
  2. Stitch length - 2.5 mm. Some suggest going with a very long stitch length. I found that the bowls were too wobbly with a longer stitch-length. I like for them to be soft but secure in their shape.
  3. Stitch width - The widest my machine will go is 5.1 mm and that is what I like. If you go narrower, you have to be more careful to catch both sides. This is not a big deal, as my machine foot has a little groove down the middle. I just keep an eye on that and make sure the shadow between the two cords is right on the groove. You know, zen sewing.
  4. Cording (clothesline) - I have been happy with Household Essentials from Amazon, but I have not tried any others. It is soft, inexpensive, and easy to sew. Just recently I found something even less expensive at my local grocery store, Kroger.
  5. Starting - for the first one, I hand-stitched a little bend in the end of the cording and cut off the tape at the end that keeps it from fraying. But after that, I found hand-stitching unnecessary. Instead, I cut off the tape at the end and fold the cord over about 1/2 inch. Then I position it under the needle and zig-zag in place. I let the stitches pile up a little just to secure it and then use the awl to give it a little nudge around the corner. I continue to use the awl until the disk is large enough to manage with my finger tips.
  6. Position of coil under machine - some recommend that the coil expand to your left so that the machine does not get in the way. I have found that I prefer to let it expand to my right while I'm making a flat bottom. It seems to stay flatter that way. After the bottom is completed, I remove it and re-position the disk so that it expands to the left.
  7. Gentle curves - the easiest way to shape the bowls. I use my left hand to gently bend the disk up alongside the sewing machine head and sew around and around. It naturally forms a lovely curve.

  8. Vertical sides - these require a good bit of tension on the clothesline as it attaches to the bowl. Once the more-or-less right angle is established, then you can relax again.  
  9. Curving inside - if I want more of an S curve, then I put much more tension on the cording as it flows under the foot. The difference between tip 8 and 9 is subtle but you'll feel it and see the result readily.
  10. Tying off - You can clip the end of the cording at an angle and work it back into the top row, but I much prefer the knotting options available if you play with the end of the cording a bit.
  11. Handles and other gaps in the bowls - To create handles in the bowl, I zig-zag backwards to secure the spot where the handle will begin. Then I pull the available cording away from the needle and zig-zag on the previous row for an inch or more until I reach the point where the handle should re-attach. Then I use the awl to push the available cording back under the needle, zig-zag backwards a few stitches and continue around the bow. As you stitch around again, you have the option of making the handles two, three or more rows deep.
  12. Knotted edge - I used the same technique as tip 11 but left regular gaps in the final row. I would count 8 stitches off the last row, and 10 stitches on the last row as I rounded the final time. Then I used the remaining cord to wind in and out knotting at each gap.


There are almost endless variations to consider but the simpler, the better for me. I may experiment with adding color and bits of fabric. For now, I am happy with the winter white produced with naked clothesline!


Friday, February 12, 2016

More Clothesline Bowls

These are so satisfying to make. Flossie Teacakes got me started. With one 100 foot package from Amazon, and a good bit of thread, you can make many different shapes and sizes. Have lots of thread and bobbins on hand. Turn on some music and begin!

The simplicity of this one is very appealing to me. It took less than half of one package.
The other half of the package went into this one, more shallow, about 12 inches wide.
This time I started by attaching two strands of about 6 inches together before beginning the spiral sewing. I also left spaces in the top row so that I could wind the remaining cord in and out with knots. A fun experiment. There is a tiny scoop that is not visible. It is made from spiraling the end of the cord and pulling tightly to curve it up constantly.


I have been tossing my used tea bags into this one. It takes color beautifully.
After putting colored thread in the bobbin for a few rows, I went back to white which I prefer. The colored threads are hidden under the fold.

The one on the far left is a favorite, about 5 inches in diameter, very simple with straight sides instead of the gradual curve I've used in other bows. It is my thread catcher now. The tiny one in the middle tested some inks I had on hand. Boy, does this stuff take color! I can't wait to try some real dye. The flat platter was an experiment with sashiko (of course!) - hard on my hands and the dark thread is too jarring.


I might have a new hobby. Oh, dear.

Wednesday, January 27, 2016

Winter White

I admire winter white especially during the cold months when nature is in stark relief. I see these gorgeous winter white wool coats. I even bought one when I moved from Texas to New Jersey. Winter white does me no favors with my coloring but it is appealing. For this reason, I am really enjoying looking at this clothesline bowl that I made yesterday.


Lynn in my Fiber Art Fusion group did a lesson on this technique a year or so ago. I obediently bought the clothesline but never did anything with it, until yesterday.


Now if you are looking for something mindless and calming, making a clothesline bowl may be just the balm. I found it to be both mesmerizing and even a little exciting. And some days you just have to make something, anything. This filled the need for a quick and satisfying make.


Armed with $6 worth of Household Essentials cotton clothesline and off-white thread, I started. First I hand-sewed the initial teeny-tiny spiral. Even so the first rounds were a little tricky. Then it became zen. One hundred feet of clothesline later, this is what I have:


Lynn wrapped hers in beautiful cotton batik strips. Gorgeous. You know how rich those cotton batik colors can be.

For now, I will stay with winter white. It might be fun to dip it in a dye bath. I wonder if it would take the color.

If you would like a lovely and inspiring tutorial, see this one at Flossie Teacakes.