Showing posts with label classic shirt. Show all posts

Tuesday, March 7, 2023

17th Birthday Gift

I've not been sewing as much in the last few months as I wish. Too much in the non-sewing part of life going on and demanding attention. Sewing keeps me sane, so this is not something to mess around with.

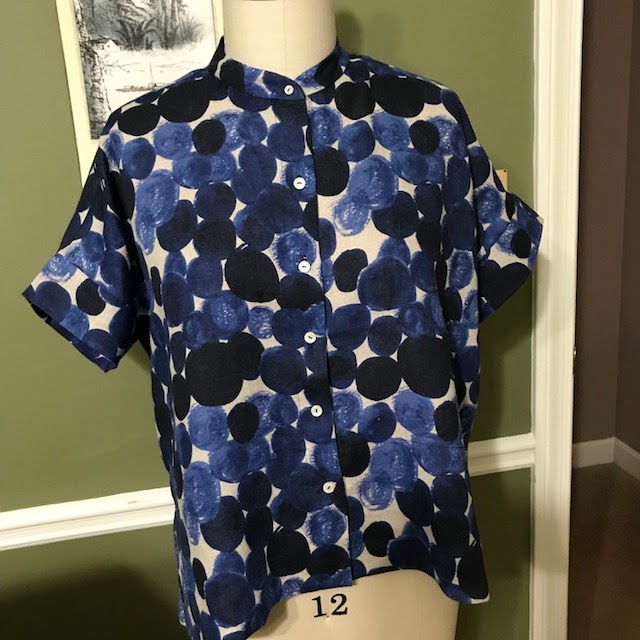
After my fun with bricolage, I found the sew-jo to finish a shirt I cut out maybe 3 months ago. It was dicey because it has all the classic shirt details that I love. I just assumed I would ruin one or more of these details.

But, surprise! It all went great. I took my time and enjoyed the entire process. 

Luckily the pattern I chose was The Blouse Perfected from Cutting Line Designs. I have blogged about that in the past. It is just such a great pattern - really a small book on professional techniques for completing classic shirt details.

First up was the collar and collar stand. CLD approaches this process in a manner that is quite different from others, I think. The collar stands are attached first, sandwiching the neckline in between the two stands. Then the ends of the collar stand are completed, leaving a gap for the collar. The collar is finished on three sides and top-stitched. Then the collar is dropped inside the gap in the collar stand. It is machine stitched to the right side of the stand and invisibly stitched to the inside of the collar stand.

I thought I'd screw that up, for sure. But indeed, it worked out perfectly. CLD patterns are nothing if not meticulously drafted. And the explanations are detailed with clear illustrations. Everything fits together as it should.

I also took my time on the sleeve plackets. There are so many ways to mess those up! 

The stars were aligned and it too worked!

And then I found perfect buttons in stash. This is when sewing is totally satisfying, right?


Monday, September 5, 2022

Camp Shirt Happiness

Happiness is...

A 16 year old grandchild who loves the item you made, just for them!

First the fabric. I spotted it when I was lucky enough to visit Mulberry Silks and Fine Fabrics in Carrboro NC. Hubs and I were on our way to visit our grandson who lives in Raleigh NC. Our son plus wife and daughter rented a house there so that we all could visit and catch up. It was delightful. 

Back to the fabric. It's probably quilt weight but I don't care. I kept circling the store and returning to it. It came home with me. When I showed it to the 16 year old (SYO), there was a squeel of delight. I knew immediately it should become something for not-me. 

I wanted the print to be about foxes but it is definitely squirrels. Foxes don't climb trees, it seems. Oh well. 

Aren't the colors wonderful? We have a lot of squirrels around here but they are not this wonderful color. SYO has a sweat shirt the exact color of the fox-squirrels. 

After some consideration, I decided upon the Cutting Line Design shirt in the Easy, Ageless, Cool envelope. I had made it once before for moi and did not like it on me. But it seemed like the style SYO gravitates towards. 

Size was not a huge deal because this is a loose fitting shirt, but SYO is petite so I went with a size S. The size is just right!

The cutting of it was slow-going. I wanted to match as much as I could. I think I succeeded with the center fronts, as well as the chest pocket. I forgot to check the side seams before gifting it.

Making it was such fun. I immediately went into the zen zone. This style is simple - slightly dropped shoulder inserted flat, convertible collar, front and back facings to enclose the raw seams of the collar, side seam vents. It was totally meditative.

I made one tiny change to the pattern, converting the Louise-Cutting version of mitered corners (at the hem) to the Linda-Lee version.

I need to make another shirt now. It is so predictable and cooperative. And I love the top-stitching part, even when it doesn't show. The next time I make this, I expect I'll add a yoke. I do love that shirt detail missing from this pattern.

Before gifting it, I did try it on, just in case it got shoved into the back of the closet at SYO's house. But I do not think that will happen. SYO is pretty honest with me. And I see happiness here.


Tuesday, June 30, 2020

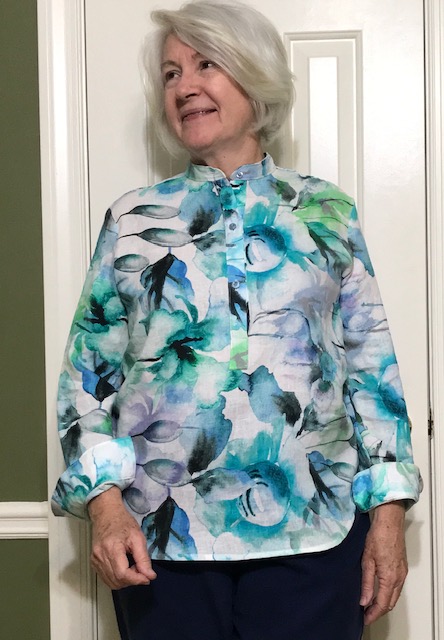
June Sewing: the Archer Popover


Here it is the last day of June and I realize that I have not blogged in over a month. I'm not sure why. I've definitely had some enjoyable time sewing on various projects.


Inspired by Grainline's Archer Sewalong, I decided to make another Archer, this one as a *popover.* I did not actually follow along with her but I did enjoy sewing it.


The *popover* version is a purchased add-on that changed the front from a classic buttoned shirt front to a placket that only extends about 3/4 of the way down the front. So it slips over my head.


I found it to be completely satisfactory to make with one issue. Without the buttons all the way down the front, I found that my belly needed more space. Embarrassed to admit it, but I had already cut it out when I realized this might be an issue. Darned belly.


I finished it as planned and decided to work on the need for extra girth later. After all, I could not uncut it.


It was such fun to make 3 (!) plackets - one on each sleeve and the third down the front. I do enjoy making plackets when I'm able to pay attention and relax. I was so pleased that each was completed without any trouble at all.


I mostly ignored Grainline's instructions for plackets, but did use the pattern pieces included in the popover add-on. I find the placket instructions Louise Cutting wrote for her Blouse Perfected to be irresistible. If I am careful, they are fail-proof.


As I learned from previous makes of the Archer, I needed to shorten the sleeves about 2 inches. This still surprises me as my arms are proportionally long. But I do notice that the owner of Grainline wears her shirts with the cuffs extending well past her wrist bone where I prefer a cuff. She looks casual and I look sloppy with that look.


I also omitted the collar as I prefer a collar band, especially if there's a chance of wearing this during the warm summer months.


The fabric is a beautiful painterly light weight linen I purchased from Elfriede's in Colorado some years ago. A friend visited Elfriede's and brought her purchases to show at our neighborhood group meeting. Well, I just had to have that linen, and was delighted to realize I could order it online. I really like it made up as a classic shirt.


I finished and tried it on. My eyes went directly to the pulling at the belly. I thought, well, that's OK and hung it up in the closet. The longer it stayed in the closet, the more I knew I'd have to fix that. The fix was pretty easy in the end.


I unstitched both side seams, and inserted a long triangular bias panel of matching fabric. I really don't think it's visible and I know I'll enjoy wearing it now.


Saturday, May 18, 2019

Cottage Shirt, but longer


This is sort of a dress. It's the Cottage Shirt, from the Sewing Workshop, but lengthened per a 2018 issue of Sew Confident.


I made it as originally published first, except I omitted the collar. I often omit the collar on a shirt with both the collar and stand. It's just a lot cooler during hot weather, I think. I love that first version, partially because of the gorgeous light weight linen. Also I love the deep hem that gives it weight and perfect drape.


I've decided I like this version too. It is a little different. It is comfortable. And the fabric is a gorgeous cotton ikat I purchased from Linda Lee when she came to Atlanta to teach. It was a dream to sew.


To avoid distracting show-through, I used solid white cotton batiste for the collar band facing, as well as the yoke lining. 


I made an attempt to chevron the back and failed. I'll re-do this part, with a single piece of fabric on the bias. Or maybe not. That is one thing I love about sewing my own clothes. I can make adjustments as the spirit moves me.


As usual I held my breath after completing all buttonholes except one. You know the one, right? The collar stand can be a stinker. I carefully trimmed the seam allowances for it and used my clapper to make sure it was as flat as possible. I've learned to use the manual buttonhole on my Bernina, rather than the automatic button hole for this spot. It worked!


As I worked (and worked and worked) with this ikat, I learned that there is virtually no symmetry in it. It was impossible to match the side seams AND the front, so I chose the front. Sort of.


I do love this piece of fabric. I think I have enough left to make some pretty placemats for the kitchen. But that won't happen until I fix that yoke!


Monday, November 19, 2018

Archer Button Up in White Linen

This one has been in the in-box of my mind for quite a while. I cut it out and took the pieces to NH to visit DS and family. No real sewing occurred there. DGD and I retrieved the sewing machine I've stashed there and made some scrunchies she wanted. I will cheerfully sew anything with her!


When I arrived back home, I decided to take my time making this Archer Button Up. What a pleasure it was.


I made one other Archer, the view with the back peplum. I like it quite a lot and picked up some ideas for improvement.


The view I selected this time is almost a classic shirt. It contains a double layer yoke with forward shoulders as well as a collar with a collar stand, though it's not at all obvious from their line drawing. The back contains an inverted pleat and no peplum.

The line drawing looks like a Peter Pan collar. The pattern contains a collar band and collar.
The not-so-classic characteristics include separate right and left fronts. The left front has a cut-on front placket and the right front has a separate placket pattern piece. This could be quite handy if you're working with a plaid and want to position the front placket on the bias, or if you want to highlight a second fabric down the front.

It's not handy if you're trying to match a pattern because you have an extra vertical seam to match. I cut two left fronts - there was no need for a separate button placket piece. In this solid white, the top-stitching makes it almost impossible to determine if the front band is a separate piece or not, IMO.


Another not-so-classic characteristic is the continuous bias sleeve placket.

Although this is faster than a typical menswear shirt placket, I don't think it is quite as sharp-looking. I have fun making conventional menswear shirt plackets every time I don't screw up. This time the sewing goddess was watching over me and I got each completed in a single try. Hooray!

I do like the notched corner of the Archer shirt
I used my modified collar stand from my previous make of the Archer. It's a little deeper than the collar stand included in the pattern envelope. I'll make another version with the classic collar and stand at some point in the future.


I shortened the sleeves per my notes from version 1 of the Archer shirt. My arms are not proportionally short. Reviews over on pattern review indicate this is an issue for lots of people.

It's worth noting that the sleeve edge has a lovely curve where it attaches to the cuff. It is such a nice draft. It has just the right amount of poof and looks better on the body, I think.


I made one other teeny-tiny change in the pocket, something no one will ever notice. It's the little things that make sewing fun for me. I top-stitched each pocket onto the shirt in what is mathematically a continuous loop. That is, I started and stopped at the same point. The appearance is just 2 rows of top-stitching. It secures the top corners nicely.


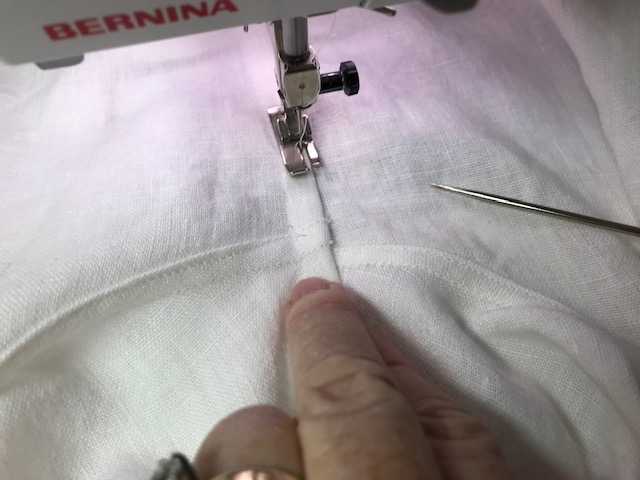
I used flat-felled seams throughout the process. The seam allowances are only 0.5" so a mock flat-felled seam was tricky. Midway through I realized this was an opportunity to make real flat-felled seams by positioning the back seam allowance below the front seam allowance.


Of course, it's a bit anxiety-producing to sew that flat-felled seam from the shirt hem, under the armpit, finishing at the sleeve hem. It's like a journey to the center of the earth. Woot! when I successfully arrive at the center.

Woot!

I made a change in the order of completion. I prefer to finish a shirt tail hem before sewing the side seams. This reduces the size of the wings at the hips, I think. Otherwise the shape of the hem tends to flare out at the side seams when the hem is finished.


It was fun to press it this morning and look at it, all crisp and white on the dress form. That won't last but I will definitely enjoy having this basic in my wardrobe.