Showing posts with label spirit cloth. Show all posts
Friday, June 16, 2017
Covered in stitch
Enjoying the process of this dense quilting, with encouragement from Jude Hill of Spirit Cloth. This piece started last week under the tutelage of Jody Alexander of Wishiwashistudio. Very slow. Meditative.
Also constructing this camp shirt from Cutting Line Designs:
Labels:
boro,
CLD,
sashiko,
shirt,
spirit cloth,
wishwashistudio
Thursday, January 5, 2017
Playing in the New Year
Since the first, I have not begun any significant sewing projects. I'm playing and healing. That is enough for now.
Today I played by thrifting for fabric. I've done this before with mixed results. It is never a large investment and I always learn something or at least have some cheap fun. And today my favorite local thrift store had shirts priced at $2 each. Such a deal for these lovely cottons:
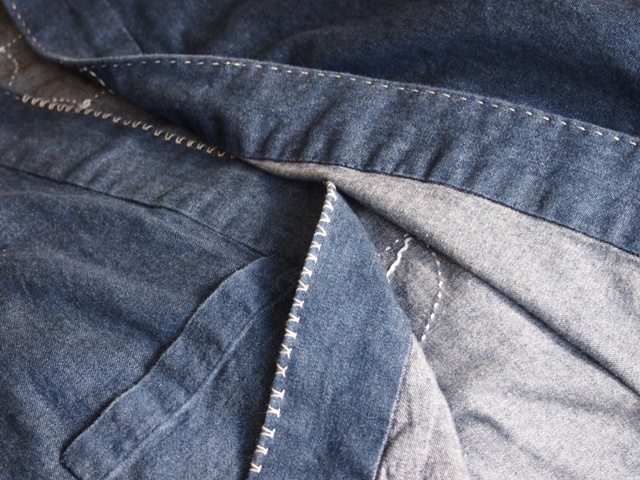
Each shirt is a men's size L or XL so as to be able to harvest the maximum fabric. First I'll toss them in the washer and dryer, though three of them still had laundry tags on them. Then I'll cut the pieces apart. I've learned that it's not generally worth the trouble to harvest from the collars or cuffs due to the fusible interfacing used. But I'll see.
I have some favorite patterns in mind but really should wait to see how large the pieces are. If all else fails, I'll just play with the pieces in some kind of an art project. I like how the colors play off one another.
In addition to playing with these thrifted shirts, I have discovered a new material - hanji paper - and a new technique - felting with hanji paper. Cornelia in my fiber art group introduced us to this cool stuff Tuesday night. Cornelia is Korean-American. She told us that in Korea, this has been used for clothing, even armor (before bullets). Bonus: it is yummy to hand-sew:
We started with two large sheets of white hanji paper and several small pieces of colored hanji. I cut profiles (or a vase, depending on your perspective) from the blue hanji and sandwiched the blue between the two white sheets. To felt you mist it with water and accordion fold it. Then it is squeezed for what seemed like hours but was really about 5 minutes. Then it was refolded in another direction, accordion style and squeezed some more. I squeezed it all the way home in the car but it was not really felted even then.
On the other hand, the blue color had transferred to the each white sheet. When I pealed it apart, the blue pieces stuck to one of the pieces of white hanji paper. And I had two versions of my design. You can tell in the picture which portions contain the blue paper because it is darker blue. The lighter blues are just the lovely bleeding. The blue pieces were just barely attached, so I hand-stitched them down. I also hand-stitched the two pieces together.
Then I
I have ordered a roll of hanji and cannot wait for it to arrive. Lots of playing left to do.
Meanwhile, I am using a modified Jude Hill technique to add on to a quilt. It started with a signature block from the family reunion in August. Some of the kids also traced their hands onto the white muslin. The piecing is a bit unsettling but the hand-stitch makes it better, I think.
To add on, I peeled back the top and the back to show about an inch of batting. Then I hand-whipped another piece of batting onto the previous batting.
adding on new batting |
After that I pieced a new portion for the top, and hand-stitched it on using a felling stitch. And then did the same thing to the back.
new portion of the back |
the new sections on the right is ready for some slow hand-quilting |
So what are you sewing in 2017?
Sunday, October 16, 2016
Stitch Itch
No real planning is required with a piece like this. I started with two hand-dyed (not by me) pieces. I had cut up one of them already and so had to stitch it back together.
The two rectangles are basted together using Jude Hill's glue stitch or invisible stitch. I am fond of this basting technique because it behaves like one piece of cloth and yet it is easy to separate when the design requires it.
I cut the top layer away and reveal color gradation beneath, using a hand-turned reverse-applique stitch. A lot of joy for so little work. zen.
Shapes |
Stitching on a park bench |
the glue stitch from the back, invisible on the front. |
Sunday, July 10, 2016
Sewing at 75 MPH
July is a month full of travel. And heart-break, evidently.
I am a passenger, not a driver. What is driving us all?
Lord, have mercy.
This piece is small but can grow organically thanks to Jude Hill of Spirit Cloth, and her combination of instruction and inspiration, especially here.
Despite the speed at which I am being propelled from one location to the next, I am engaged in slow sewing. Maybe not my best work, but still satisfying. And the light is fantastic.
I keep wanting to hand-quilt a larger quilt but traditional techniques have failed to sustain me. Just too much to manage, once the top, batting, and back are all pinned or otherwise basted together. I feel like I'm drowning.
I tried omitting the batting. After all I live in the southeast US and so a light quilt would be useful. It was still unwieldy and I did not like the way the layers worked (did not work) together.
So, thanks, Jude. This approach fits my needs just fine, as I am always working from the edges.
It will remain light weight with mostly 2 layers, and it will have two right sides.
Or two wrong sides.
Hoping and making.
I am a passenger, not a driver. What is driving us all?
Lord, have mercy.
This piece is small but can grow organically thanks to Jude Hill of Spirit Cloth, and her combination of instruction and inspiration, especially here.
Despite the speed at which I am being propelled from one location to the next, I am engaged in slow sewing. Maybe not my best work, but still satisfying. And the light is fantastic.
I tried omitting the batting. After all I live in the southeast US and so a light quilt would be useful. It was still unwieldy and I did not like the way the layers worked (did not work) together.
So, thanks, Jude. This approach fits my needs just fine, as I am always working from the edges.
It will remain light weight with mostly 2 layers, and it will have two right sides.
Or two wrong sides.
Hoping and making.
Sunday, October 27, 2013
Color Play

These three projects form a sort of triptych, playing with solid colors and reverse applique.
Back in August I posted the first one, in progress. Even then I was trying to learn to create an effect that I've enjoyed seeing over at multicoloredpieces. This fiber artist lives and works in Tunisia, posting art from nature, art from fiber, art from the heart. Her applique *wings* are just wonderful. Oh, to be able to create such gorgeous pieces!
I have not been able to recreate her work. And, as it turns out, that is a good thing. If I attempt to copy a technique from someone else, I tend to change some aspect of it, not deliberately, not even consciously. It is an organic adaptation (or creation) into what works for me. I modify the technique (as I understand it) to fit my skills, as well as my interests.
The author of multicoloredpieces posts works-in-progress, but I cannot figure out exactly how she does what she does. Being a lifetime student and academic, I'd love for her to post a tutorial. Cut right to the chase. But I do learn more this way. And perhaps it becomes mine in some sense.
That said, here are some of my attempts. I'm not sure where they will go, but I think they will go together.
I have completed the reverse applique on this first one. I've basted it to cotton flannel and begun to add decorative or sashiko-style stitching. I tried layering some other solid colored fabrics on top but found the result to be jarring.
The above is the second one. The reverse applique is complete and I'm ready to add some batting or other layer to support some decorative stitching. The blue tones are pretty close, so I hope the stitching will give it more character and interest.
This third one is applique-in-progress and my technique is (perhaps) easy to see. In case it's not, here is what I have done. I used Jude Hill's (see her wonderful blog here) invisible baste to attach two pieces of fabric, wrong side of the top one next to right side of the bottom one. Then I use sharp scissors to cut the top layer only for several inches. After creating this opening in the top fabric, I use the tip of my finger to turn the raw edge under and applique it in place. I cut several inches, stitch parts down, and cut some more, and repeat.
This is pretty standard reverse applique. The only difference is that I am not following a pattern. Instead, I start with a blank slate formed by the top layer of fabric. Then I peal away the design. It is as close as I can come to what I understand happens with a sculptor. I am definitely not a sculptor, but it is fun to imagine that my design is organically revealing itself within the two layers of fabric.
Here is a detail picture of the third one. You can see the raw edge right in the middle next to where I have pins holding the raw edge under, as I approach it with my threaded needle. Much of the surrounding area is already appliqued in place.
I am home for a while (I hope), I am continuing to enjoy this play with fabric, thread, and color. I'm trying another way to introduce additional fabrics into an applique piece. I want the design to emerge as I stitch. I don't want to plan too much. So much more interesting to me.
I hope you are enjoying color in your world.
Sunday, May 12, 2013
Kimono as Canvas
Tuesday evening I am teaching a small class on the use of kimono as a canvas for fiber art. We will construct very simple kimono. Then the artists will have their way.
I have long been attracted to the kimono shape. It is easy to wear. It is easy to make. It is perhaps the original zero waste design, though the bog coat probably takes that honor. The kimono has so many more possibilities though.
If you are interested in kimono construction, you'll find an excellent pattern for it from folkwear. It contains two versions of kimono plus the very wonderful, and also zero waste, monpei (pants). I have made and continue to enjoy all three pieces in this pattern grouping called Japanese Field garments.
In preparation for teaching the class, and as part of my participation in the What-If Diaries taught by Jude of Spirit Cloth, I am working on a small white linen kimono.
After completing a pair of white linen pants, I had a nice size remnant, just enough for a child sized kimono. I drafted it proportionally to my available fabric, rather than using a pattern.
I sewed the sleeves to the body, as well as the underarm seams and the front band by machine. Then I finished all the edges, using various techniques, by hand. It is a great travel project.
The first part of the What-If Diaries is a study of white on white - using the shadows, and the slight variations in white to create texture, shape, and artistic composition. So I started the embellishment of my little kimono with a moon from one of its remnants:
Sunday, February 17, 2013
Design Mending a la Jude
![]() |
running stitch then combination wrap stitch |
One of my favorite garments is a kimono made out of a 7 ounce denim - not as sturdy as indigo, I expect, but it was the closest I could come to indigo at the time I made it. I have now discovered sources online, like especially Shibori Girl.
As denim does, this one is beginning to show wear at the edges. First it fades to white, then it begins to fray. And without my taking note, the entire garment has become a softer blue, a softer textile, a softer item to wear.
Today I am adding some stitch to the edge to provide a buffer from normal wear. It's a stitch I made up, but it is probably not original with me.
I started with a running stitch all along the edge. Next I anchored a thread at one end and began to wrap the running stitch on both sides - moving from a stitch on the front to a stitch on the back.
![]() |
Looking a little faded. I like it. |
To me the resulting stitch looks like bird tracks. I'll call it the bird track stitch for now.
Subscribe to:
Posts (Atom)