Showing posts with label Gail K. Show all posts

Monday, April 29, 2019

It Must Be Spring


I made a dress!


The idea of wearing a dress crops up every spring. I start seeing interesting and lovely patterns for dresses and I delude myself into thinking, yes, I will definitely wear that dress. So I buy the pattern and make the dress.


Actually there are a few dresses from previous springs that are in current rotation. I always get complements when I wear the Memphis from the Sewing Workshop. It is so comfortable. So comfortable that I have trouble remembering to suck in my belly.


The dress that caught my seasonal attention this year is the Adeline from Style Arc. It looks great on almost everyone. I'm not yet convinced it looks great on me.


Since I'm trying to use stash, and I wanted something solid colored, I chose this piece of eggplant cotton sateen from Gail K. It was fairly inexpensive, as I recall, so I figured it would be a good piece to try.

Looks pretty good with the Tremont jacket, I think.
It does not have as much drape as some of the linen Adeline's I've ogled online. I would have loved to make a linen one but just cannot justify a fabric purchase at the moment. Maybe after I burrow through stash a bit more I'll make it again in a soft linen.


As I was making it, I began to worry that it would look like scrubs lengthened to dress length. That V neck and cut-on sleeves might give it that vibe.


I've had good luck with Style Arc patterns. The only trick is to remember they 3/8 inch seam allowance, as well as the 1/4 inch seam allowance on enclosed seams.

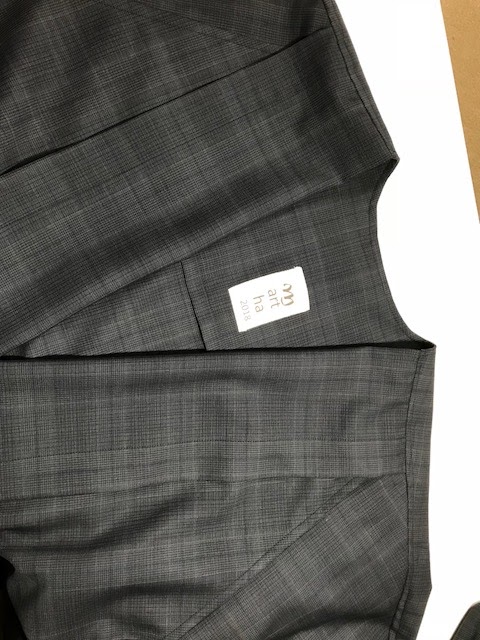
wrote myself a note on the back side of the fabric
The instructions are minimal but there's not much need with the Adeline. StyleArc patterns tend to be several notches above something so plain as hospital scrubs. And I think this one is nicely drafted to avoid that look.


It has good bones with its lantern shape and a slight high-low hem. It has big patch pockets. And you're supposed to roll up the sleeves. Both the neckline and the hem is faced. I like a faced hem, especially with top-stitching.


I made one minor change to the size 16, bringing the V up 1 inch. I am always leery of V necks because they tend to be too deep for me. I looked at lots of them on Instagram and Pattern Review. No one mentioned a too-low neck but you can't exactly raise the neckline after the fact.


I actually think I like it. My legs are not used to seeing the light of day, but I can wear leggings, maybe. At the very least, I'll wear it around the house, and maybe to the grocery.

Tuesday, February 13, 2018

Haiku Two


The Haiku Two jacket pattern was a remake of their original Haiku pattern. And now it too is out-of-print. What a shame. It has that Japanese, Miyake-like cut and shape that was the signature of the Sewing Workshop, early on.

I made the original Haiku a looooonnnnngggg time ago out of black and white herringbone silk. I remember wearing it while sitting in a meeting one time right after I became department chair. Maybe it was Valentine's Day.

It's probably good I cannot find a picture or any evidence of this original Haiku as I think it wore me. It was ginormous. It had these glorious deep patch pockets. I wore a thick red heart brooch with it.

When the Haiku Two came out, with its less voluminous lines, I intended to make it too. Finally I did and here it is.


The fabric is wool men's suiting, very light weight with great drape. It was a cut piece from Gail K in Atlanta. It was a dream to cut, press, sew. A truly lovely piece of cloth. The pattern does not call for lining which is fine by me. Living in the southeastern U.S.A., I get a long better mileage with an unlined light-weight wool coat.


I'm not sure why the Haiku Two is OOP. I think it is such a pretty style.


I love the lapels in the front. One can never have too many vertical lines.


I love that the sleeves are raglan in the front and cut-on in the back. The pattern pieces are crazy shapes!


And I love all the top-stitching.


Finally I love that it still has the glorious deep patch pockets.


So far I've worn it once. I think I'm going to have to shorten it. It is still too voluminous in this longer version. That means sacrificing the wonderful pockets but I can probably add smaller ones. Or maybe hidden ones.


Or maybe I should leave it alone!


Wednesday, January 10, 2018

Real Man's Shirt


I love making shirts.

I even have a shirts tab on this blog, though I've not updated it in a while. I find all the details fascinating from the button plackets on the sleeves to the double row of top-stitching on the cuff. The latter is especially fun since the double row shows on the outside, but not the inside!


I guess I qualify as a sewing nerd when it comes to shirts.

Though I've made many a shirt for myself and a few for the grandboys, I had never made a regular man's shirt until last month. My guy wanted a shirt to match one the 2 year old grandson wears. We all looked high and low for a similar shirt with no luck. The obvious solution was for me to make one for each of them.

Now I knew DH would discourage me from this project, so I kept it under wraps until Christmas. This was both good and bad. The down side to such a surprise is that I could not take his measurements. The next best thing was to use one of his many existing RTW shirts. The man loves shirts and has more than a few.

Men's patterns are not plentiful so that was a challenge too. I wanted a shirt pattern with ALL of the conventional men's details. Vogue 9220 comes pretty darned close. It has the button plackets on the sleeves and the instructions are quite clear. It has a yoke and forward shoulders. It comes in three views - standard, slim fit and formal wear.


The sizing is not conventional for men's shirts from RTW. I was really hoping it would be sized by neck size and sleeve length like DH's shirts. But I guess it makes sense that the sizes are listed by chest size, as that is a good place to start fitting.

Comparing his RTW shirt with the pattern tissue, I chose size 40, standard fit. Sleeve length was easy to adjust. The neck size seemed about right.


The fabric is a lovely cotton shirting from Gail K. With a plaid or stripe, I like cutting the top yoke in two pieces with a center back seam. This allows me to create a solid line where the yoke joins each front. It also creates a chevron in the back.


Plaids are such fun, especially on a man's shirt, because there are great places for bias.


The little guy's shirt was made with an OOP Ottobre pattern.


It was child's play compared to my guy's shirt. Some of the conventional details were missing from the pattern including the yoke and the sleeve placket. I think that's OK for a  two-year-old.


In the end my guy's shirt is too tight and the little guy's shirt is a bit large. But they were sweet to pose for the picture anyway.


By the time I remake DH's shirt, the little guy will have grown into his. Fingers crossed.

Saturday, October 14, 2017

Another Hadley


So I went stash-diving for fabric to make the Grainline Archer shirt and came across this cotton border print from Gail K in Atlanta. It's been languishing in stash long enough now to be considered free. That's how it works. I've had it long enough to forget how much I paid for it, so it's free.


I would have used this for the Archer shirt but, alas, not enough fabric. That's another reason why I like Grainline's Hadley shirt. And the Hadley is really a nice pattern for a border print. I did not have enough to cut both sleeves from the white border, so one is solid black. As is often the case, this is actually better than it would have been if I'd had enough fabric.


As I mentioned in my previous post, this is a simple make so it should have gone smoothly. And it did with just one or two glitches.


The wrong side of this fabric is not noticeable until you attach the shoulders using French seams, and finish the neckline with self-fabric bias binding. Then it's real noticeable.


Also I found it relatively easy to sew the hem facing up-side-down. I swear, I'm going to go back and add some notches to the top of the facing so I don't fight that battle again.


Here's something I missed on Hadley #1: you use only the outer two notches when forming the inverted pleat in back. I am guessing I would have noticed that sooner if I had used the provided facings. This pleat is deeper and prettier, I think. To help it keep its shape, I stitched the inside fold of the pleat about 1/8" from the fold.


I made the same changes to this Hadley as the previous - bias binding for finishing the neckline and sleeve hems, cut both front and back on the fold, and I shortened the sleeves by 2" (!).


I think I like this Hadley even better than the first one, maybe because of this fabric. It's a cotton lawn and a tad sheer so I may need a cami underneath.

Next up: Grainline's Archer shirt. I have it cut out already.


Friday, September 15, 2017

One white shirt, two pockets


White shirts have a shorter life span than some pieces, I've found. The white becomes dingy and the stains are in a place where no amount of boro design will save them. And so I will cut them up for quilts and other small pieces.

I added a button to an otherwise weak juncture in the construction at each sleeve cuff.
And, as it happens, white shirts are great fun to make. This one is based on a tutorial in Sew Confident from the Sewing Workshop. It is a hybrid of the Liberty shirt and the MixIt shirt. Their version is more of a tunic length but I kept the original length of the Liberty with its deep hems and pretty miters.


If you are familiar with these two patterns, you can probably see that the neckline is from the MixIt and the rest is the Liberty with shorter sleeves. I think the V neckline of the MixIt is sweet, especially when the tiny collar is omitted. And the Liberty hem is always appealing to me. I really like those diagonal seams in the front and top-stitching the facings creates a faux princess line.


The tutorial suggests that you shorten the sleeves at the shorten-lengthen line but I was pretty sure that would make the sleeves too tight on me. So I shortened mine 3" at the hemline and redrew the cuff portion. You may be familiar with this easy formula for redrawing the hem facing/cuff: fold the tissue along the new hem line and trace the side seams.


The fabric is a cotton shirting purchased at Gail K in Atlanta. They have such wonderful men's shirting. This one has a dolby weave so it's not just a plain white shirt.


Of course, Diane Ericson's pocket challenge is on-going so I added a pocket. It's placed too high in the picture at the top but I fixed that. It has an inverted pleat and a flap. The first version was too large so I'll save that for another project. It was fun to just play with a small piece of fabric, folding until it pleased me.


The pocket structure is a little more visible here:


I am enjoying following along with Diane's pocket challenge on Instagram. Hers are always so artful, whereas mine are more utilitarian.


This zippered pocket was added to my jeans vest after I wore it for the first time. Originally I constructed it with only one pocket - the breast pocket. I decided then that I'd enjoy it even more if it had another larger pocket. I was able to harvest a pocket from the scraps remaining from the raggedy jeans, as well as the zipper. The panel above the zipper is from the fly! I simply top-stitched it down, but it does not show much at all on the exterior. I like that it is behind the shadow of a pocket from the original jeans.


Now it's even more fun to wear!