Showing posts with label tower plackets. Show all posts

Monday, April 1, 2019

Berwick Street Tunic


Happy April! This is spring. The sun is out. I'm happily making clothes. And the temp is 35F. Maybe not spring yet. But I have my first make (clothes) in the studio since the official start of spring, March 20. It's the Berwick (pronounced Ber'ick?) Street Tunic, a new one from the Sewing Workshop.


I like it. A lot. It has a sweet mandarin collar, and hidden front placket closure, some pleats strategically placed in the mid-section, and sharp set-in sleeves.


I made this first one from a light-ish medium weight printed cotton. The pattern is printed in groupings that look like broad stripes. I played a little with that, cutting the right front cross grain.


The included sleeves have a bias vent closure at the sleeve hems. I'm not overly fond of that treatment so I installed a standard sleeve placket, using Cutting Line Designs excellent instructions in the The Blouse Perfected.


I'm realizing that this makes the blouse a bit more masculine. I can see where the continuous bias closure is a bit softer. Maybe I'll use that next time, especially if I use a soft, drapey fabric.


Also I may take a little pleat the sleeve before applying the sweet narrow cuff. I think it's a little big and needs just a bit more shape.


Other than the sleeve finish, I made no changes to the pattern.

Things I love:

  • the fit in the shoulders. 
  • the clean serged finish for the side vents (great new-to-me technique)
  • sweet mandarin collar
  • narrow hidden front placket


This is a cheerful shape and I quite like it with slim pants like the Helix pants or Pencil Pants.


Monday, November 19, 2018

Archer Button Up in White Linen

This one has been in the in-box of my mind for quite a while. I cut it out and took the pieces to NH to visit DS and family. No real sewing occurred there. DGD and I retrieved the sewing machine I've stashed there and made some scrunchies she wanted. I will cheerfully sew anything with her!


When I arrived back home, I decided to take my time making this Archer Button Up. What a pleasure it was.


I made one other Archer, the view with the back peplum. I like it quite a lot and picked up some ideas for improvement.


The view I selected this time is almost a classic shirt. It contains a double layer yoke with forward shoulders as well as a collar with a collar stand, though it's not at all obvious from their line drawing. The back contains an inverted pleat and no peplum.

The line drawing looks like a Peter Pan collar. The pattern contains a collar band and collar.
The not-so-classic characteristics include separate right and left fronts. The left front has a cut-on front placket and the right front has a separate placket pattern piece. This could be quite handy if you're working with a plaid and want to position the front placket on the bias, or if you want to highlight a second fabric down the front.

It's not handy if you're trying to match a pattern because you have an extra vertical seam to match. I cut two left fronts - there was no need for a separate button placket piece. In this solid white, the top-stitching makes it almost impossible to determine if the front band is a separate piece or not, IMO.


Another not-so-classic characteristic is the continuous bias sleeve placket.

Although this is faster than a typical menswear shirt placket, I don't think it is quite as sharp-looking. I have fun making conventional menswear shirt plackets every time I don't screw up. This time the sewing goddess was watching over me and I got each completed in a single try. Hooray!

I do like the notched corner of the Archer shirt
I used my modified collar stand from my previous make of the Archer. It's a little deeper than the collar stand included in the pattern envelope. I'll make another version with the classic collar and stand at some point in the future.


I shortened the sleeves per my notes from version 1 of the Archer shirt. My arms are not proportionally short. Reviews over on pattern review indicate this is an issue for lots of people.

It's worth noting that the sleeve edge has a lovely curve where it attaches to the cuff. It is such a nice draft. It has just the right amount of poof and looks better on the body, I think.


I made one other teeny-tiny change in the pocket, something no one will ever notice. It's the little things that make sewing fun for me. I top-stitched each pocket onto the shirt in what is mathematically a continuous loop. That is, I started and stopped at the same point. The appearance is just 2 rows of top-stitching. It secures the top corners nicely.


I used flat-felled seams throughout the process. The seam allowances are only 0.5" so a mock flat-felled seam was tricky. Midway through I realized this was an opportunity to make real flat-felled seams by positioning the back seam allowance below the front seam allowance.


Of course, it's a bit anxiety-producing to sew that flat-felled seam from the shirt hem, under the armpit, finishing at the sleeve hem. It's like a journey to the center of the earth. Woot! when I successfully arrive at the center.

Woot!

I made a change in the order of completion. I prefer to finish a shirt tail hem before sewing the side seams. This reduces the size of the wings at the hips, I think. Otherwise the shape of the hem tends to flare out at the side seams when the hem is finished.


It was fun to press it this morning and look at it, all crisp and white on the dress form. That won't last but I will definitely enjoy having this basic in my wardrobe.


Saturday, October 18, 2014

Vogue 1414 Day 4 and Complete!


Final Steps:
  • Cuffs attached 
  • Shirt tail hemmed
  • Sleeves inserted
  • Bumpy stuff flattened
  • Buttonholes (always a nail-biter)
  • Buttons
Cuffs

I was reminded of a tip from sewing friend June when adding the cuffs. Place cuff and sleeve right sides together, keeping the cuff facing out of the way. If you push the cuff piece about 1/16 inch beyond the sleeve placket edge. Then when you turn it right side out, grade the layers, and tuck the raw edges inside, there is just enough room. Of course, this is known as allowing for turn-of-the-cloth.

When I line up the edges perfectly, with no allowance for turning the cloth, there is either the little bit that wants to jut out, or worse, that awful buckling of the sleeve placket. This fine cotton shirting only needed that 1/16 inch but of course heavier fabrics need more.


Shirt Tail:

Once again, I used Pam Howard's effective technique here to create a smooth curve on the shirt hem. I had added a center back seam to allow for a little curve in my back, so I also created a vent. 


Alert!

Sweet, sweet Pam has given me a link so that you - my blog buddies - can sign up for her excellent shirt making class on Craftsy and receive a discount:


This class, along with the newer one on constructing a tailored jacket, are really wonderful. I use techniques from those two classes constantly.

Bumpy Stuff Flattened

Even with the turn-of-the-cloth technique above, I sometimes grind my teeth when I put a buttonhole in the collar band. If that one looks bad, it is really, really bad. You know what I mean.

My Bernina makes gorgeous buttonholes but it likes a flat surface. So I steamed the collar band as flat as I could, then used the clapper and left it there until everything cooled. The buttonhole went in without a hitch. Hooray!

Smashing

Smashed

Buttonhole success!

Buttonholes and Buttons:

The rest of the buttonholes were a breeze. 

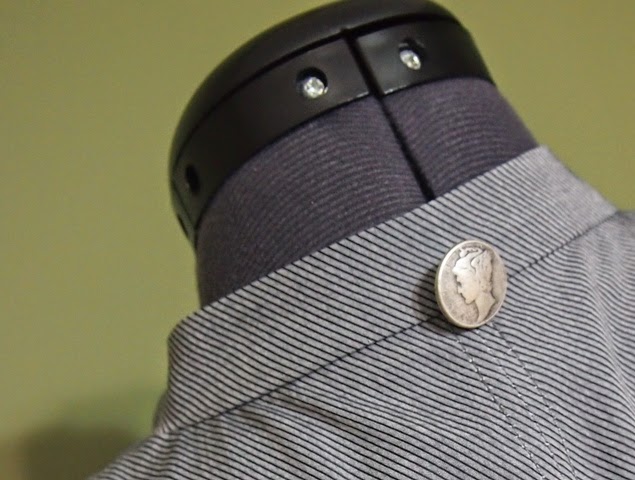
And I just love these buttons. On a recent vacation I shopped at a wonderful little button shop in Montreal. I purchased way too few of these metal buttons made from Canadian coins. So I had to use the US coin buttons on the sleeves. 

I purchased one larger button in Montreal and so put it on the back.

This is a really good pattern. Try it. You'll like it.


And don't forget to use the discount Pam passed along over on Craftsy. Thanks so much, Pam!


Wednesday, October 15, 2014

Vogue 1414 Day 3

Completed today:
  • Collar band
  • Side seams
  • Sleeve plackets
  • Sleeve pleats and side seams

The collar band went in smoothly though it still needs hand-finishing and top-stitching.


I was curious to see how the instructions for the sleeve placket stacked up against the excellent instructions in Louise Cutting's The Blouse Perfected. Those instructions truly are near perfection for a classic technique that is so counter-intuitive. And it's one of those techniques that I have to study a bit each time I make a shirt with a placket.

Used the other side of the fabric for the placket since the *wrong* side shows on the flounce anyway


I like Louise's instructions better. For starters, the plackets for this pattern do not include interfacing. Interfacing is key to being able to carefully fold and stitch precisely on a tower placket, I think. 

There are a few other aspects of Louise's instructions that are superior but I won't detail them here. Her instructions are so much better than my version would ever be. If you are interested in clear, near-fool-proof directions for plackets, I recommend you buy her pattern The Blouse Perfected, even if you don't like the rest of the pattern!

Next up - cuffs and inserting the completed sleeves.

Friday, June 1, 2012

Plackets in Pictures

Here is my basic process for making shirt plackets:

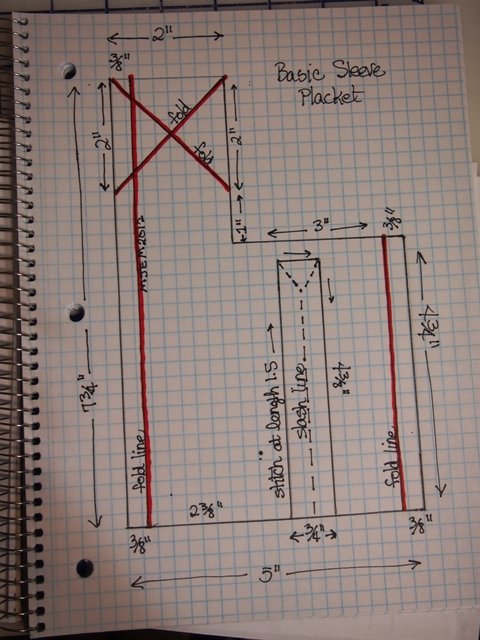
Step 1: Cut out a standard placket piece such the one shown below. Mark the rectangle to be stitched and slashed. Press along the fold lines, shown in red below. A little spray starch helps. Once pressed, it looks like a church with a steeple. The steeple looks a little off at this point because only one side of it is pressed.

Step 2: Place the placket piece in the marked position on the shirt sleeve. The wrong side of each is face up. Check that it is closer to the back of the sleeve than to the front. Also check that the short leg of the placket is closest to the back side seam. I've trimmed bulk from my steeple but it's not necessary.


Step 3: Using a short stitch length (e.g. 1.5) stitch around the placket opening pivoting around the top. Then slash this opening open creating a Y shape at the top. Clip close to the stitching in the corners. Here is how it looks from the right side now. I haven't turned the placket to the right side yet.


Step 4: Turn the placket to the right side and press. There is a gap of about 3/4 inch in the opening right now.


Step 5: Fold the short leg under covering the raw edge. This is a second fold because you made the first fold in step 1. At the same time, shift it to cover the 3/4 inch opening. Press in place.


Step 6. Edge stitch the short leg covering the length-wise raw edge. Note that there are still raw edges at the top of the short leg right now. 


Step 7. Now fold the long leg into its final position, accordion style. Press. It covers the short leg, but has not been stitched into this final position yet.


Step 8. It should *look* like a finished placket now even though it is not stitched yet. Notice how the raw edges of the short leg get covered. Magic, right?


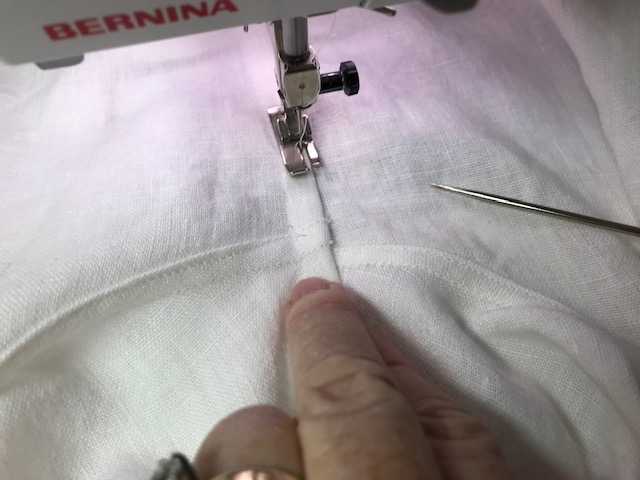
Step 9. Edge stitch the long leg into position, making a *P* shape (see note below). Start this stitching at the raw edge of the sleeve (the leg of the P), being careful to keep the short leg of the placket free. As you approach the top of the placket (the church steeple), raise the presser foot with the needle down. Now smooth the top of the placket into position with the top of the short leg sitting comfortably under the steeple. Finish edge stitching the steeple (the top of the P) of the placket to the shirt.


Step 10. As dear Shannon Gifford would have said at this point, stand back and admire your work! Way to go!

Note on the *P* shape. This shape is a minimum to catch all the remaining raw edges. Most shirts will have a decorative *X* in the upper part of the P, as well.

Design options are endless.

Thursday, February 23, 2012

Vogue 8746 - a basic white shirt

Vogue 8746 is a quiet little shirt pattern with nice lines, I think. I like the pleats at the shoulder, as well as the collar. The collar reminds me of collars I've seen on the BBC series "The House of Elliott." And I wanted an excuse to try out the tower placket from another Vogue pattern - 1204.

Issey Miyake cuff
My last shirt, Vogue 1215, was a bit challenging to fit because I did what I usually do as a slightly pear-shaped person - make the size matching my bust measurement and then make sure the hips are big enough. And the shoulders were too large. That's not overly easy to fix.

sleeve gusset
So with Vogue 8746, I decided to do what Louise Cutting recommends - a kind of slash and spread approach. I started with a muslin of only the shoulder area to get that right. Then I split the front piece as well as the back piece and spread them enough to provide adequate hip room. The fit was really pretty close.

Except for the sleeves. The upper sleeves were too tight. I compared the measurements to other shirts I've made and this one is much more close-fitting. So I inserted a gusset in the underarm seam of each sleeve.

The result is a pretty basic white blouse - a go to item, not too exciting on its own, but definitely a nice filler in my wardrobe.

Thursday, February 9, 2012

Tower Plackets

includes a tower placket
As mentioned in a previous post, I had the pleasure of taking a class on classic shirt details from Pam Howard last weekend. The very last technique covered was the tower placket, the traditional placket found on most men's shirts.

I was totally intrigued and wondered if, perhaps, some day, I too could make a tower placket. There wasn't time to actually try one in the class, but I watched Pam make one. Pam is very dexterous and can fold, press and top-stitch the most amazing details ever. This, as it happens, was better than reading an explanation, better than technical drawings, and almost as good as trying it myself on the spot.
Back at home, I found a pattern - Vogue 1204 - in my stash with just such a placket. I doubt I'll ever make the shirt in this pattern (and definitely never those skinny jeans), but it does contain the tower placket. I'm applying this sleeve finish to another pattern - Vogue 8746.  V 8746 is a bit of a sleeper, I think. I like the shoulder pleats and the collar on view A.

Pattern adapted to include the tower placket
The directions for making the tower placket in 1204 made absolutely no sense to me. Even the technical drawings looked wrong. But somewhere in the deep recesses of my little brain, I could still see Pam's nimble fingers pressing, turning, folding and simulating where to top-stitch.

Voila! It worked. I did have to re-do my first one, but the second and third were fine. Thank you, thank you, thank you, Pam.