

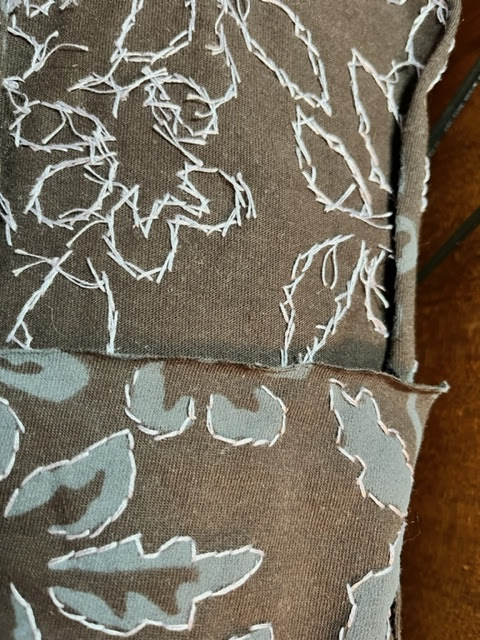
The process is quite meditative - repetitive and yet providing a sense of accomplishment. I used my good old running stitch to outline the stenciled shapes. My hands just work the stitch without my mind even kicking into gear.

The details:
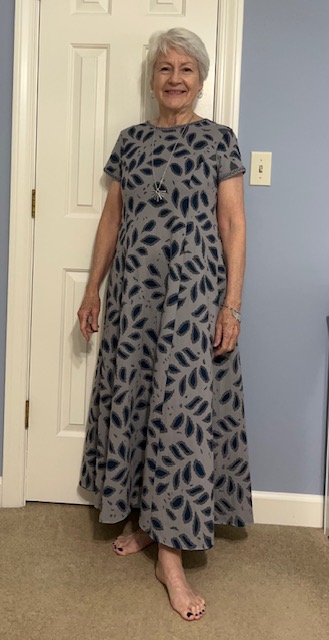
The Factory Dress, size s, with added length to the medium length
Outer Layer: Dove
Under Layer: Peacock
Cotton Embroidery Floss for embroidery: a dark blue-gray from stash, DMC floss - 2 strands
Embroidery stitch: running stitch
Buttoncraft thread for construction: Gray
Stencil: New Leaves
Based on a dress worn by one of the other participants, I lengthened the medium length dress by 7". Once I got started, I could see that would graze the floor on me, so I removed about 2.5".

There were lots of pieces! Due to the armhole princess seams, there are 3 front sections and 3 back sections. I chose short, almost cap sleeves.

Sections of the dress traveled with me to Shakerag, and on several trips to visit grandchildren and other family travels. I struggled just a bit to find enough of the DMC floss I selected and ultimately was able to order it online. It is a shade of blue that matches the AC *peacock* knit fairly closely. I like that the underlayer picks up the color of the embroidery stitching.
During the April AC workshop, Linda Lee mentioned a great idea for attaching binding to the raw edge of a garment. She suggested basting it to the back side, then wrapping to the front and stitching the decorative stitch.

The basting stitch is easy to remove once the decorative (and purposeful) stitch is complete. On previous garments, I've struggled to keep the binding wrapped tightly around the neckline raw edge while focused on the decorative stitch. This fixed that. So, thanks, Linda!


Now I've started on the other kit I purchased while in Florence AL in April. This too is a dress - the fractal dress with a g-zillion pieces. The stencil is fairly intricate without a lot of open space for cutting away the interior stencil. After wearing the factory dress a couple of times, I realized that I did not want another heavy dress. This fractal one will be single-layer (giving me a bonus dress!) with the stencil outlined but not cut away.

There are really a lot of variations on these kits.
And while on a knits kick, I made some panties! Yes, I made underwear. I've made them before but recently was gifted this yummy fair isles cotton knit - just right. I used my old, old Stretch and Sew pattern adjusted for my current body. Satisfying, quick, and fun. Great partner with these forever AC garments.


