Showing posts with label tee. Show all posts

Saturday, August 12, 2023

1001001

As I begin a new year around our planet, I am pausing to think about the joy I receive from my hobby of sewing and other making. 


It is no longer all about the fabric. I do love fabric and fabric shopping, and I salivate knowing I am about to enter a fabric store, but it does not drive me to making one garment after another, as I've done in the past. Instead I am looking at existing garments and imagining improvements.

Though I am still enamored of patterns and will always use them - why invent something that others invent for a living - I do not feel the need to constantly try another new-to-me pattern. I have a fairly large collection of unused patterns when that urge strikes.

North rim of the Grand Canyon in Arizona

I want to push myself in new directions. In the last few weeks, I have been pulling out Diane Ericson patterns and I love her inspiring videos. Her patterns are unique, I think, in that the instructions are chocked full of ideas and variations on the pattern enclosed. The instructions are different from, say, Cutting Line Deisgn patterns, in that they invite creativity rather than precise results. 

Modified TSW Urban pants + self-drafted pullo-over

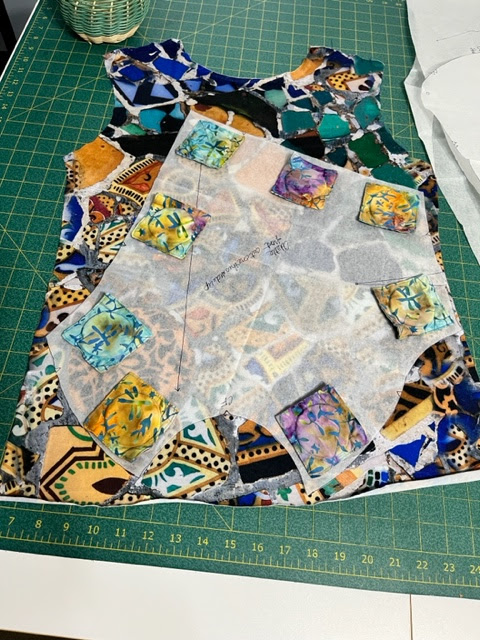
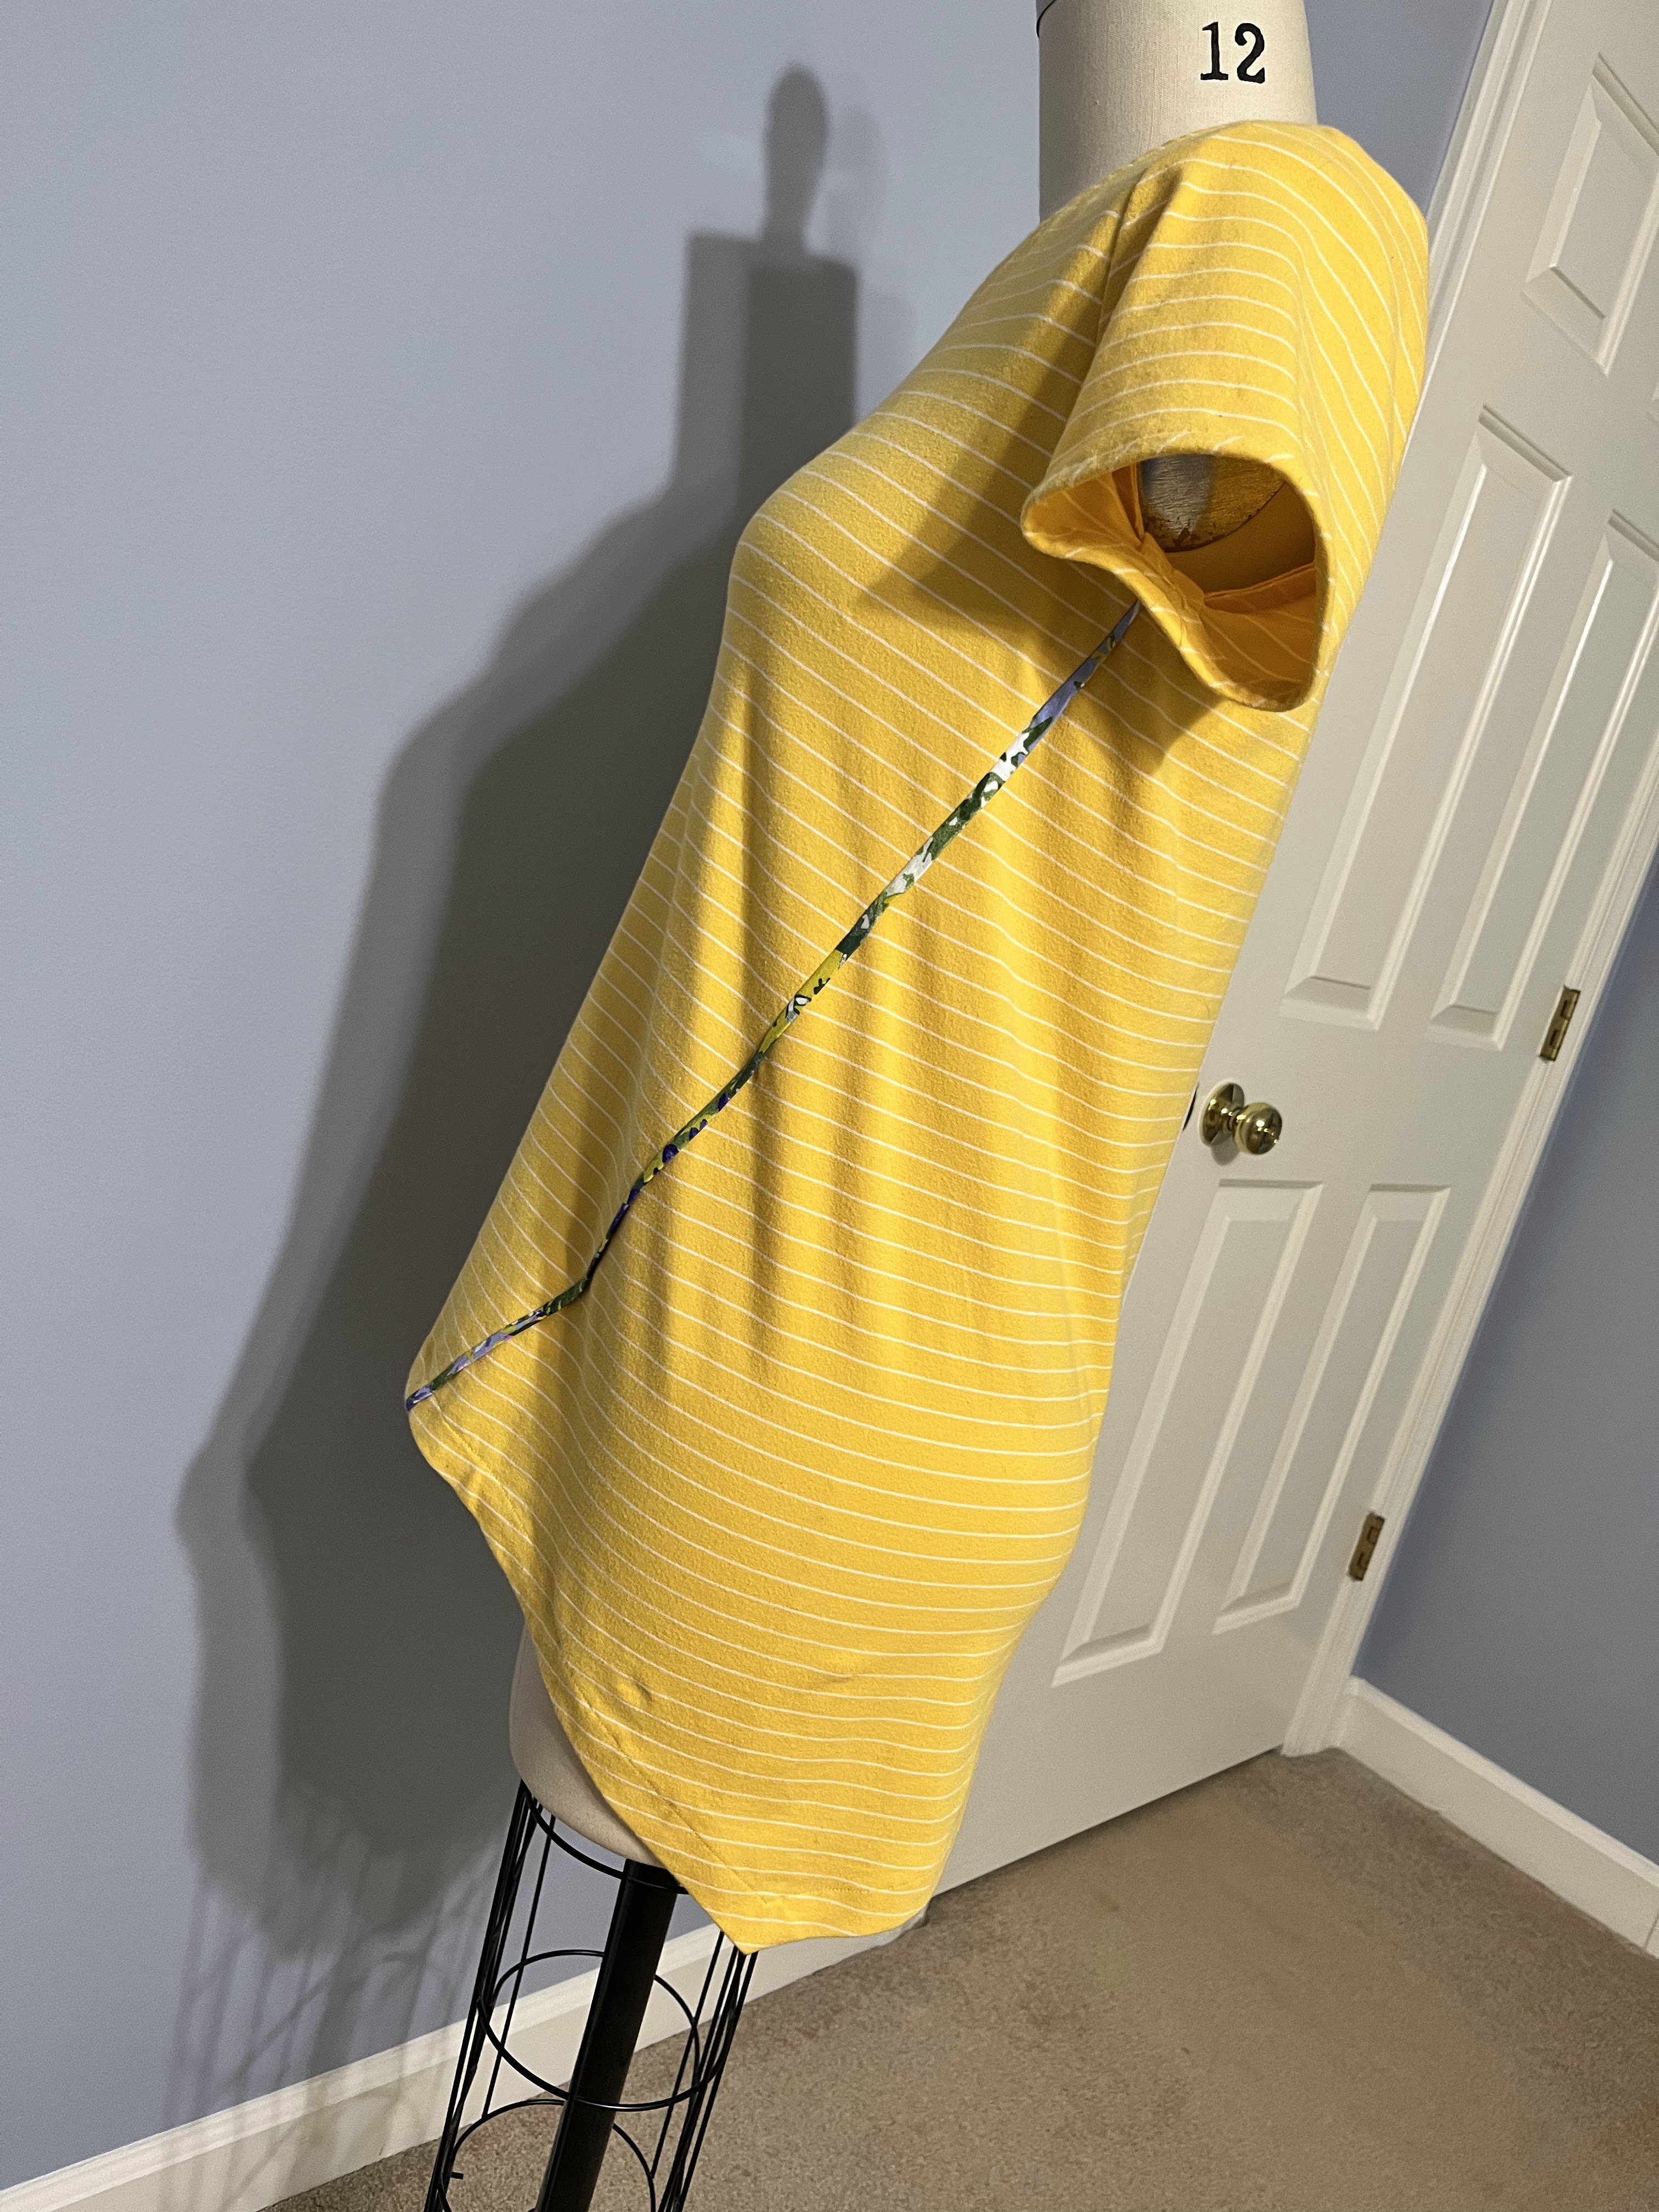
Here is my latest make. I am not too sure about wearing these pieces as an outfit. I may find them to be more useful as separates with other pieces. The fabric is light weight cotton pique from Five Eighths Seams in Charleston SC.

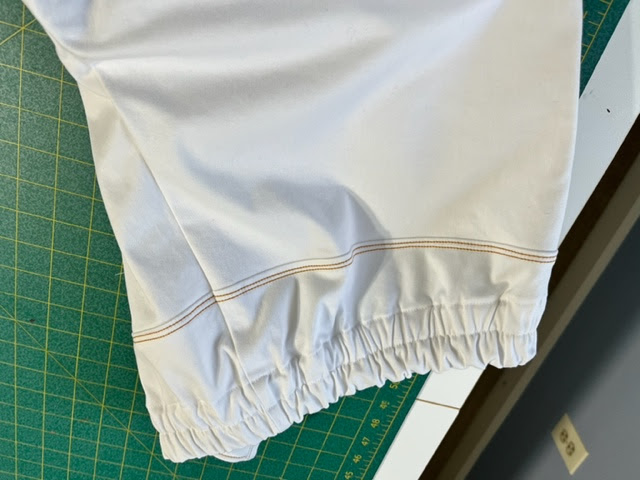
The pants are constructed with a slight modification to the Urban Pants pattern from the Sewing Workshop. Instead of tabs and buttons, I threaded a bias tube through a channel in the bottom hem. Then I gathered it slightly to give a little shape. 

The top is constructed from the pants remnants. I created to rectangles, roughly 25" x 25" each. I opened the center fron seam on the front piece enough to create a V neck. The triangles are folded to the inside and top stitched in place. I added a small pleat to each arm cap to bring in the silhouette a bit, but I may remove that and do something different. It is too cutsie right now.

It is not terribly creative but the process is engaging. I'll keep pushing Diane's approach to constructing garments.

A decade ago I spent one week with Diane at Design-Outside-the-Lines in Sisters, Oregon. It was the last one where she partnered with Marcy Tilton. I met some wonderful women and I was overwhelmed with inspiration. Though I was sort-of a deer-in-the-headlights during the workshop, I soaked up a playful attitude shared by all present.

Taos location for upcoming Design Outside the Lines

Now I am excited that I will spend another week with Diane in Taos, New Mexico next month. I am tickled. A space opened up and now I am working on the logistics.

Biking in Zion National Park

Meanwhile I have returned from a wonderful time with family in Las Vegas, NV, and Zion National Park in Utah. What a blast! My legs are still sore. My elbow scrapes are healing, as are the bruises. 

I bought two souvenir T shirts that I am treating as fabric. The price of the shirt does not change as sizes change so I bought the largest shirts I could. I cut open the side seams and began to experiment with some Diane-style ideas. I started with this very inexpensive, very large shirt from the Cirque de Soleil show I saw in Las Vegas.

After some play, I shopped by closet for clothes I made but never wear. This yellow shirt seemed to be ready for a remake. That yellow is cheerful but not good with my skin tone. So I never wear this shirt.


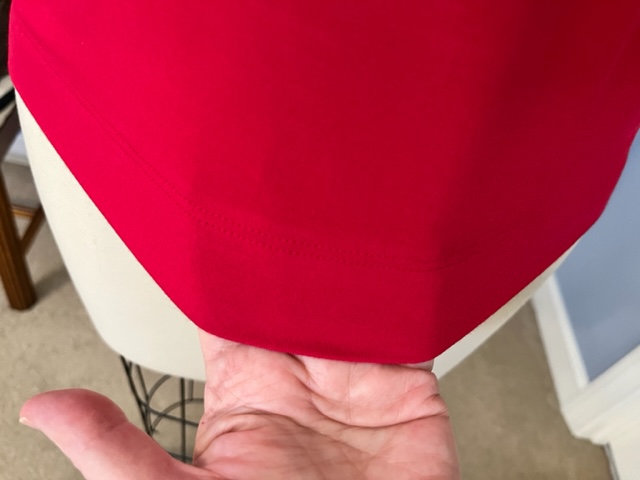
I used the Grainline Studio Lark shirt as my base. I was able to cut two long sleeves from the yellow striped shirt. I slit the front and back of the pink Love shirt with an S curve. Once I had assembled them, placing part of the back on the front and vice versa, I knew I had made a mistake. 


I sort-of wish I had kept the two images as they were in the original shirt and just cut them to fit the Lark pattern. My work-around was to cut some black-and-white striped knit into strips and zigzag onto the seam line. After washing and drying, it curled up and I'm OK with the result.


I hope that this new shirt gets more rotation than that yellow one. In any case, it was great fun to use for my experiment.

Canyoneering in Zion's slot canyons

*My title 1001001 is a palidrome when written in binary. Yep, I'm still a geek.

Thursday, February 23, 2023

Bricolage

In January, I attended a virtual class with the wonderful Mary Ray via my local fiber art organization, Southeast Fiber Arts Alliance. And it was just full of the kind of inspiration that makes you want to drop everything and get into the sewing studio. It was just what I needed!


We have a follow-up virtual meeting this coming Saturday. During this meeting, participants' bricolage projects will be shown. I cannot wait to see what everyone made.

So what is bricolage anyway? As I understand it, the basic idea is to use what you have. That is not all that difficult given the embarassment of riches I have in my fabric storage.

1st Attempt:

Ever since I made a vest from my husband's old jeans, I have been collecting old jeans. I volunteer at a food pantry that also includes a clothing closet. I sometimes rescue items that are deemed unredeemable and end up in the trash. The clothing volunteers are on to me and pass along used jeans when not useful.

I now have a fairly substantial pile of old jeans, some already diassembled. I tried to disassemble more but, two bandaids later, I simply cut them apart. Next I made *fabric* by stitching pieces together.

My idea was to recover 8 cushions on my sunroom love seats. Ha!

2nd Attempt:

When I finished covering one cushion, I stopped. It did not look that great, honestly. And it took forever to piece together enough to cover a cushion. This surpirsed me. Not one to let go too easily, I converted it into this pillow:

3rd Attempt:

About a decade ago, we visited Spain on a tour. In Barcelona I became enamored of Gaudi, of course. How could I not? And I wanted fabric to remind me of Gaudi. 

Tours like ours did not include fabric shopping.  Instead I bought a tshirt with a Gaudi-esque print on the front. It was a too-small size but I liked the front print, so I bought it, figuring I could work it into something.

After capturing the maximum amount of fabric from the tshirt, I pulled out some thrifted tshirts acquired over the years, one of which I had used for another project, leaving me with less that one tshirt.

I selected the Odette pattern from the Sewing Workshop's Odette and Ivy. It's an interesting take on a tshirt with lots of assymetrical piecing. 


My approach was to start with the focus fabric from my Gaudi tshirt. I wanted to use it as efficiently as possible while keeping the focus on it. It became the front piece.

I worked from there using first one and then another shirt to cut out the various pieces of the Odette. In the end I did not have a lot of choices. The sleeves and the lower band take a good bit of fabric. Then I spotted the bicycle and decided to incorporate that.

Next I began to cut apart the other tshirts, using parts for first the large pieces in the pattern, until I had each piece cut out. I enjoyed the process so very much. And I like that the funky bicycle made it into the final piece.

OK - bring on the bricolage!


Friday, April 29, 2022

Red Noto Tee and White Jeans


When spring rolls around, I feel like I need white pants. And the previous versions of white pants just won't do. It's a fiction that I allow myself, imagining I'll look better this year!

Fiction aside, I have been wanting some white jeans. A jeans fit is of course quite different from other pants styles. These are extra comfortable due to the elastic across the back. Otherwise they are classic jeans with a couple of odd darts near the front inseam. You can barely see them in the line drawing.

It is tricky to get the proper fit through the stride and I'm still working on it with this pattern. 

Somehow a couple of yards of white stretch denim came to be in stash. I know that I do not like stretch wovens, so I'm not sure why I made that mistake. Again.

But I was optimistic making these Getaway Jeans from the Sewing Workshop. For one thing, I have a pair of black Getaways in 100% cotton denim and I think they fit great.

So I cut out and constructed a pair with this part-lycra stuff. All was well until I reached the buttonhole. The jeans call for lots of lovely topstitching and I really like that. Inserting the fly zipper was smooth sailing. In my previous pair, I somehow got the right and left waistbands reversed, so I was extra careful this time.

Boy, do I wish I had cut the waistband so that the length-wise grain would run around my waist. The pattern calls for it to be cut on the cross-grain. No problem with nice stable 100% denim. But with this stretch, the buttonhole was difficult. After a number of samples, I determined that a buttonhole made with my automatic feature on my Bernina was never going to work. So I made one using the manual settings. 

I tried them on. They feel great. And they look good from the front, I think. Here I'm wearing them with last year's bias cut Emerald top published by Made By Rae in red linen. I do love that shade of red.

And here I'm wearing them with my recent Berwick Street tunic (the Sewing Workshop) hack. I rather like the navy contrast with the white.

Now the back needs some tweaking. I'm not going to show a picture, but I sure do hope I remember to extend the horizontal crotch a bit next time. Also I will avoid stretch wovens like this one. I feel like I'm pulling the pants up constantly. It might be my imagination, but the black version in 100% cotton denim feels much more secure.

Here with the Bristol top in Alabama Chanin organic cotton knit

I also finished my first and last Noto tee from the Sewing Workshop. It is a simple t-shirt with an inverted V shape to it. I hesitated to make one before losing some weight. Now my measurements fit into a size M so I gave it a try.

Super easy-to-make Tee Shirt, the Noto

I used a luscious red rayon jersey with nice drape. It was relatively easy to sew, not much rolling. And I so love this shade of red. 

I did struggle some on the neckline. Initially I tried navy and white striped rayon jersey, thinking the stripe would be pretty. I cut it on the lengthwise grain so that the stripe would have the desired effect. This failed. By the time I made it large enough in circumference, it simply flopped around looking sloppy.

So I used the standard signature t-shirt neckline suggested by the Sewing Workshop. It does not look great flat, but the puckers disappear when I wear it. And doesn't it look fun with this Fillmore Duster in the same shade of red?

My first try-on made it clear that this length, combined with this shape is not that great for me. I cut off about 2" and like it much better. Here is the BEFORE:

And here is the AFTER:


This is not the best shape for me. The color makes it feel successful but I'm not loving the shape. My hips are just slightly larger than my bust measurement and I think this silhouette highlights it some. Maybe I'll wear it and learn to love it. 

It is RED, after all.


Monday, October 25, 2021

Stencil Play

As I have blogged previously, I had the opportunity to take a class in Florence AL this past spring and learn some of the Alabama Chanin techniques. In addition to my two kits (blogged here and here), I purchased one of their stencils.

I have collected more than a few stencils over the years, especially those I've used over and over again with Nancy Shriber's contemporary sashiko technique. That is a sure-fire technique for me and I return to it over and over again. Such a meditative practice. 

I've also had some small successes with paint. I've used make-up sponges and I've tried stencil brushes. It is very hard, IMO, to get the paint applied smoothly. At AC, they use a commercial air brush machine that is very even and predictable. It does not change the hand of the fabric much at all. And the person applying the paint is an artisan in her own right. It takes just the right touch even with the best equipment.

Here is my first result using that AC stencil I purchased:

It is two layers of AC organic cotton and the sewing pattern is a variation on the Sewing Workshop's eTee. I applied the stencil to the outer light gray cotton. The paint is a metallic silver from stash. I used a make-up brush to apply it. It worked OK. But the paint was a bit uneven and, in places, it feels kind of leathery and stiff.

This is not terrible because I cut away most of the interior of the stencil, AC style. And I am quite pleased with the result. I sure do like the AC technique for applying a binding to a V neck. So good.

In September I took a class locally from Kathy Colt. The title was something like Printing with Natural Dyes. It checked a number of boxes for me so I signed up. And it was a great class.

The class spanned 2 consecutive days because natural dyes require quite a lot of processing. She wanted to walk us through the entire procedure from applying the thickened dyes to finished product. She gave us a recipe for creating the thickened paints from natural dyes. I'll try that some day.

before

The resulting fabrics are quite soft as the paint does not change the hand much at all. Natural dyes do finish much lighter than they look when initially applied though. This can be a good or bad thing, depending on your goals.

after

We had quite a lot of time to experiment on our own. Kathy brought with her a large selection of stencils, some purchased and some she created from photographs (another class!). She guided us in her process of applying thickened dyes to stencils on fabric. 

This was a "duh" moment for me. She uses a plain framed silk screen with the stencil sandwiched between the fabric and the screen. In a similar manner, she applies masking tape to fabric and prints geometric shapes flawlessly. Voila! The paints were so easy to apply evenly and not too thickly.

Kathy also brought a wonderful selection of her own creations - bags and garments and experimental pieces. She is a gifted artist, so inspiring. I have several samples from the class to incorporate in future projects and the left-over paint is still in my refrigerator. I must get to that soon!

My first step after Kathy's class was to purchase a plain framed silk screen. It is probably made from polyester and not silk. I don't think that matters much in this process. It was not expensive and I'm glad I added it to my tool kit.

My first project with this tool used up more stash of AC organic cotton.  The pattern is the Lark tee from Grainline Studio. I printed a front and back of a plain tee shirt with my koi stencil. I am smitten with the design. I took almost a week, working a few minutes each day so that the paint on each stenciled shape had time to dry. It was during a rainy period and it took a while for the prints to dry out.

I used ordinary fabric paint, navy blue. Unlike the natural paints, this produces a crisp dark image. I do love that! The silk screen worked like a charm. My work is not perfect, but it is getting better.

It has been suggested to me that you can make your own screen by placing polyester organza in a large embroidery hoop. I think that would work as well. However the framed one I purchased was not expensive. The paint does stain the frame or hoop. And I think it's easier to apply the paint in a rectangular space. So why not have a dedicated tool?

And there's more, right? I may create my own stencils now that I have a better understanding of the process and some keys to success. It is not a quick process but it is artistically satisfying.


Good times! I hope you too are finding time to explore your artistic side. We all have one.