Saturday, December 31, 2016

Goodbye to 2016

December went by me in a blur of travel and illness. Luckily the illnesses were not serious - just temporarily debilitating - the flu and shingles. And the travel was fun - one trip to NH to see our son and family and then on Christmas a trip to Charleston to see our daughter and her family. Both great trips.

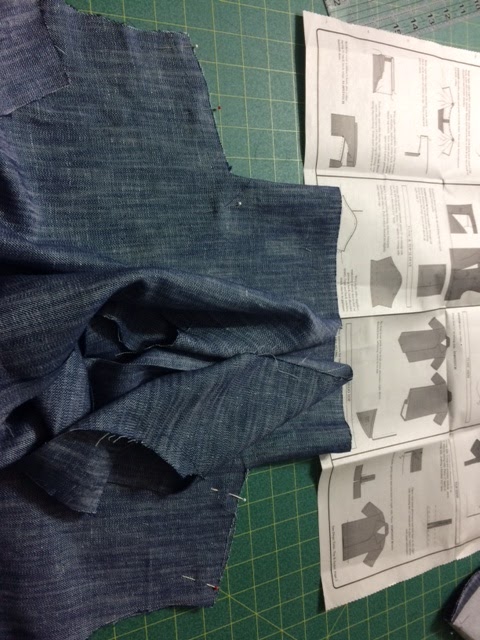
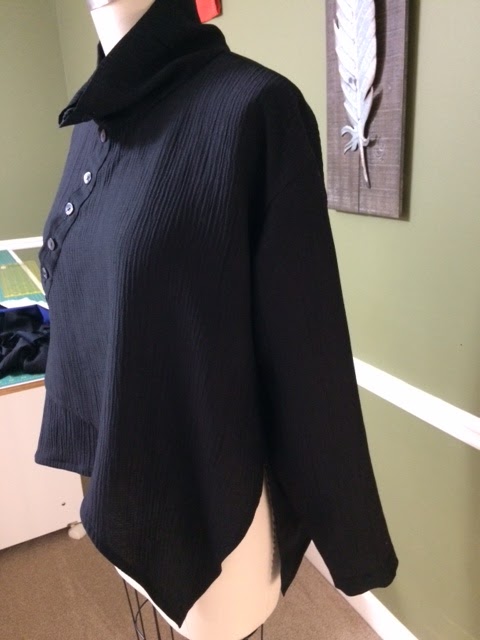
But I sewed very little this month. And here it is the last day of the year and I'm finally back in my sewing space making clothes for me! We have some fun plans tonight and so I'm making Quincy pants to go with a top I made a while back. The top is Vogue 9063 and I see that it is on sale today over at ClubBMV. I made it from one of those interesting Asian silks - actually 2 pieces that seemed to go together.

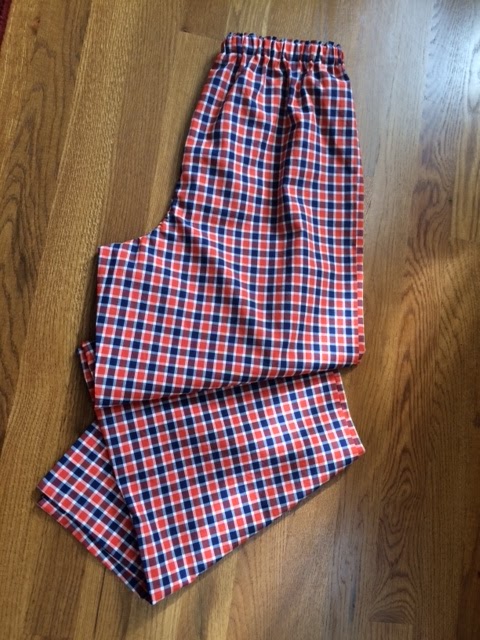
The Quincy pants are made using this mystery fabric. It's been in my stash so long I do not remember buying it and I have no idea of the fiber content. Seems a bit like tencil or some other kind of rayon. Drapey. Soft.

Vogue 9063 made over a year ago. I just love the fabric!

The Quincy pants are from the Sewing Workshop (TSW). They are narrow leg pants which leaves me hoping that I do not end up looking like a top-heavy golf tee in them. TSW also has the Helix pants - narrow leg for knits. The Quincy is intended for woven fabrics and so should work this tencil (?) fabric. I've made the Quincy pants twice before - once was unsuccessful due to poor fabric choice but the second pair was more useful. I have high hopes for this 3rd pair.

I'll be omitting the artsy buttons on the outside seam this time, but it is kind-of cute, isn't it?


I did manage to make a few more clothesline bowls as gifts, many wrapped in pretty cotton batik fabric. But I still like the naked ones. Have I mentioned that these are entirely addictive to make?


This one was given to daughter but her MIL liked it so I re-gifted it to her. It'll be no problem to make another!

This one I kept. I like the beehive-like structure and use it as a tissue holder.
Lastly I made PJ pants for two grandsons, and a jacket for one granddaughter. Then I ran out of time.


Onward to 2017! I'm closing out 2016 with a wish that we all spend more time making and creating in 2017. Life is shorter and shorter - here's to being happy where we find ourselves each day.

Martha

Tuesday, December 6, 2016

San Diego - the new one


The San Diego jacket or big shirt is an older pattern from the Sewing Workshop. I had the pattern pieces but no instructions due to a pattern inheritance. I was intrigued and have wanted to make it for quite a while now.


My interest in the San Diego was piqued when I attended Sew Kansas the first time. Linda Lee wore a version of this shirt in a light weight silk. She had decided to just stitch the two fronts together to create a pull-over. It was of course quite lovely on her.

Then this past summer at Sew Kansas, a young woman on the staff wore her version of it, this time lengthened and the volume was greatly reduced. She also shortened the sleeves in keeping with the hot weather. She looked so fresh.

Now the Sewing Workshop has re-issued it, this time with the original jacket, as well as a new top and a tunic. The top/tunic are from the same base pattern pieces but they are quite different from the original jacket. So this really is a two-fer. And now I can make the original one as a moderate weight winter jacket.

But I made the top first. The silhouette is more contemporary - so much less volume. The shoulders are just barely dropped, sitting almost on top of my shoulders. Also it is a pull-over, with a modified placket that ends half way down the front. Below that is a lovely wide pleat.


It still has the forward shoulders and the pretty collar shape.

I am not overly fond of short sleeves on shirts so I added 9" to the sleeve pattern piece for the top/tunic. Otherwise I made almost no changes to it, constructing a Medium as I usually do. I say almost, because after I had finished it, I made some selfies and discovered that I would really like having a fastener to keep the placket smooth.

Here is the before:


And here is the after:


I like the shape of the collar with the button better too.

You can see how far forward the shoulders are in this shot.
It was fun to make and I did definitely need the instructions, particularly for the Y-seam that creates the cut-on collar. Sewing that Y-seam required that I pay careful attention to the direction of the pieces. In the picture below, you can see I've pinned the shoulder seams and the facing/collar is piled up in the center.


The fabric is a silk-linen weave, I think, purchased at the old Textile Fabrics in Nashville, before they moved. I've not been back through Nashville since they moved, but would love to do so. They always had such interesting fabric.

The fabric looks like it would fray easily. Actually it was easy to sew and with a little care, should last a long time.
I hope to make an actual jacket using the original jacket pattern. The volume will suit my plan for outer wear. It has a two-piece sleeve but I'm scratching my head about that since the seam on the sleeve does not provide any shaping.

This is a good pattern, one I think I'll use several times again.


Monday, November 28, 2016

Like prayer beads

And better than nail biting...


This one will last me a while.


cotton batik remnants wrapped around clothesline. I like the lip on it.


Playing with the 5x7 idea in preparation for gift exchange at Fiber Art Fusion:

Paper rust dyed, stenciled, and hand-stitched together

Paper dip-dyed in black walnut juice. I'll do this again.


Silk leaf sewn by hand to fabric fused onto heavy interfacing and attached to navy blue paper

Friday, November 18, 2016

Joy in Color

These colors give me joy.


This, too:


And the Christmas cactus is about to burst with red blooms


Wednesday, November 16, 2016

Madrid, black and blue


Madrid is a beautiful city, clean, open, modern. And it contains some of the best examples of Picaso's later work. So inspiring and even disturbing during his blue period.

the two sides, black on top of blue

The fabric I used to make this Madrid shirt (The Sewing Workshop) is black on one side, deep navy on the other side. I purchased it at The Sewing Workshop in Topeka KS about 18 months ago. The navy side is so dark that it looks black until you compare it to the black side. It is 100% wool, something I questioned until I steam-pressed it. It is a fine double-weave, so fine that it has a glimmer like silk. And it is crinkly. It was mostly fun to sew and I love how it feels.


Initially I thought I'd make up the Madrid in a window-pane black and white plaid. In the process of planning that I realized that the curved seams in the front and in the back are design-only. So if I do make it up in something requiring matching, I'll just overlap the curved back pieces and cut as one. I'll do the same for the right front pieces. That way, I'll have no need to unnecessarily match plaid on the curves.


Since this is a solid colored piece, I followed the pattern closely. The curved seam in the front does create a stable base for the buttons. And it adds pretty lines to the garment, I think.


I like almost everything about this pattern. The uneven hems are attractive and they float over my belly. The sleeves are quite tapered which I think is a pretty shape. I am rather enamored of the curved band that contains the buttonholes.


But. I am not crazy about those dropped shoulders. With this puffy fabric, the sleeve cap is not as smooth as I like, though it contains no bubbles in the sewing. I guess I just prefer a sleeve cap that sits directly on my rather square shoulders.


Next time I may add some fabric to the hems. The pattern assumes that you will finish the raw edges of the fabric with a serger, I think. But I chose to use French seams throughout and did not want to use the serger on the hem where it might even show. There is only a 5/8 inch hem which becomes a 3/8 hem when you fold the raw edge under. This led to some tiny miters, not quite as pretty as deep miters.


This was a fun make. I almost always have a great time following a pattern for the first time, especially with patterns from The Sewing Workshop. And I see more potential for the Madrid shirt. I probably will not make the pants, a re-issue of the Zigzag pants. These pants are meant to fit like jeans with tight crotch and low waistline, so not my cup of tea.


I am checking my mailbox daily for their re-issue of the San Diego jacket.

Friday, November 11, 2016

Staying busy


Trying to re-center myself.


Turning my brain to OFF.


Feeling anxious.


They look so hopeful. I do not feel hopeful.

Thursday, November 3, 2016

Joy in Blue


Tuesday night at Fiber Art Fusion, Lynn guided us through the construction of a rope vase, a wrapped rope vase. I have had a great time making naked rope bowls. I still find that to be meditative. Lynn's tips for wrapped rope vases led to great fun and new directions in these sculptural makes.


My rope is wrapped with batik strips about 3/4 inch wide (a good activity for watching the news, if you can stand it). I used three different pieces of batik from the stash. There is one red linen strip in the bottom. A glue stick is used to secure the edges at the transitions and then when you zig-zag over it, it becomes very secure.


The first surprise was that when the direction of the curve changes, people-who-know-what-they-are-doing make a separate piece. Then the pieces are sewn together by hand! In the above picture, I'm making the upper section of the vase, the part where the vase opens.


So this piece has two sections that are sewn together where they meet. I like that it created a sharp angle in the piece. But of course it has me thinking of ways to create a smoother transition. And it has me thinking of ways to add some hand-stitch accents. And it has me thinking of combining the wrapped rope with naked rope...