Friday, August 30, 2019

Blue and White


Blue and white - forever and ever a favorite combination for me. Toss in a little rusty red, and my heart sings. Indigo dyeing is maybe even more seductive to me. It fits nicely with my craving for blue and white. I do love most colors and have trouble sticking with a curated palette, but I always return to blue and white.


So as I approach the birthday of DD1, my bio daughter, I created with my favorite combination. This is dangerous territory, making wearable gifts for people who don't want to hurt my feelings, but I cannot stop myself.

The first item is a haori in cottons and precious scraps from previous projects. I cut out the solid dark navy cotton with some petite mods for her tiny frame, and then proceeded to piece on top of that.


I've been down this road before, with less than spectacular results. So I was not surprised when I discovered that it just wasn't working.


All that piecing creates a very busy and somewhat stiff silhouette, like wearing a quilt. Not good.


So I took every single piece off the solid dark navy cotton and began again with the solid navy cotton pieces.

Finished Haori
I purchased this cotton print with the intent to use it with the solid navy, but I veered off course. Once back on course, I completed the haori, fully lined with the print.


Making sure that the outer coat and lining were as exactly the same size as possible, I sewed them together by first sewing the hems right sides together and adding several rows of top-stitching.


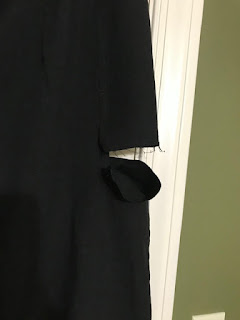
That's when I decided to add patch pockets.


I basted the two layers together to keep things from shifting during the finishing. The sleeve hems are a double fold silk bias, from a favorite blouse.


And I used some of the precious scraps for the front band. That was very satisfying.


At the end of this, my entire sewing room was covered with piles like this.


Rather than put it all away, I made DD1 a komebukuro or rice bag. Maybe she will like this, even if she doesn't like the haori. If not, I'll take it back and use it myself! I actually like it quite a lot. 


My first komebukuro bag, 6x6 inches
The komebukuro pattern is from kzstevens. I previously blogged about the red one. It is so worth the $6 for a PDF download. The download is just instructions and measurements, no pattern pieces.


This time I made the larger size described in the pattern. Of course, it's pretty easy to scale up or down, but I used her measurements. The finished large bag is 8x8 inches.


quilted bottom

I got to use some of those precious scraps (hooray!) and I quilted them to cotton flannel that was a little larger than the finished cutting sizes. 


Then I cut it down to the exact sizes listed in the instructions. This is key to making the pieces fit together.

I made a few changes to the instructions based on my previous experience making the small version. I made dots in the bottom square and quartered off the main bag piece, which is like a soft bottomless box.


That made it so much easier to attach the bottom to the body of the bag. I sewed it in 4 steps - one for each side of the square bottom, clipping at each corner in the main bag piece.


Outer bag before attaching lining
The lining was cut to the exact dimensions and sewn in 4 steps too. I got to use some scraps from Christina Daily's kind donation to me. It is shibori-dyed cotton and linen, and has a fairly beefy hand. There was no need to interface anything, given the quilting on the outside and weight of the lining.


I added a little rusty red square and lamp shades to the cording ends. These two additions finally did make my heart sing.


Note: I'm sure these little fabric scraps on the ends should not be called lamp shades. I just cannot remember the proper term, as taught to me by BSF.


I am so grateful for this satisfying hobby that allows me to surround myself with colors and shapes I treasure.

Monday, August 26, 2019

Finished


In May I finally had the pleasure of taking two classes from Cindy Grisdela, a fabulous quilt artist. I took a class on improv piecing and then another on free-motion quilting. I have been following her since seeing her work at the American Craft Council show in Atlanta. Follow the link to see her gorgeous work.

Her pieces are strictly art with no need to be something useful. Like all successful artists, she has developed a signature look too. She does commissioned work and sells at some of the ACC shows, though she hasn't been to Atlanta lately.

20x30 mostly linen

Since the classes in May, I've completed two pieces. This most recent one is composed entirely of remnants from clothing projects, so mostly non-quilting cotton, linen, and cotton-linen blends. It also includes one thrifted linen shirt that I dyed and over-dyed until it was unwearable.

In each case, I decided to hand-quilt them. I do love having a hand-stitching project at the ready. It is so calming to me. So in each case, I thoroughly enjoyed the process.


But I must say that, by the time I finish, I find the results to be ho-hum. Maybe I need to put them away and look with fresh eyes later. My continuing top passion is clothing construction where understated color schemes are my favorite. This influence may be limiting my color choices in quilting arts - maybe I don't make the bold color choices I would love in the end.

I particularly like the edge finishing techniques that Cindy describes in her book, Artful Inprov. For this piece I used her framing method. I like how these techniques create a frameless border that makes it less quilt-y and more artful


I haven't pursued free-motion quilting but I still intend to do so. I've taken several classes in free-motion quilting, enough to know that the key to it is practice, practice, practice.


So I'll make another Grisdela-inspired piece, for sure. Maybe the next one will be machine quilted. And bold.

Saturday, August 24, 2019

Red Pants!


How many pairs of red pants do you have?

Yes, I know. I too had zero red pants once upon a time. But then I asked Linda Lee if she thought red pants would be a good idea for someone with hips like me.  She said Yes! I have no idea why I thought I needed permission but sometimes you just need a little shove to take a little leap.

Now for some folks, the wearing of red pants does not constitute much of a leap, but for me it is so bold and brave, really. I feel like singing Let It Go when I wear them.

So this is not my first pair of red pants and it won't be my last. My mother used to say that red was her favorite neutral and now it is mine.


And these are not my first Pencil Pants from the Sewing Workshop. These are currently my favorite pull-on knit pants ever. I made them with a light weight ponte that I can even wear during hot weather if I stand in the shade. They may even be year-round pants, though the slightly cropped length will be less appealing during the cold months.


I like the shape. And I like the waistband finish that is smoothed with darts before the elastic is inserted.


The only down side is that it is a PDF download only. I've become quite used to that though and it doesn't slow me down. In fact, it is a kind of instant gratification. And the second pair goes together super fast.


So do you need red pants? I think you know the answer.


Saturday, August 17, 2019

Splice, now thrice


Another Splice top: As soon as the pattern was published, I knew I wanted to use this fabric with it.


It's a linen-cotton blend from Craft South. It is perhaps a bit too heavy for this pattern but it's striped. Stripes are great fun to sew, especially one like this that is perfectly symmetrical and in a neutral color. The stripe that reads gray is a shot weave in black and white. And I'm almost always drawn to a shot weave.


As described in my previous post, the Splice top is a blank canvas. It is a loose-fitting, drop-shoulder shirt with 3/4 length sleeves, side panel pieces and an uneven hem. The weave of this fabric places the stripes vertically, so I was mighty tempted to make pants, but in the end, I knew that this was not the kind of stripe that makes flattering pants. The stripe is too bold for that (on me).


This stripe was perfect for a cross-grain cut on those small splices in the sides, with the body following the usual lengthwise grain. The weave is quite stable.

before top-stitching the hem
It has facings that I like but I worried that the stripe would show through and distract from the simplicity of this top. So instead I cut a bias strip for the neckline. I finished the front neckline and then the back neckline before sewing the shoulder seams. I like this treatment for a bateau neckline as it prevents a center front gap by drawing the neckline in just slightly.


I made one additional change to the pattern. It is very loose fitting. The earlier versions were all size M, my typical for Sewing Workshop tops. But I was curious about making a size S. The finished measurements are plenty generous for my hips. I cannot actually tell any difference between the size S and size M, probably because the fabrics are so different.


In other sewing news, my latest *fix* (hack?) was to add a pocket to a pair of Picasso pants. I was short on fabric when I made this last pair and had to piece one of the side panels. Each pant leg has three panels so I figured, the additional seam was a good fit with the style, even though this one is horizontal.


As I wore them, I realized how perfect that would have been for a pocket. Inserting a pocket into the seam would have been super simple if I had thought to do so during construction. Inserting the pocket after finishing construction was a bit time-consuming but not difficult.

BEFORE:


AFTER

Inside - pocket was attached to the upper and lower seam allowances, top-stitched at the bottom.


At the same time I've been increasingly interested in a pattern hack I see on Instagram - the Clyde pants hack.

Original Clyde pants for Elizabeth Suzann
The hack starts with a pair of favorite pull-on pants. These pants are then hacked so that each pant-leg is composed of three panels, with a pocket in the side panel. That side panel becomes an easy location for almost any pocket shape.


I did all the pattern work for this hack, starting with Cutting Line Designs One-seam pants.


And then I realized. Duh. The Picasso pants are perfectly suited for interesting pockets. And they are loose fitting, a must with deep side pockets. The shape of the original Clyde pants is more narrow than the Picasso, but otherwise, just right.


So now I'm thinking about a future pair of Picasso pants with more cool pockets. Or maybe I'll make a pair of pants using the One-Seams I hacked into Clyde pants. I can always use another pair of comfy pants!