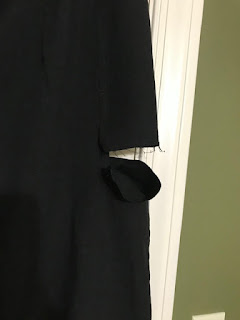
On our daily walk, he asked me, what are you making today? Mistakes, said I.
That is the way it seems some days. Not often and never for long, but there are days like that, right? And it's tempting to avoid blogging about it.
I think it happens when I let my thinking get too far ahead of the project at hand, especially when making something that should be straightforward.
This project started with the desire for a simple turtleneck tee. I remembered the Urban tee from the Sewing Workshop and thought I could quickly convert it to a simple tee. I'm thinking I misidentified the center front, so important in this adaptation.
I measured twice and cut once but you cannot uncut. After cutting most of the pieces I realized that something was wrong. The front piece was entirely too narrow. I've given up trying to figure out what I did.
So I pulled out my trusty Lark Tee pattern from Grainline Studio. It is a winner, IMO. This one fits me nicely with a slight curve at the waist. I have no idea why I did not start with the Lark. Anyway I was very lucky. I was able to fit the pieces onto the remnants of my screw-up including the turtleneck piece.
I worried over whether or not I needed to change the neckline before committing to a specific turtleneck piece. So I sewed the shoulder seams and slipped it over my head. Just right.
I cut the collar piece using Linda Lee's 7/8 rule, rounding up. Then I stitched it without aggressive back-stitching (I've learned to avoid that) and slipped it on over my head. Also just right.
The rest was easy. I'm in love with this yummy fall layering piece, even though it's now spring here in the southeastern US. I suppose it's not a real turtleneck as it scrunches, but I like the way it feels up against my neck.
For my next round of mistakes I used another knit fabric purchased from the Sewing Workshop, a cotton-lycra black and white jersey with 1" wide stripes. I fondly remembered their Trio pattern that included a simple top with raglan sleeves. I carefully started cutting out each piece single layer to make sure that the stripes did not drift, matching the stripes using the notches. I worked my way around the garment, carefully matching notches as I went along. And then.
That required some very careful piecing, not an artful touch, but OK.
Well, oops. I should have matched the stitching line, not the notches. The seams are angled in such a way that the notches do not relate well to where the seam is sewn, especially with such wide stripes cut at an angle. Yuck.
I was also working in a make-shift sewing space while my sewing room was being painted. So, for once, I realized I needed to just stop. Stop cutting. Stop ripping. Stop sewing. It was a good idea.
Now back in my sewing room, I returned to the Lark tee. I managed to cut two fronts and two backs, with two different black and white strips. The narrow stripe was a remnant from my leggings. Just enough. whew. That eliminated the issue of matching and I like it better anyway. Really.
I did not have much left for sleeves and so opted for cap sleeves. Somehow my first round with these went badly and I had these puffy places on my shoulder blades. I could not bear to take pictures.
So I once again ripped out seams. I went back to my original Lark pattern (the taped together PDF version) and recut the sleeves. Since I had added CF and CB seams, and this fabric curls like crazy, I decided to reassess all pieces with the original pattern too. A little re-cutting was more-or-less successful.
Next I worked on adding a little color to the neckline. I imagined a double binding that I've seen Linda Lee demonstrate. No problem in the first round of sewing. Then I could not decide how to finish the edge of the neckline binding. Machine stitching looked terrible, so I thought, OK, sashiko to the rescue.
Nope.
So the next and final step was to invisibly under-stitch the binding down. That worked.
Now the shirt is too short.


