Monday, June 13, 2011

Curves Tutorial

Curved Seam Applications:
Princess seams
Neck lines, armscye
Design features (V1105 at left)
For fun


Curved seams and finishes are essential in clothing construction. They appear in obvious places such as the princess seams in the dress (Vogue 1237) at left, or even as design features such as in the jacket (also Vogue 1237) with curved horizontal seams. Here the seams do, no doubt, provide fit too. Curves are also pretty obvious in neck lines and in sleeveless tops and dresses. It's also fun to introduce new seams in order to introduce design features or color blocking. as in the simple top at right.


Here are some of my favorite techniques:


Brute Force


This requires seam allowances (SA) of ¼” or less, works best in pieces where precision is not required. It's a good idea to do this before cutting out a pattern piece. Place the two fabric pieces right side up on your cutting surface, overlapping enough to allow for the curve. Gently carve out the curve within the overlapped portions using a rotary cutter. Separate and discard the part cut off of each piece. Pin right sides together, just at the beginning.  Sew slowly with stitch length of about 2.0, adjusting the SAs to meet as you encounter curves. Sew especially slowly around the curves.  Press to one side. Now you can cut out the pattern piece that will contain this design feature or color blocking. Again the simple top above illustrates this technique.


Sewing concave to convex (e.g., princess seams):
  1. Staystitch 1-2 threads inside SA on both the concave and the convex curves. I use a 2.0 stitch length or less, depending on the fabric. This allows you to clip and notch BEFORE sewing.
  2. Clip the concave curve. Notch the convex curve.
  3. Pin at beginning of seam, end of seam and matching any notches or other registration marks you have. Because you have already clipped and notched, you should be able to pin a more-or-less straight seam to sew. Sew slowly, staying outside of the staystitching, opening clips and closing notches as needed.
  4. Sew seam using your normal stitch length. Press open or finish seam as desired.
Neckline and armscye with facings or similar
  1. Staystitch inside the 5/8” mark. The reason is to avoid distortions as you handle the pieces.
  2. Sew seam using usual SA, e.g., 5/8”.
  3. Grade seam so that one SA is no less than ¼”; the other SA must be more than ¼”.
  4. Clip the curves one layer at a time. Do not clip both layers together. Clip each separately so that the clips are staggered.
  5. Press, turn, press in place, favoring the outside fabric slightly.
  6. Top-stitch, understitch or use another method to keep the layers from shifting.
Creating your own curves (similar to brute force, but with more accurate results)
  1.  Draw a gentle curve free-hand onto the pattern piece tissue.
  2. Draw grain line to each side of the curve.
  3. Create registration marks (notches) - at least one per curve - by marking across the curve.
  4. Trace each piece onto a separate piece of pattern tissue, leaving enough space by the curved edge to add SA.
  5. Add desired SA, usually 5/8”, to the new seam line of each piece. Make sure to mark the notches you created in step 2.
  6. Cut out pattern tissue for each new piece.
  7. Cut out fabric using these new pattern pieces. Be sure to mark notches (registration marks).
  8. Sew the two pieces together following the “concave to convex” method above.


Monday, June 6, 2011

Extreme Curves

Finished circle insertion
I'm preparing to be teacher-of-the-moment for my ASG neighborhood group this week. My chosen topic is "curved seams." I posted about an interesting detail in TSW Verona coat back in January and I've been watching and trying to learn more about curved seams since then. Curved seams are everywhere! Of course, when you go looking for something, you find it.

For example, my occasional sewing student recently brought in an Anna Sui dress she wants to make. At first I thought that it was just too difficult for a beginner. Maybe it is, but over the course of that afternoon, she inserted the godets into the front and back skirts without a hitch. Now these are straight seams but it is still a similar insertion. I have noticed that many patterns instruct you to sew the seam BEFORE clipping. I find that this does not work well for me. You do have to staystitch, but clipping before stitching is essential to a smooth insertion, I think.

After sewing the seam in one pass!

Sewing the seam
Black staystitching, yellow seam


So today I decided to make an "extreme" sample for my upcoming class. How about a complete circle inserted into a piece of fabric, by machine? This is really a form of machine appliqué, but more refined for clothing. There is no stitching on the exterior.

I started by tracing a circle from a dinner plate onto freezer paper. Then I added a 1/2" seam allowance to each side of the line. I cut out the circle and used it as a template for cutting out both pieces here. I used the outer edge for the cream fabric and the inner edge for the striped fabric. So the cut circle is 1" larger than the hole in the fabric to allow for 1/2" seam allowancs.

I will post my lesson soon. I'm very pleased with this sample. It sort of looks like a pizza in these pictures. But I am pleased.

Friday, June 3, 2011

My Hearts 'a Flutter shell - vs. 1.0109

I still don't have a completely satisfactory version of this fabulous little shell by Louise Cutting. But I think I've figured it out. I have been thinking about something I read on artisan's square from LC. Someone started one of Louise's patterns by making all of her usual changes. And she couldn't get it work. I think I did something similar, so tonight I've retreated back to the original pattern with the size appropriate to my measurements.

But I did learn something from my failures. The armhole really is too low for me. So my plan with the current one is to use bias bindings on the neck and armhole edges, rather than the included facing piece. For the neckline, I plan to use TSW method of binding. I first learned this with the Mimosa top. Attach a double-fold binding to the wrong side, stitching at 5/8 inch; trim and grade, then flip to the right side and top-stitch in place. This effectively takes up the provided 5/8 inch seam allowance. On the armholes though, I plan to just bind the raw edge with self-fabric bias tape. The net effect is like adding 5/8 inch all around the armhole. That is, this will raise it and make it wider over my shoulder.
TSW Binding Technique

Using some lavender crossweave free fabric from church, I have cut out a (really?) wearable muslin. I will test all of this before stitching on the binding. But I feel some sewing karma kicking in. I think it really might work and then I'll have my TNT shell for hot summers. Hooray for summer!

Monday, May 9, 2011

By Popular Demand

My sewing muse has been whispering "sew that By Popular Demand top" by Cutting Line Designs for a while now. When Rita brought hers over to my house and let me try it on, that clinched the deal. What a cute top, flattering to lots of shapes (Rita has one; I don't)! I may be one of the few remaining women on the planet who has not already made this cool summer top, but I'm finally on board. Thank you, muse!

Now mine did not go together fast as I had hoped/thought. First I bought 3 yards of chocolate brown cotton sateen from Gail K ($8 per yard after ASG discount) and made a pair of pants from my TNT pants pattern, Sewing Workshop Mimosa pants. The fabric was 60" wide so I had just enough for this top to match. The pants went together smoothly and I love them.

And then I started the top. First I had too little fabric for a facing out of the same fabric. So I used some cowboy themed quilt cotton instead. Then I started constructing it and somehow managed to forget that cotton sateen has two distinct sides. Distinct enough to really show my screw ups in certain lights; subtle enough for me to lose track of this characteristic of the sateen. So after sewing the vertical seams, trimming, serging, and even top-stitching (twice - edge stitching then 1/4" top stitching), I had to admit I had flipped the sleeves over. I even started applying the facing before allowing reality to creep in. Bah!

My lazy sewing muse told me to just ignore it. No one will notice. My more demanding sewing muse had a different perspective. I decided I would be embarrassed about this. So I started unsewing trying to avoid pulling out the bias edges and trying to remember how the grading affected the seam allowances so that I could repeat it.

Well, I am glad I did this. While this does not go down as a one-day project for me, I do like the results at the moment. I've finished everything except buttons and buttonholes. Top button placement is marked with a pin.

I really like this pattern!

Sunday, May 8, 2011

Happy Mother's Day

Like so many sewers I know, my mother taught me. I just had her machine worked on. It's a beautiful black Singer in a wooden case and sews like a kitten purring. Of course, I'm spoiled by all the cool stuff my Bernina does, but this beautiful machine holds a special place in my heart. Using it again has been a sentimental journey this mother's day. I sure miss Mama.

Thursday, April 28, 2011

Folkwear Middy Blouse as a Jacket


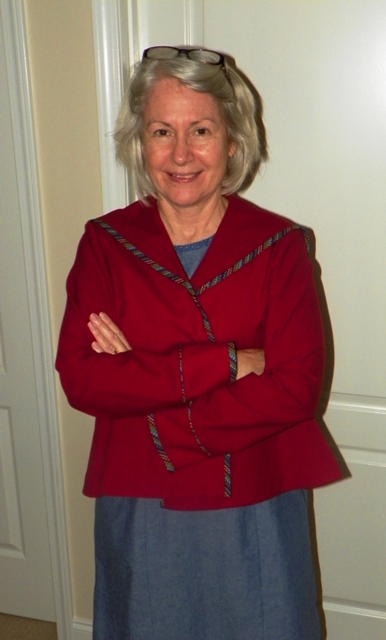
Just finished this fun jacket/blouse. I made it as a jacket this time and have it cut out as a blouse next. Gotta love a sailor collar!

Thursday, April 7, 2011

Sewing for Grandgirls

Kyoto dress
Shirred sun dress
Ice cream dress
I was just thinking - what happened to March? Then I realized that I spent a lot of time making grandgirl clothes. I made the Oliver and S Ice Cream dress for the 5 year old and the 7 year old, though in different fabrics. That pattern is a little pricey but I love the styling, and the instructions are pretty good too - very thorough. Each of them also got a shirred sun dress. What fun those were to make - just thread that narrow elastic thread into the bobbin and away you go! Just stitch, steam and finish. My 5 year old grandgirl also received a Kyoko dress, a pattern by ModKid. She calls it her Mulan dress. My 7 year old grandgirl is receiving a little Ottobre varsity-style jacket since she lives way up north and won't be wearing a bare sun dress for a while.


Varsity jacket
Now I'm ready to make something for myself. I took Pam Howard's fitted sheath class and I'm anxious to make a few - some as dresses, some as tops. I'm not sure I really like me in a dress but they are really comfortable, so we'll see.