Saturday, January 28, 2012

New Vogue Patterns

I've been checking out all the posts of fave patterns in the new Vogue line-up. It's always fun to see what my favorite bloggers chose as their favorites. This one seems to be a bit of a sleeper. It may be the color, but I find it interesting.

I even like the line drawings. And I have no idea why. It's not edgey or Asian or asymmetric (unless you count the little slit in the skirt). Maybe it just looks easy to wear. I would make the skirt longer.

I also really like the Katherine Tilton t-shirt. Now that one is a little something different. But it's not the pattern that is different - it's her cheerful use of various fabrics. The Tilton sisters have such a happy approach to sewing.

Thursday, January 26, 2012

TNT Plaza Pants

I've made too many pairs of plaza pants from the Sewing Workshop to even count at this point. They are so comfortable that I have myself convinced they look good too. Maybe they do.

This pair is made from a light-weight wool, interlined with Bemberg Ambiance. It looks almost navy blue in these pictures. In real life they look medium gray.

The interlining required lots of basting to keep things from slipping away. I might have been better off just lining them in the normal fashion. But they do feel great this way. And they hang nicely.
While steam pressing, I was reminded of one of the properties of rayon (Ambiance). It puffs up with moisture. For a few minutes I thought for-sure I had ruined the pants, but a dry iron seems to have fixed the bubbling.

I think it may be time to try a new pull-on pants pattern. Maybe I'm ready for the new one-seams from Cutting Line Designs.

Just some fun


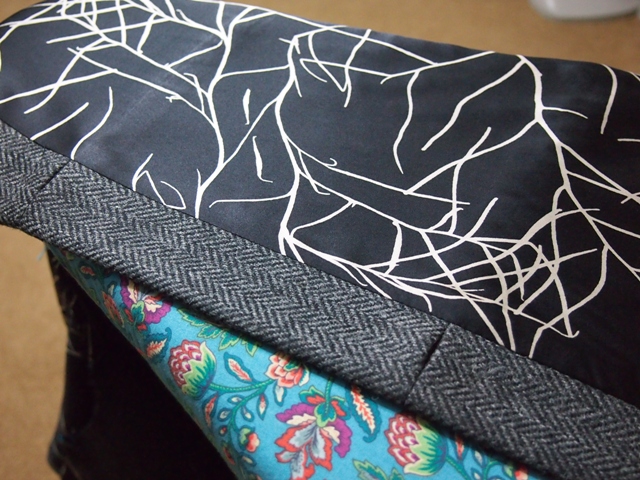
Saw these wonderful chairs at a party last Friday. It almost makes me want to try a little home dec. Almost.

Non.


This picture shows some fabric manipulation with evenly spaced pleats. From the book Stitching Magic by Reid. It really is magic, I think. Sometimes.

Friday, January 20, 2012

ABO Complete!

With some extra help from Louise Cutting on Artisan's Square, I have finished my winter jacket version of her Anything But Ordinary jacket. Thanks to Louise, even the top slot buttonhole went in nicely. Thanks also to Terri for her question about the back facing. I thought about her question and decided to take it as a suggestion. What a needed improvement in what I was doing!


This is such a nice classic jacket pattern. Blogger Sew Forth Now and Conquer and others have made this as a vest, so that may be my next use of this clever pattern. I also saw it as a shirt plus a vest by Carolyn on Artisan's Square. Each version is such an inspiration and all from one pattern.

Aren't sewing buddies the best?

Wednesday, January 18, 2012

Buttonhole Puzzler

Work continues on my Cutting Line Designs Anything But Ordinary coat. Right now I'm trying to puzzle through the slot buttonhole at the neckline. As mentioned in my previous post, Louise has instructions for gorgeous slotted buttonholes at the Threads website here.

The technique requires that seams be pressed open. The slots are formed by leaving a gap in the seam. This worked great on the lower two button holes but I'm perplexed about the one at the neckline.

I made a mistake (well, lots really, but who is counting?) when I thought I could enclose all those SAs in the collar. That does not leave a way to put the gap in the seam for the button.


So off to rip a few stitches.

Any ideas?

Monday, January 16, 2012

Anything But Ordinary - a coat version


Every time the temp drops outside, I am reminded that I need a new coat. I had some nice heavy wool tweed in the stash but needed the right pattern for it. I've made a few muslins but ditched each one in turn. Then Louise Cutting posted instructions for making slot buttonholes here at the Threads magazine site and suggested making her Anything But Ordinary (ABO) jacket in a longer version. There is also a picture of a gorgeous RTW coat posted along with the instructions. Louise's post plus BlueMooney's Paco Peralta T-Coat (gorgeous - go see it) propelled me in the right direction finally.

  
I'm having to think a bit as the ABO instructions are for an unlined jacket. With this wool, lining is a must. Drafting the lining pieces is not particularly challenging but the order of construction, particularly with the slot button holes has me wrinkling my brow a bit. For example, there is no back facing in the pattern. Rather the raw edge of the neckline is stitched into the collar in back. And I'm working those slot button holes into the neckline too, as described by Louise.

So far I've completed the outer part of the jacket and the collar is almost ready to attach. I need to cut out the lining and construct the jacket lining so I'll be ready to puzzle through the neckline.

Cut-on facing prep for button holes
There is one unusual aspect to this pattern. There are NO notches. Not even on the sleeve. There is a dot on the sleeve cap to match to the shoulder seam, but otherwise no markings on the sleeve pattern. (There are also some helpful dots on the collar.) The sleeves have to be vertically symmetric, I guess. It is a dropped shoulder so there is not a lot of shoulder shaping. Louise's shoulder pads give it a nice shape.


Thursday, January 12, 2012

SAM 1 - Hibiscus from The Sewing Workshop

The Hibiscus shirt was published by the Sewing Workshop years ago. In fact, I cannot find it on their website so maybe it's OOP. I've had it in my stash a while. I kept pulling it out and thinking about it. Then Blue Mooney started the Shirt-A-Month (SAM) challenge on Artisan's Square. I decided it would be my SAM #1.

completed collar & stand
The pattern contains some challenges. The right front goes together like an origami puzzle. I read a review at PR that warned of the need to mark all notches and dots, but I missed a few. On the right front. Yikes!

When I'm making something challenging, I keep the pattern tissue handy to reference again and again. First I had to mock up the right front with the three right front pattern pieces. Then I (re)marked everything. It was still a bit of a 2D-to-3D challenge.

Before inserting collar
The collar stand and collar were very satisfying to make. Sewing friend Lorraine taught the David Coffin method at my ASG neighborhood group a while back. You basically complete the shirt-plus-collar-stand, leaving an opening in the top of the collar stand. Then the finished collar is simply inserted into the opening and it is edge-stitched in place around the collar stand.


shirt sandwiched between stands

right front

right front inside

Finished back


Finished collar and stand

TSW Hibiscus
I kept the outside of the stand on top while sewing, and now wish the inside had been on top, but it still looks pretty good, I think. To Lorraine's (David's) method, I added some stay-stitching on both the upper collar stand and the edge of the finished collar. This made it easier to match up the stitching lines while pinning it.