 |
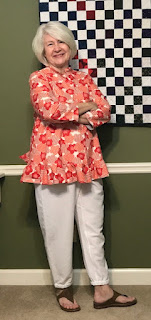
| Quincy pants, Cottage shirt |
Each summer, as the days heat up, I begin to think I need to make white pants. This time, I also decided I needed a white tunic. Do I need white pants? No. Do I need a white tunic? Definitely not. But I guess my sewing fun is not tightly coupled with need. I've established that by now!
 |
| Quincy pants, Venice shirt |
The fabric for each is a rayon-linen blend from the Sewing Workshop. It's a lovely fabric, especially for summer. With the rayon, I don't think it wrinkles quite so much, and it has nice drape. It was very cooperative and fun to sew.
 |
| Quincy pants with the splice top |
For pants, I chose the Quincy pattern, also from the Sewing Workshop. The Quincy has an interesting jacket, and I tried it once but the fabric was wrong. I've made the pants a number of times. Even so, I keep tweaking the fit. This pattern is no longer in print from TSW.
My first run at the pants produced a pair that was way too big. I felt like I was wearing long bloomers. This was a relatively easy fix. I had created a separate waistband though, so I had to remove the elastic, remove part of the waistband, and then I simply took it up about 3/8" on each side seam. The fit seems right for now.
 |
| Quincy pants with another Splice top |
Because these are for warm weather, I cropped them some. And I added elastic to the hems for a little something different. I'm pretty happy with them.
For the tunic, I decided on the Hugo shirt from TSW. I prepared the pattern tissue some time back but never got around to making it up. In my mind, I began to imagine a floaty ensemble with a long white tunic over narrow pants. I imagined walking through the sand, the wind in my hair, beautiful sea in the background. So elegant. In my mind.
So I added 6 inches to the Hugo and proceeded to make it.
The front has a single visible button that fastens with a bias loop, and 3 additional buttons in a hidden placket. The shirt is pleated about 2" just below the finished placket. Otherwise, this is a super simple pattern.
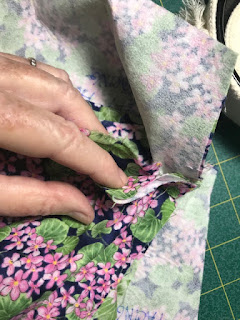
The sewing of the placket did not go well for me. I don't know if I was just having a bad day or what was up. Now that I've completed it, I am not sure why it was so challenging for me. Ordinarily I'm fairly patient and just follow instructions carefully and with great faith that all will be fine in the end.
But on this particular day, I started reading ahead and became frustrated when it did not make sense to me. Linda Lee (thanks so much!) and I exchanged several email messages with accompanying pictures from my project. Because I was afraid I was going to ruin it, I finally just abandoned it and cut out a sample.
And I had the same problem!
But Linda stayed with me, and finally the sample came together and looked great. It still took me another hour to duplicate that on my actual blouse so I'm not sure how much I really learned from my sample. My brain was simply not working that day!
It was a frustrating experience that I totally brought on myself. What finally worked was to simply complete each instruction, one sentence at a time, and not get ahead of myself. Everything fit together perfectly.
Whew!
 |
| The lower raw edge of the placket gets enclosed in the rectangular stitching on the right side. |
Then I tried it on, first with the white pants, beach scene in mind. Hmmm...
Next I tried it with cropped Helix pants. Ew. Not so much.
I even tried it on with a necklace.
No. Definitely not.
Then I happened to glance at the pattern and realized that it is described as tunic without adding any length. By adding 6" it became almost a dress.
Now admittedly this looks worse than in reality because I had the fan on high and that caused everything to billow out. Oh, my.
My next fix was to remove the hem and create a 6" hem. And I quite like that. The original hem is just 3/4". I really like the added weight of a deep hem. This is similar to the Cottage Shirt which is actually a much easier make with no mysterious hidden placket.
I made one additional change to the pattern. The lower hem on the center front of the top has a lump where the center front hem is finished. So you cannot press the pleat in place. To fix this, I opened the hem and the center front seam. Next I finished the hem on each front piece. Lastly, I finished the center front seam and serged it. I was able to thread the serger threads into the seam to neaten it all up. Now I'm happy with it.
I'm pretty sure I could make this again without any trouble. But maybe I won't tempt the sewing goddesses just now.
I'm pretty sure I could make this again without any trouble. But maybe I won't tempt the sewing goddesses just now.
But I won't be wearing the two pieces together.
 |
| Maybe PJs? |


Oooo, I like the deep hem, too. Great save!
ReplyDeleteThe extra long Hugo would have looked good with leggings. Great outfit with the deep hem and helix pants but then I like the two white garments together especially if accessorised with one of the chunky necklaces you wore in this post.
ReplyDeleteSuch a disappointment when the end product does NOT match what you envisioned. But it did turn out nice (with the deep hem) and looks really good with the deep red pants.
ReplyDeleteIt looks SO good! That shorter length is perfect and I agree that any slim pant would be great with it.
ReplyDeleteNice
ReplyDelete