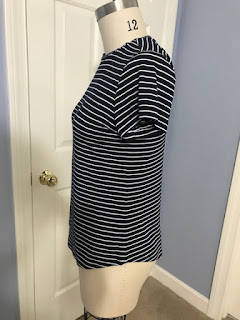
This pattern was first published maybe 7 years ago. It's been around a while for sure and it seems to crop up often during Linda Lee's FB live programs. The reason is that it is a great little tee shirt pattern, a perfect layering piece.
I've just finished two versions. I think there will be many more in the future, especially with variations in sleeves, necklines, and lengths.
The shaping at the waist is a nice feminine touch, I think. And the curved hemline also adds to that. This is a downloaded that I sent off to pdfprinting.com.
I had a little trouble determining the size to make. The instructions do not include recommended sizes based on bust measurements as I expected. But I found a table on their web site with finished measurements. Based on this information and the amount of ease I wanted, I chose size 1.5.
For my first one, I used a navy and white striped fabric from stash, most likely rayon jersey, quite stretchy. I just love these striped knits for summer. I made my standard 3/8" forward shoulder adjustment but otherwise cut it straight off my traced pattern tissue.
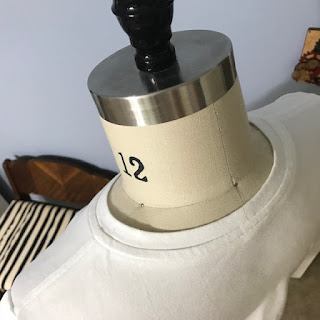
I think the neckline is a little high on this first one. It seemed too long to me, so I shortened it by 2". I chalked two inches onto the pieces and cut it off the bottom, retaining the original curve.
For the second version, I used white organic cotton knit from Alabama Chanin. This knit does not have an enormous amount of stretch so I used 3/8" side seams. That worked great, I think. I also cut down the neckline by 1/2" all the way around. That feels better than the original high neckline. So now I need to remember to go back and cut that off of the pattern tissue.
In order to shorten it, I folded the pattern tissue at the waistline.
The pattern comes with basic short sleeves. I made no changes there for either version.
The white one is not too exciting but just what I've needed to fill a hole in the wardrobe. And I love the feel of that organic cotton knit.
These were quick makes and fed my creative soul. Just what I needed. I was not in a hurry and still completed the two in two days starting with tracing the pattern tissue!
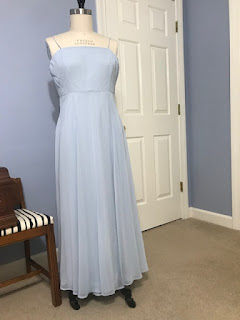
I've been battling a little project for a friend. Maybe you're familiar with the scenario. I said maybe, then yes, when I should have just passed along a recommendation for a professional tailor!
It seemed like it would be so easy to adjust!
1. The straps were too long.
2. The skirt was too long.
3. The bodice gaped at the armpit.
It was easy to fix the straps. But not so much for the other items.
There were 3 layers to the skirt. And the outer layer was a wispy sheer skirt cut on the bias. I finally tamed that when I located some fusible thread in stash. That saved me! I put it in the bobbin and stitch around the circumference about 1/2" from the shortened edge.
Then I ironed the hem along the stitched line - this activated the fusible stuff and created a nice crisp edge. Then I trimmed the excess 1/4" or so, folded it again and machine stitched a baby hem. Then I hung it up.
The 2 under layers were more cooperative and easy to hem. However, after the dress hung on my dress-form over night, the underlayers were quite a bit longer than the sheer outer layer of skirt! I cut the underlayers again and aligned it all as best I could. It looks OK, I think.
The bodice gave me the majority of my heartburn. The upper seam on the bodice slants fairly dramatically as it approaches center back. Overlapping the side seams to close the gap created a jagged edge. I could have trued it up but worried that cutting off the excess in the front would leave her too exposed.
My next and final step was to run a tiny piece of elastic along the upper edge (inside the bodice) to draw it up.
And it was of course 100% polyester and so I had to do all my pressing with a silk pressing cloth. Not easy!
Lastly I gave her the name of a tailor who may be able to adjust the bodice correctly for her. Lesson learned. I hope!


